You can usually fix a leaking shower head yourself with basic tools and parts. However, if the leak persists or you suspect more complex issues with the plumbing or valve, it’s a good idea to hire a plumber. Professional help ensures the problem is fully addressed without causing further damage.
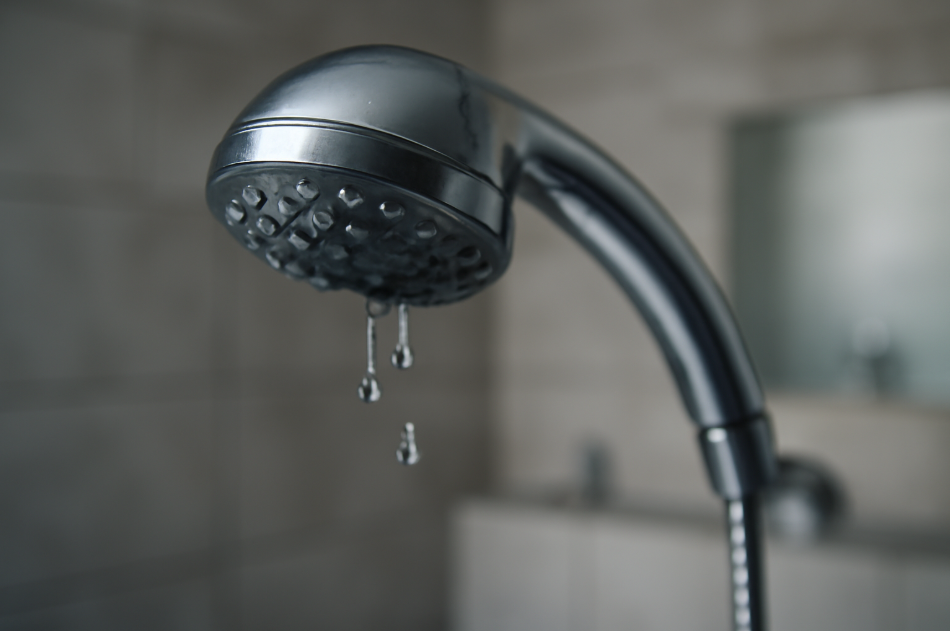
Are you tired of the constant drip, drip, drip from your shower head? Not only is it annoying, but that steady stream of water could be costing you more than you think—both in wasted water and higher utility bills. 
 If you’ve ever wondered how to fix a dripping shower head, you’re in the right place.
In this step-by-step guide, we’ll show you exactly how to stop that leak, saving water and money while restoring your peace and quiet. Whether you’re a beginner or just someone looking for a simple solution, you’ll find practical tips, helpful insights, and easy-to-follow instructions to tackle the issue like a pro.
By the end of this article, you’ll have the confidence to fix your shower head yourself—no plumber required. Ready to stop the drip? Let’s dive in! 
Understanding the Common Causes of a Dripping Shower Head
If your shower head is dripping, it’s likely due to one or more common issues. Understanding the root cause of the leak will help you pinpoint the problem and fix it efficiently. Let’s go over the most frequent culprits behind a dripping shower head:
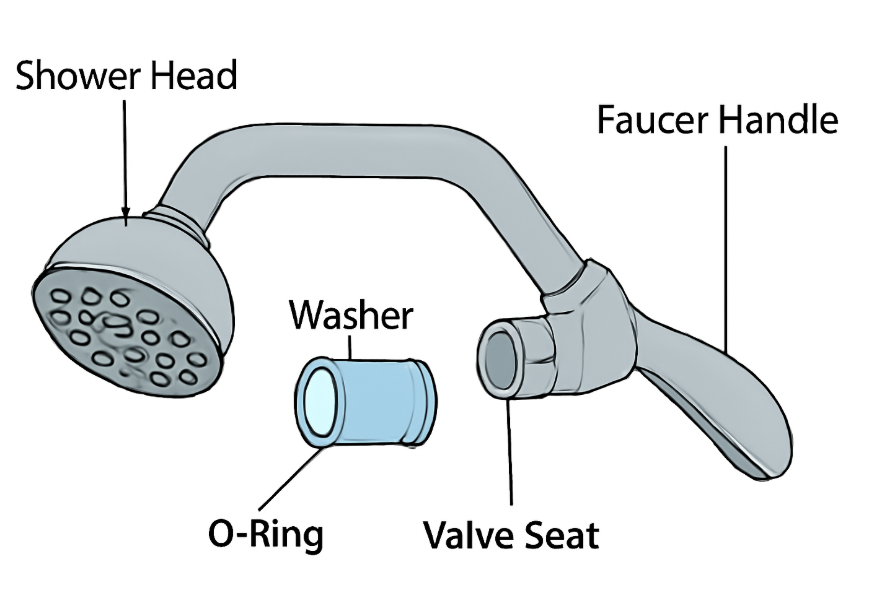
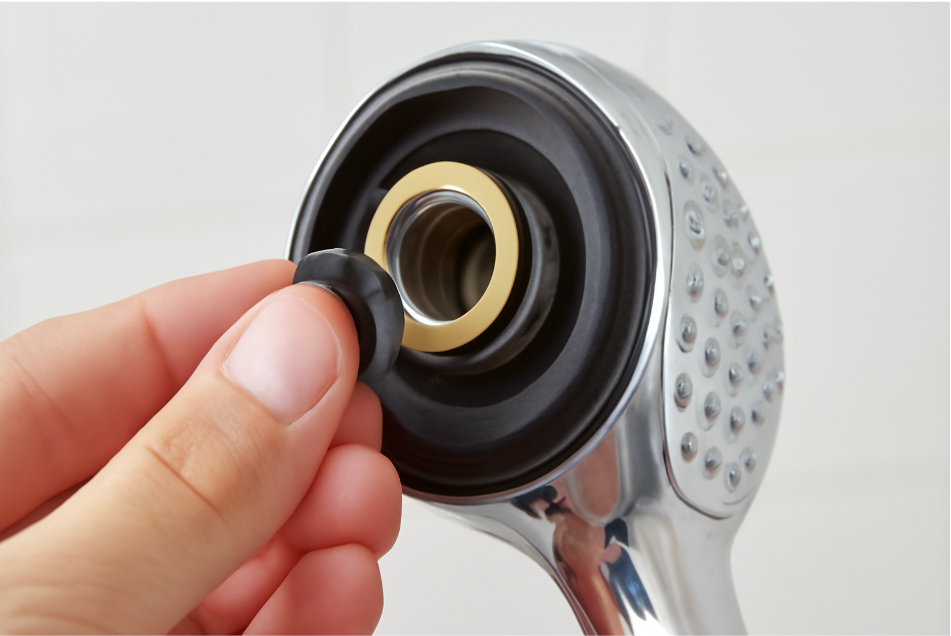
Worn-Out Washer or O-Ring
Over time, the washers and O-rings inside your shower head can become worn out or damaged. These small rubber components create a seal to prevent leaks, but they lose their effectiveness with age. When they crack, harden, or wear down, water begins to slip through, causing that frustrating drip. 
- How to fix it: Replace the washer or O-ring. It’s an easy, affordable fix that can be done in just a few minutes.
Corroded or Damaged Valve Seat
The valve seat is a critical part of your shower faucet. It ensures that water flows correctly when the faucet is turned on. If the valve seat becomes corroded or damaged—often due to hard water deposits—it can create gaps, leading to leaks. 
- How to fix it: Inspect the valve seat for any signs of corrosion. You might be able to clean it with a small wire brush, but if the damage is severe, replacing the valve seat might be necessary.
Loose or Faulty Faucet Handle
A loose faucet handle can result in water seeping through even when the shower is supposed to be off. If your handle isn’t turning completely or feels wobbly, this could be the problem. 
- How to fix it: Tighten the handle with a wrench. If it’s too damaged, you may need to replace the handle or other faucet components.
Mineral Buildup
If you live in an area with hard water, mineral deposits like calcium and lime can accumulate inside the shower head and plumbing. This buildup not only clogs the showerhead but can also affect seals and cause leaks. 
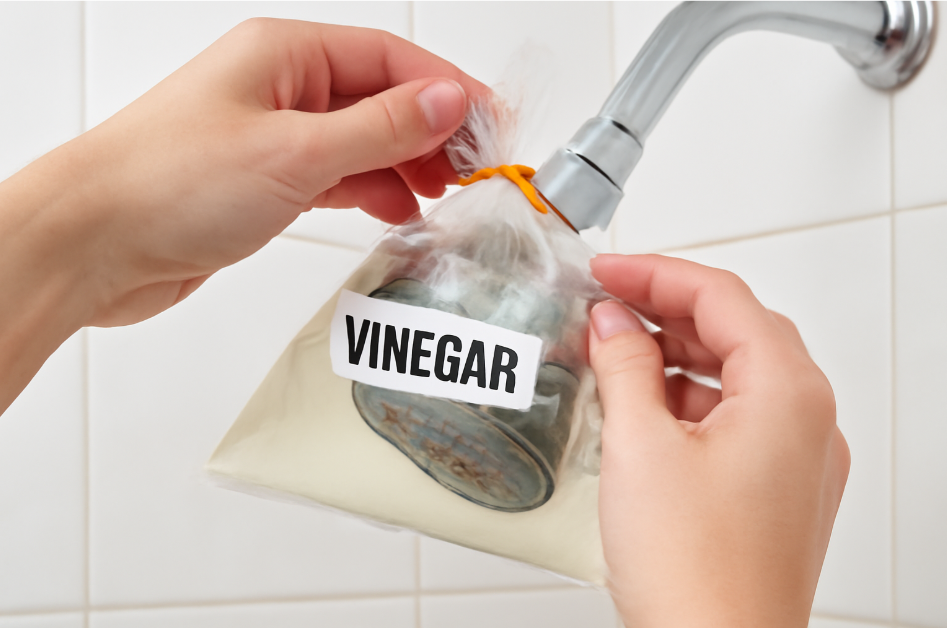
- How to fix it: Clean the shower head by soaking it in vinegar overnight to break down the mineral buildup. Regular maintenance can help prevent this from happening again.
High Water Pressure
Sometimes, high water pressure can be the culprit. Excessive pressure causes water to push through seals and joints, resulting in leaks at the showerhead. 
- How to fix it: Install a water pressure regulator to ensure your system isn’t working under too much strain. This can help prevent future issues.
Tools and Materials You’ll Need
Before you dive into fixing that dripping shower head, it’s important to gather the right tools and materials. Having everything you need at hand will make the process quicker and smoother. Let’s take a look at what you’ll require:
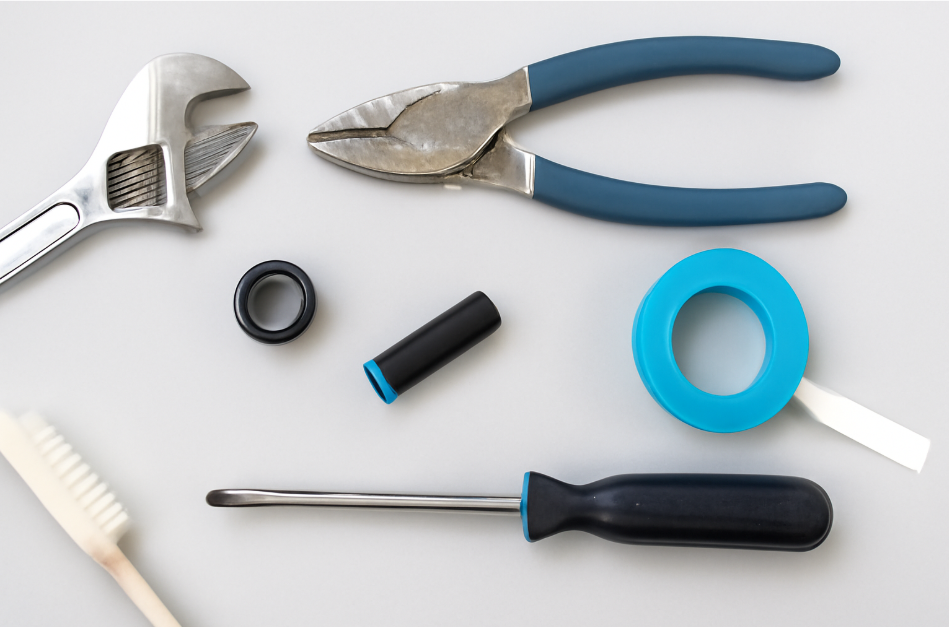
Essential Tools:
- Adjustable Wrench
An adjustable wrench is perfect for loosening and tightening showerhead components without damaging them. It’s a must-have for removing the showerhead or faucet parts.
- Pliers
Pliers come in handy for gripping and unscrewing stubborn parts that the wrench can’t handle. They’re especially useful for loosening the faucet handle or gripping tight connections. - Screwdriver (Flathead and Phillips)
You’ll likely need a flathead or Phillips screwdriver to remove screws from the showerhead or faucet handle. It’s a good idea to have both types on hand to cover all your bases. - Cleaning Brush or Cloth
If you find mineral buildup or grime in your showerhead, a small cleaning brush or soft cloth will help you scrub away the debris. A toothbrush can also work well for cleaning hard-to-reach spots.
Replacement Parts:
- Shower Head Washers or O-Rings
If the cause of the drip is a damaged washer or O-ring, you’ll need replacements. These parts are inexpensive and easy to find at most hardware stores. Make sure to match the size of your current washers to avoid any leaks.
- Plumber’s Tape
Plumber’s tape (also called Teflon tape) is used to create a tight seal between threaded connections. It helps prevent leaks and ensures that your new washers or O-rings fit snugly in place. - Valve Seat (If Necessary)
If your shower head’s valve seat is damaged, you might need to replace it. This is more of a rare fix, but if you notice corrosion or a rough surface, it may be time for a new valve seat.
Safety Tips:
- Turn Off the Water Supply
Always make sure to turn off the water supply before you start working on your shower head. This prevents water from gushing out unexpectedly and keeps the area dry.
- Wear Safety Gloves
It’s a good idea to wear safety gloves to protect your hands from sharp edges or any debris that might be hiding around your showerhead or faucet.
Step-by-Step Guide to Fix a Dripping Shower Head
Fixing a dripping shower head is easier than you might think. With the right tools and a bit of patience, you can tackle this common problem yourself and stop the leak in no time! Follow these simple steps to fix your shower head and save both water and money. 
Turn Off the Water Supply
Before you do anything, make sure to turn off the water supply to your shower. This prevents any accidental water flow while you’re working and avoids unnecessary mess. 
- Tip: You can usually find the shut-off valve near the water heater or under the sink. If you can’t locate it, simply turn off the main water supply to your home.
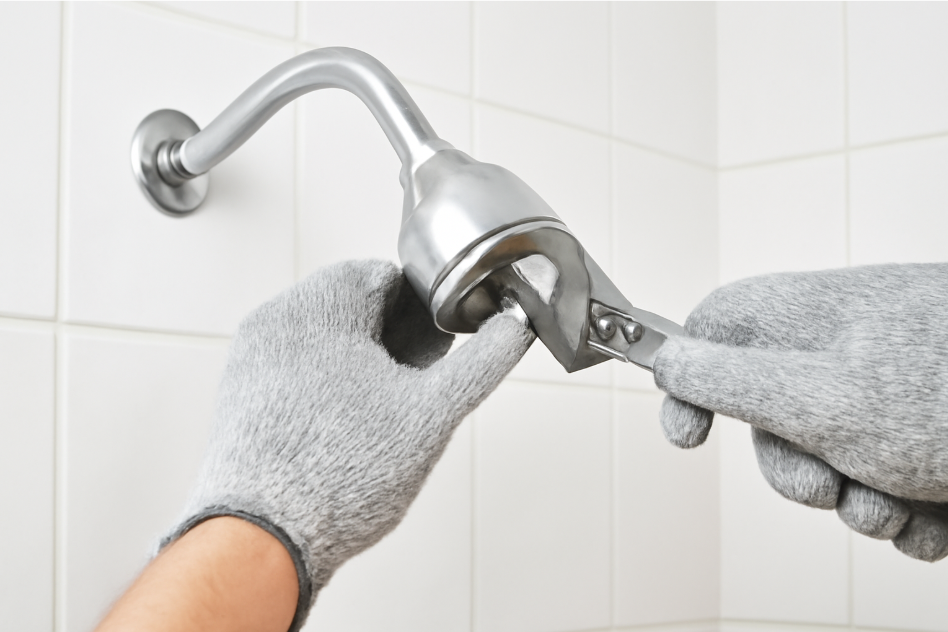
Remove the Shower Head
Now that the water is off, you’ll need to remove the shower head to inspect the parts inside.
- How to do it:
- Use your adjustable wrench or pliers to carefully unscrew the shower head from the pipe. Be sure not to damage the threads.
- If the shower head is stuck, wrap a cloth around it to avoid scratching the finish while you grip it with the wrench.
Pro tip: If the shower head is too tight, use some penetrating oil and let it sit for a few minutes before trying again.
Inspect the Shower Head and Components
Once the shower head is removed, it’s time to check for any obvious signs of damage or wear.
- Look for:
- Worn washers or O-rings: These rubber seals help prevent leaks. If they look cracked or brittle, they need replacing.
- Mineral buildup: If you notice white or greenish deposits, it’s likely mineral buildup from hard water.
- Corrosion or damage: Check the valve seat (inside the shower faucet) for any roughness or corrosion.
- Tip: If you see mineral deposits, soak the shower head in vinegar overnight to dissolve them. This will help restore water flow.
Replace the Washer or O-Ring (If Necessary)
If the washer or O-ring is damaged, it’s time for a replacement.
- How to do it:
- Remove the old washer/O-ring carefully.
- Replace it with a new one of the same size. Make sure it fits snugly to avoid any gaps where water can leak through.
- Pro tip: If you’re unsure of the size, take the old washer to the hardware store to match it up with the right replacement.
Reassemble the Shower Head
After replacing the washer or cleaning the shower head, it’s time to reassemble everything.
- How to do it:
- Apply plumber’s tape around the threads of the pipe (if needed) to ensure a tight seal.
- Screw the shower head back onto the pipe and tighten it gently with your hands. Use the wrench for a final snug fit, but avoid overtightening.
Turn On the Water Supply and Test
Now, it’s time to test your work. Turn the water supply back on and check for any leaks around the shower head.
- What to check for:
- Ensure that no water is dripping from the shower head or faucet.
- If water is still leaking, check the washer/O-ring installation again or inspect the valve seat for damage.
- Tip: If the problem persists after replacing the washer and cleaning, the valve seat or faucet handle might be the culprit.
Tips to Prevent Future Drips
Now that your shower head is fixed, let’s make sure you don’t run into the same problem again. By following these simple tips, you can keep your shower head in top condition and prevent future leaks. 
Regularly Clean Your Shower Head
Mineral buildup from hard water is one of the most common causes of leaks. Cleaning your shower head regularly helps prevent this and keeps water flowing smoothly.
- How to do it: Soak your shower head in vinegar for 1–2 hours once a month to dissolve any mineral deposits.
- Pro tip: If you don’t want to remove the shower head, tie a plastic bag filled with vinegar around it and let it soak.
Check Washers and O-Rings Annually
Over time, washers and O-rings can wear out, causing leaks. Regularly inspecting these components helps you catch problems early before they turn into drips. 
- When to check: Once a year, or if you notice any signs of wear (cracking, brittleness, or water leaks).
- How to do it: Remove the shower head, check the washers/O-rings, and replace them if they look damaged.
Install a Water Softener
If you live in an area with hard water, mineral deposits can build up quickly and cause long-term damage to your shower head. Installing a water softener can reduce the effects of hard water, keeping your shower head and plumbing system in better condition.
- How to do it: Consult with a plumber to install a water softener for your home. This will reduce mineral buildup and improve water flow over time.
Keep an Eye on Water Pressure
Excessive water pressure can stress your shower head and its seals, leading to leaks. If you notice a sudden increase in pressure, it could be time to check your system.
- How to do it: Install a pressure regulator to ensure that your home’s water pressure stays within the recommended range (usually 40-60 psi). This helps protect your shower head and other plumbing fixtures.
Don’t Over-Tighten
While it’s important to ensure that your shower head is properly secured, overtightening can damage the components and create leaks. Be gentle when tightening the shower head back into place. 
- Tip: Hand-tighten the shower head and only use a wrench for a final snug fit if necessary.
Troubleshooting Common Issues
If your shower head is still dripping after following the steps to fix it, don’t worry—there are a few common issues that could be causing the problem. Here are some troubleshooting tips to help you identify and fix the issue.

Persistent Drip After Replacing the Washer/O-Ring
If you replaced the washer or O-ring but the drip continues, it could be due to a few reasons:
- Washer/O-ring not seated properly: Double-check that the new washer is installed correctly and sits snugly in place. A misaligned washer can still allow water to leak.
- Wrong size washer/O-ring: Ensure the replacement part is the same size as the original. Even a small difference can cause leakage.
How to fix it: Remove the shower head again, carefully inspect the washer/O-ring, and ensure it’s seated correctly. If the washer looks slightly damaged or worn out, replace it with a new one.
Leaking from the Faucet Handle
If water is leaking from the faucet handle rather than the shower head, the issue might be with the valve seat or the faucet cartridge.
- Possible cause: A worn-out valve seat or a damaged faucet cartridge can lead to leaks at the handle.
How to fix it: You may need to replace the faucet cartridge or the valve seat. If you’re not sure how to do this, it’s best to consult a professional plumber to avoid causing further damage.
Mineral Buildup in the Plumbing
If your shower head is clean, but the drip persists, mineral buildup in the pipes could be restricting water flow and affecting the seals.
- Possible cause: Hard water deposits inside the pipes or valve seat.
How to fix it: Clean the valve seat or soak the showerhead in vinegar as previously suggested. If mineral buildup is deep inside the plumbing, you may need a plumber to clean the pipes or install a water softener.
High Water Pressure
Excessive water pressure can put strain on your shower head, seals, and pipes, causing leaks. If the water pressure in your home is too high, it could be the source of the problem.
- How to check: You can purchase a water pressure gauge to check the pressure. If it’s above the recommended 60 psi, it might be time to install a water pressure regulator.
How to fix it: Install a pressure regulator to reduce the pressure to safe levels. This can help prevent leaks and protect your shower and other plumbing fixtures.
Old or Damaged Shower Head
If you’ve done everything correctly and the drip still won’t stop, your shower head may simply be too old or damaged to function properly.
- Possible cause: Cracks or internal damage that prevents a proper seal.
How to fix it: If all else fails, it might be time to replace the shower head. Modern, high-quality shower heads are built to last and are often designed to prevent mineral buildup.
You’ve successfully learned how to fix a dripping shower head and prevent future leaks. By understanding the common causes of a shower head leak and following the simple steps in this guide, you’ve saved yourself both time and money. Whether it was a worn-out washer, mineral buildup, or high water pressure, you now have the knowledge and confidence to tackle this problem on your own.
Remember, regular maintenance and inspections can keep your shower in top shape for years to come. By cleaning your shower head, checking the washers and O-rings, and managing water pressure, you can enjoy a drip-free shower and lower utility bills.
No need to call a plumber for every little leak—now you know how to handle it like a pro! Keep your tools handy, and don’t let the drip get you down. Happy showering!