
Imagine this: you’re cruising down the highway, music blasting, wind in your hair, when suddenly—thump! Your heart skips a beat as you realize you have a flat tire.  It’s an all-too-familiar nightmare that can happen at the most inconvenient times. Whether you’re on a road trip, heading to work, or simply running errands, knowing how to fix a flat tire can turn a stressful situation into a manageable one.
Don’t worry—this step-by-step guide will walk you through everything you need to know, even if you’ve never changed a tire before. From gathering the right tools to properly lifting the car and installing your spare, we’ll make sure you feel like a pro by the end of this article. 

By the time you finish reading, you’ll not only have the confidence to fix a flat tire on your own, but also the peace of mind that you’re prepared for whatever comes your way on the road. Let’s dive in and get you back on track—safely and efficiently!
What You’ll Need to Fix a Flat Tire
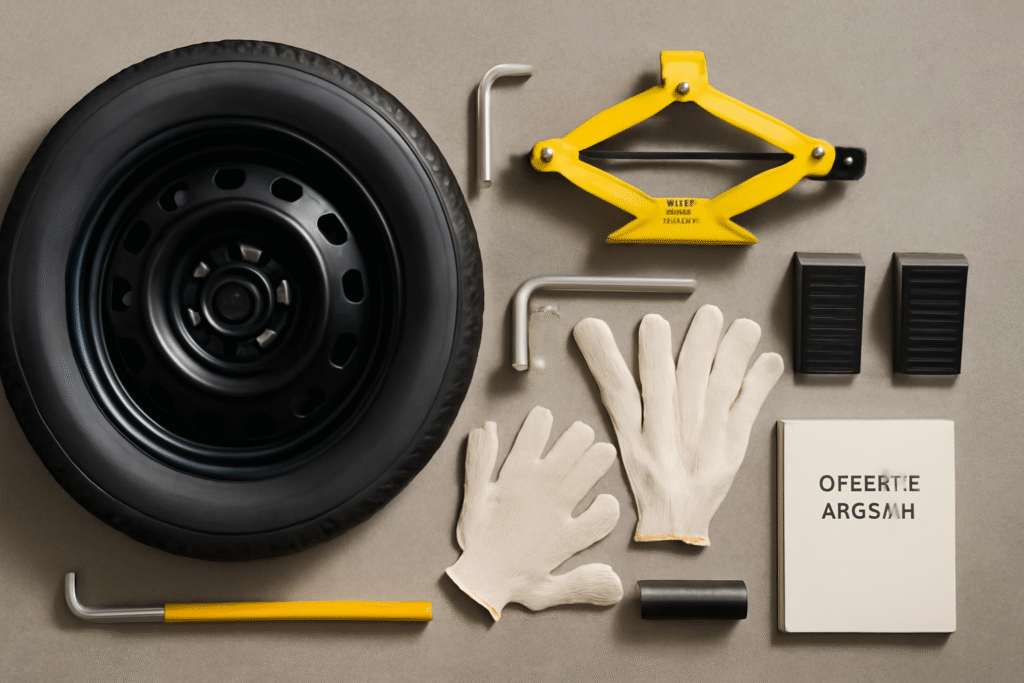
When you’re faced with a flat tire, having the right tools on hand is crucial for a smooth and quick repair. If you’re prepared, you can get back on the road in no time. Here’s a list of everything you’ll need to fix a flat tire like a pro:
1. Spare Tire
Your spare tire is the most essential item. Most vehicles come with a spare, but it’s a good idea to check its condition before you need it. Make sure it’s properly inflated and ready to go. 
2. Jack and Jack Stands
A jack is used to lift your car off the ground so you can remove the flat tire. Most cars come with a basic jack, but if you’re planning to keep your car for years, you might want to invest in a higher-quality, more stable jack. Jack stands are also important for added safety once the car is lifted. Don’t rely on the jack alone to hold up the car! 
3. Lug Wrench
A lug wrench helps you remove and replace the lug nuts that hold the tire in place. It’s essential to loosen the lug nuts before lifting the car and tighten them after replacing the tire. Make sure the wrench fits your car’s lug nuts properly. 
4. Wheel Chocks
Before lifting your car, you need to make sure it doesn’t roll away. Wheel chocks are small, wedge-shaped blocks that you place behind the wheels to prevent movement. If you don’t have wheel chocks, a large rock or sturdy block can work in a pinch. 
5. Flashlight
Even if you’re changing your tire in the daylight, a flashlight is still useful for seeing better, especially when working in low-light conditions or at night. It helps you see every step clearly, avoiding any mistakes. 
6. Gloves
Tire changes can get messy, so gloves are a great way to protect your hands from dirt and sharp edges on the tire or car parts. Choose gloves that offer both comfort and protection. 
7. Car Manual
Your car’s manual will have the correct jacking points and other specific details about your vehicle’s tire change process. It’s always good to have it on hand just in case. 
8. Tire Repair Kit (Optional)
If you’re dealing with a puncture rather than a completely flat tire, a tire repair kit can help you temporarily fix the hole. These kits typically include a plug kit or sealant, which can get you to a repair shop for a more permanent solution. 
Safety First – Prepare for Tire Repair
Before you start fixing your flat tire, ensuring your safety and the stability of your car is crucial. Taking the proper precautions not only protects you but also makes the process smoother and more efficient. Follow these safety steps to stay secure and focused throughout the repair.

1. Park on a Flat, Stable Surface
Find a safe, level area to park your car. Ideally, it should be off the road and away from traffic. Avoid slopes, as they can make the car unstable when lifted. A flat surface ensures the car doesn’t roll while you’re working. 
2. Turn on Your Hazard Lights
As soon as you realize you have a flat, turn on your hazard lights to alert other drivers. This is especially important if you’re on the side of the road or in a busy area. It’s a simple yet effective way to ensure everyone knows you’re stopped and working on your car. 
3. Engage the Parking Brake
Before you do anything, make sure your parking brake (also known as the handbrake) is engaged. This prevents the car from rolling when you’re lifting it or removing the tire. It’s a small step that provides big safety benefits. 
4. Use Wheel Chocks
Wheel chocks are your best friend when it comes to preventing your car from rolling while you’re working on it. Place the wheel chocks behind the tires that are still on the ground (the front wheels if you’re changing a rear tire, or vice versa). If you don’t have chocks, you can use a large rock or a sturdy block in a pinch.
5. Double-Check Your Tools
Before you start the repair, double-check that all your tools are within reach and in good condition. This includes your jack, lug wrench, and spare tire. Nothing slows you down like realizing halfway through that you’re missing a crucial tool!
6. Keep a Safe Distance from Traffic
If you’re changing a tire on the side of a busy road, stay as far from traffic as possible. Position yourself and your tools away from moving vehicles to reduce the risk of an accident. If you’re in a high-traffic area, consider using cones or reflective triangles if you have them.
Step-by-Step Guide to Fix a Flat Tire
Now that you’re prepared and safe, it’s time to fix your flat tire. Follow these easy-to-understand steps to get the job done quickly and efficiently. You’ll be back on the road in no time!

Step 1: Prepare Your Tools and Setup
Start by gathering everything you need: your spare tire, jack, lug wrench, wheel chocks, and gloves. Place the wheel chocks behind the wheels that are still on the ground to prevent the car from rolling. This is the foundation for a safe and smooth tire change.
Step 2: Loosen the Lug Nuts
Before lifting the car, use the lug wrench to loosen (but not remove) the lug nuts on the flat tire. Turn the wrench counterclockwise to break their initial grip. Do this in a crisscross pattern, which ensures even pressure. Don’t remove them completely yet—just loosen them enough so they’re easy to take off once the car is lifted.
Step 3: Lift the Car with the Jack
Next, find the proper jacking point for your car. Your vehicle’s manual will show you exactly where to place the jack. Typically, it’s located near the tire you’re changing, under the car’s frame. Once in position, start using the jack to lift the car. Raise it until the flat tire is completely off the ground. Be sure to keep the jack stable as you lift. 
Step 4: Remove the Flat Tire
Now that the car is lifted, it’s time to remove the flat tire. Unscrew the lug nuts completely and keep them in a safe spot—you’ll need them for the spare tire. Once the lug nuts are removed, gently pull the flat tire off the wheel hub. If it’s stuck, give it a little wiggle to loosen it. 
Step 5: Install the Spare Tire
Grab your spare tire and align it with the wheel bolts. Slide the tire onto the wheel hub and push it into place. Once the tire is on, hand-tighten the lug nuts onto the bolts. Be careful not to overtighten them just yet.
Step 6: Lower the Car
Slowly lower the car back to the ground by carefully releasing the jack. Once the car is fully lowered, you can remove the jack. Make sure the car is securely resting on the spare tire before moving to the next step. 
Step 7: Tighten the Lug Nuts
It’s time to tighten the lug nuts. Use the lug wrench to tighten each nut in a crisscross pattern, ensuring that the tire is securely fastened. Tighten them as much as possible by hand, then give them one final tightening with the wrench. It’s important not to over-tighten them, as this can damage the wheel or tire.
Quick Temporary Tire Fix (For Minor Punctures)
If your tire has a small puncture or leak, you might not need to fully replace it right away. Instead, a quick temporary fix can help you get to a repair shop or a safer location. These fixes are simple, effective, and can save you time and hassle until you can make a permanent repair. Here’s what you need to know:

1. Use a Tire Repair Kit
A tire repair kit is your best friend when dealing with minor punctures. These kits usually include tire plugs, rubber cement, and insertion tools. If the puncture is in the tread (not the sidewall), here’s how to use the kit:
- Locate the Puncture: Remove the wheel from the car and find the puncture. If you’re unsure where it is, inflate the tire slightly and look for escaping air or listen for the sound.
- Insert the Plug: Use the reamer tool to clean and expand the puncture hole. Then, thread a rubber plug into the insertion tool, push it into the hole, and pull it through until about half of the plug is inside the tire.
- Trim Excess Plug: After removing the insertion tool, trim the excess plug material so it’s flush with the tire surface.
This is a quick fix that can seal small holes in the tread. However, it’s only a temporary solution. Drive carefully and get the tire checked or replaced soon!
2. Use a Tire Sealant
If you don’t have a repair kit, tire sealant can also work as a temporary solution. These sealants are usually packaged in a can with a valve attachment that connects directly to the tire’s valve stem. Here’s how to use it:
- Shake the Can: Follow the instructions on the can. Generally, you’ll need to shake the sealant before use.
- Apply the Sealant: Attach the can’s nozzle to the tire valve and release the sealant. It will fill the tire and seal small punctures automatically.
- Drive Carefully: After applying the sealant, drive the car for a short distance to help the sealant spread evenly inside the tire.
Sealants are quick and easy, but they’re not a long-term solution. They can get you to a repair shop, but be sure to replace the tire or have it properly repaired as soon as possible. 
3. Keep Your Speed Low
After applying a temporary fix, it’s essential to drive cautiously. Both tire plugs and sealants are designed for short-term use, and driving at high speeds can cause the fix to fail. Stick to slower speeds and avoid sudden sharp turns or hard braking.
What to Do If You’re Unable to Fix the Flat
There may be times when fixing a flat tire on your own isn’t possible. Whether you don’t have the right tools, or the damage is too severe, it’s important to know your next steps. Here’s what you should do if you find yourself unable to fix the flat tire:

1. Call for Roadside Assistance
If you’re unable to change the tire yourself, don’t panic. Many insurance companies or car manufacturers offer roadside assistance services. If you have access to this service, call for help, and a professional will come to your location to either fix the tire or tow your vehicle to a nearby shop.
- Tip: Check if your insurance policy includes roadside assistance before you need it, so you’re prepared in case of an emergency.

2. Use a Tow Service
If you don’t have roadside assistance or it isn’t available, calling a tow service is another option. Tow services can take your vehicle to a nearby repair shop or your home, where you can fix the tire or get it repaired by a professional.
- Tip: Keep the contact info for local tow services stored in your phone for quick access in case of an emergency.

3. Find a Nearby Repair Shop
If you’re in a safe location and the tire can’t be fixed on the spot, search for a nearby tire repair shop or service center. Many auto shops offer mobile tire repair services, so even if you can’t drive your car, they may be able to come to you. You can use Google or a GPS app to locate nearby services. 
4. Stay Safe and Stay Visible
While waiting for help, make sure you stay safe. Move away from traffic if possible and remain visible to passing vehicles. Keep your hazard lights on, and if you have a reflective vest or warning triangle, use them to alert others. This simple precaution can prevent accidents while you wait for assistance.
5. Consider a Temporary Spare or Sealant
If the flat is due to a minor puncture and you have a spare tire or tire sealant, you can still try to apply a temporary fix. If you’re unsure about replacing it, this can buy you enough time to get the car to a repair shop safely.
Common Mistakes to Avoid When Fixing a Flat Tire
While fixing a flat tire is a straightforward task, it’s easy to make mistakes—especially if it’s your first time. To help you avoid common pitfalls and ensure a smooth tire change, here are some mistakes to watch out for. 

1. Forgetting to Loosen the Lug Nuts Before Lifting the Car
One of the most common mistakes is attempting to loosen the lug nuts after the car is lifted. This can be dangerous and inefficient. You’ll find it much harder to loosen the nuts once the car is in the air. Always loosen the lug nuts while the tire is still on the ground, but don’t remove them completely until the car is lifted.
2. Lifting the Car from the Wrong Spot
Improperly positioning the jack can damage your car. Always refer to the car’s manual to find the correct jacking points. Lifting from the wrong spot can cause the car to slip off the jack, or worse, cause damage to your vehicle’s frame. Be sure to place the jack under the designated lifting points for your model. 
3. Not Tightening the Lug Nuts in a Crisscross Pattern
When you’re putting the spare tire on, make sure to tighten the lug nuts in a crisscross pattern. This ensures that the pressure is evenly distributed and the tire is properly secured. Tightening them in a circle or a random pattern can lead to an uneven fit, which could cause the wheel to become loose while driving.
4. Over-Tightening the Lug Nuts
Many people make the mistake of tightening the lug nuts too much. Over-tightening can damage the threads on the nuts or the wheel itself. Use the right amount of force—tighten them until they’re snug, but not to the point where you’re putting all your strength into it. A good rule of thumb is to tighten them as much as you can with the wrench and then give them a final snug with a cross pattern. 
5. Not Checking the Spare Tire’s Condition
Before you get started, always inspect your spare tire. A flat spare isn’t going to help you! Check its air pressure regularly to ensure it’s ready for use when needed. If your spare tire is worn or damaged, get it replaced as soon as possible to avoid any surprises when you need it most.
6. Working Too Close to Traffic
If you’re changing your tire on the side of the road, make sure you’re a safe distance away from moving traffic. Never attempt a tire change in a busy or dangerous area, and always use your hazard lights. If possible, pull over to a safer location, such as a parking lot or side street, to avoid accidents. 
7. Forgetting to Check Tire Pressure After the Change
After you’ve installed the spare tire, it’s important to check its air pressure. Sometimes, spare tires aren’t inflated to the proper pressure, and driving on an under-inflated tire can be dangerous. Use a tire pressure gauge to ensure the spare is at the correct PSI (pounds per square inch) before hitting the road. 
How to Maintain Your Tires to Prevent Flats
The best way to avoid dealing with a flat tire is to take proactive care of your tires. Regular maintenance can significantly reduce your chances of running into tire issues while driving. Here are some essential tire maintenance tips to keep your tires in top shape and prevent flats.

1. Check Tire Pressure Regularly
One of the easiest ways to extend the life of your tires and prevent flats is to ensure they’re properly inflated. Under-inflated tires are more prone to punctures and blowouts, while over-inflated tires wear unevenly. Use a tire pressure gauge at least once a month to check your tire pressure and adjust it according to your car manufacturer’s recommendations (usually listed on the door frame or in the car manual). 
2. Rotate Your Tires
Tire rotation helps ensure that all four tires wear evenly. When you rotate your tires, you balance the wear and tear caused by different forces on the tires, such as turning, braking, and acceleration. Most car manufacturers recommend rotating your tires every 6,000 to 8,000 miles, or with each oil change. This simple step can significantly extend the lifespan of your tires and help prevent unexpected flats.
3. Inspect Tires for Damage
Regularly inspect your tires for visible signs of damage. Look for cuts, bulges, cracks, or anything that looks unusual. If you find something suspicious, it’s best to have the tire checked by a professional before it becomes a bigger issue. Early detection of tire damage can help you avoid sudden blowouts or flats. 
4. Avoid Overloading Your Car
Excessive weight can put extra stress on your tires, leading to faster wear and a higher likelihood of a flat tire. Check your vehicle’s manual for the recommended weight limit, and avoid exceeding it. If you regularly carry heavy loads, consider investing in stronger tires that are designed for more weight. 
5. Drive Carefully
Driving habits play a big role in tire health. Avoid slamming into potholes, curbs, or debris, as these can cause tire damage or slow leaks. Try to drive smoothly, making gentle turns and braking. Sudden impacts or rough driving can lead to punctures or tire wear that results in flats.
6. Keep Your Tires Balanced and Aligned
Proper alignment and balance help ensure that your tires wear evenly and last longer. Misalignment can cause uneven tire wear and reduce fuel efficiency. If you notice your car pulling to one side, have the alignment checked. Similarly, if you hear unusual noises or feel vibrations while driving, it might be time for a balance check.
7. Use Tire Sealant for Extra Protection
If you want an extra layer of protection, consider using a tire sealant. These sealants can help seal small punctures as they occur, reducing your chances of a flat. It’s not a replacement for proper maintenance, but it can be a helpful backup. Just make sure to follow the manufacturer’s instructions for application. 
Fixing a flat tire might seem daunting at first, but with the right tools, preparation, and knowledge, you can tackle the task like a pro! By following the steps outlined in this guide, you’ll not only be able to fix a flat quickly and safely, but you’ll also have the confidence to handle the situation when it arises.
Remember, tire maintenance is key to avoiding flats altogether. Regular checks, proper tire care, and safe driving habits will keep you rolling smoothly and reduce the likelihood of needing a roadside fix.
Next time you face a flat tire, you’ll be ready to handle it—no stress, no hassle. So go ahead, check your spare, grab your tools, and hit the road with peace of mind. Safe travels! 