Have you ever been driving and noticed your car’s engine temperature climbing higher than usual? 
 If left unchecked, overheating can lead to severe engine damage, leaving you with an expensive repair bill. One of the most common culprits of engine overheating is a malfunctioning thermostat. But how can you tell if your thermostat is the problem? And what can you do about it? In this guide, we’ll show you exactly how to check and replace a thermostat to fix overheating issues and prevent costly engine damage.
By understanding the role of the thermostat in your vehicle’s cooling system, you’ll be able to spot the signs of trouble early on. This step-by-step process will empower you to tackle thermostat replacement with confidence, saving you time and money in the long run. Ready to keep your car running smoothly? Let’s dive in!
Understanding the Thermostat and Its Role in Your Car
The thermostat might seem like a small, inconspicuous part of your car’s engine, but it plays a crucial role in keeping things running smoothly. Understanding how it works can help you spot issues early and prevent costly engine damage.
What Is a Thermostat?
Simply put, the thermostat is a valve that controls the flow of coolant in your engine. It opens and closes to regulate the engine’s temperature by allowing coolant to circulate when it gets too hot and restricting the flow when the engine is cold. This helps the engine warm up quickly and stay at the optimal operating temperature, which is essential for fuel efficiency and overall performance.
Why Is the Thermostat Important?
A properly functioning thermostat ensures that the engine operates within a safe temperature range. If it’s stuck open or closed, your engine might overheat or run too cold, both of which can cause serious damage.
- Overheating: If the thermostat is stuck closed, coolant can’t flow properly, leading to overheating. This can cause the engine to seize or even crack the cylinder head.
- Running Too Cold: If the thermostat is stuck open, the engine will struggle to reach its ideal operating temperature, which can lead to poor fuel efficiency, increased emissions, and reduced engine performance.
Signs Your Thermostat Might Be Failing
So, how can you tell if your thermostat is on its way out? Here are a few red flags to watch for:
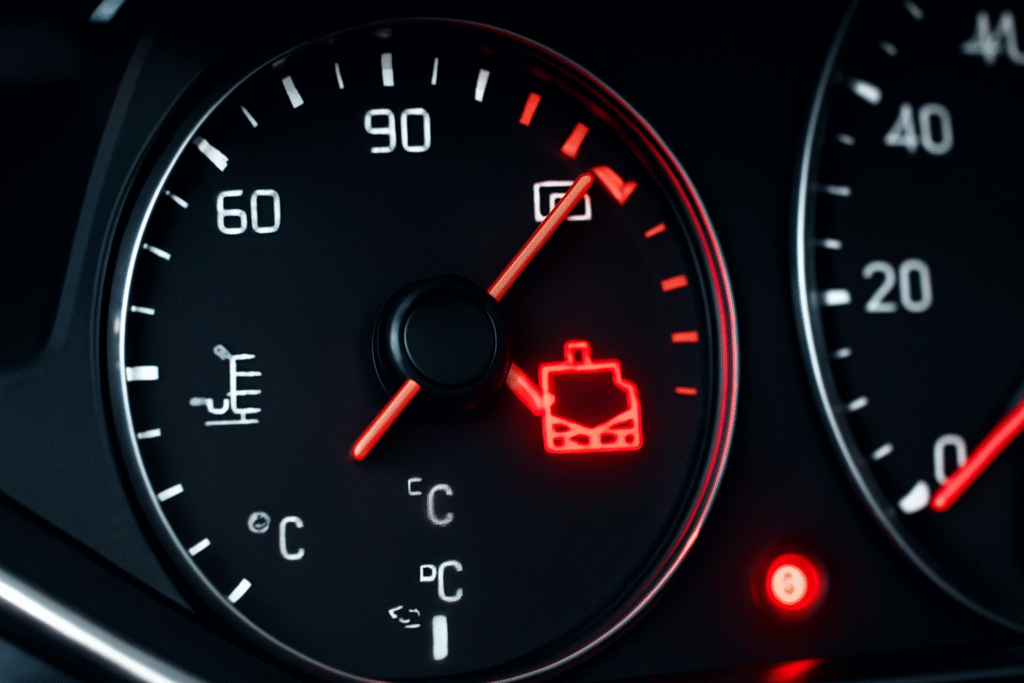
- Overheating Engine: The most obvious sign is if your car’s engine starts running too hot, indicated by the temperature gauge reaching the red zone or the engine warning light coming on.
- Erratic Temperature Gauge: If the temperature gauge jumps up and down unexpectedly, your thermostat might be stuck open or closed.
- Cold Air Blowing from the Heater: When the engine doesn’t reach the right temperature, the heater might blow cold air because the coolant isn’t circulating as it should.
- Poor Fuel Efficiency: If your engine’s running colder than normal, it may not be burning fuel efficiently, leading to higher fuel consumption.

Tools and Materials Needed for the Job
Before diving into replacing your thermostat, it’s important to gather all the tools and materials you’ll need.  Having everything ready will help the job go smoothly and avoid unnecessary trips to the hardware store mid-repair. Here’s a simple list to ensure you’re fully prepared:
1. Wrench Set and Screwdrivers
You’ll need a wrench set or a socket wrench to remove the bolts holding the thermostat housing in place. Having a set of different sizes will ensure you can tackle various bolt sizes. A screwdriver may also be needed for any screws securing the housing or other parts.
2. Pliers and Hose Clamps
Pliers are useful for loosening any hose clamps that might be attached to the radiator hoses near the thermostat. You’ll also need these for securing the new hose clamps once the thermostat is replaced.
3. Coolant Catch Pan or Drain Pan
To safely drain the coolant from the radiator, you’ll need a coolant catch pan or drain pan. This will help you collect the coolant and dispose of it properly—don’t just let it spill out on the ground!
4. New Thermostat
Ensure you have the correct replacement thermostat for your car model. You can check your car’s manual or consult a local auto parts store to make sure you’re getting the right part. You’ll also want to inspect the thermostat gasket, as it may need replacing too.
5. Coolant
When you remove the old thermostat, you’ll lose some coolant, so have a fresh bottle of coolant on hand. It’s essential to refill the system with the correct coolant to avoid any engine issues after the replacement.
6. Funnel
A funnel will help you pour the coolant back into the radiator without making a mess, especially if your car’s cooling system has a tight fill neck.
7. Safety Gear
Don’t forget your gloves and safety goggles!  Handling hot coolant and engine parts can be dangerous, so make sure to protect your hands and eyes while working.
8. Torque Wrench (Optional)
While not always necessary, a torque wrench ensures you’re tightening the bolts to the correct specifications. This can prevent over-tightening, which could damage the housing or cause leaks.
With these tools and materials ready, you’ll be all set to tackle the thermostat replacement with confidence. The right preparation will make the job faster and easier, giving you the best chance at success. 

How to Check a Thermostat for Malfunctions
Before replacing your thermostat, it’s crucial to confirm that it’s actually the source of your overheating problems.  Checking the thermostat for malfunctions is a straightforward process that can save you time and money if it turns out the issue lies elsewhere. Here’s how to check if your thermostat is working properly:
1. Turn on the Engine and Let It Reach Operating Temperature
Start your car and let it run for a few minutes. The engine needs to reach its normal operating temperature before you can properly test the thermostat. Keep an eye on the temperature gauge to see if the needle climbs steadily. 
2. Check the Temperature Gauge
Once the engine is warm, check the temperature gauge on your dashboard.
- Normal Reading: The needle should stay steady within the middle of the gauge, indicating that the thermostat is allowing coolant to flow at the right time.
- Fluctuating Reading: If the needle jumps up and down unexpectedly, this could indicate a malfunctioning thermostat that is opening and closing at the wrong times.
- Overheating: If the temperature gauge reaches the red zone, your thermostat is likely stuck closed, preventing coolant from circulating properly.
3. Feel the Radiator Hose
Next, carefully feel the radiator hose (use gloves to avoid burns!). With the engine running and at normal temperature, the hose should feel warm to the touch.
- If the hose is cold and the engine is overheating, this could be a sign that the thermostat is stuck closed and isn’t allowing the coolant to flow properly.
- If the hose is hot and the engine is still overheating, the thermostat might be stuck open, allowing too much coolant flow and preventing the engine from warming up.
4. Check for Leaks or Low Coolant Levels
Low coolant can also mimic thermostat issues. Check the coolant reservoir to make sure the level is full. If it’s low, top it up and monitor if the overheating persists. A leak or low coolant could indicate that there’s another problem, such as a faulty radiator or a hose leak, rather than a bad thermostat.
5. Perform a Simple Thermostat Test (Optional)
If you want to take things a step further, you can test the thermostat by removing it from the engine and placing it in a pot of boiling water.
- Thermostat Opens: The thermostat should open up as the water heats up.
- Thermostat Doesn’t Open: If it doesn’t open when the water is boiling, it’s faulty and needs replacing.
This test is not always necessary but can give you a clear indication of whether the thermostat is functioning as it should.
6. Look for Other Symptoms of a Faulty Thermostat
Besides temperature issues, other signs can indicate a thermostat problem:
- Cold Air from Heater: If the engine never seems to reach optimal temperature, your heater might blow cold air because the thermostat is stuck open.
- Engine Warning Light: In some cases, the car’s engine warning light might illuminate, signaling a problem with the cooling system or thermostat.

How to Replace a Faulty Thermostat (Step-by-Step Guide)
Replacing a faulty thermostat is a manageable DIY task that can save you a lot of money on labor costs.  Here’s a step-by-step guide to help you replace your thermostat like a pro. Let’s get started!
Step 1: Preparation and Safety First
- Turn Off the Engine: Ensure your car’s engine is off and completely cool before you begin. Working with a hot engine can be dangerous!

- Disconnect the Battery: For added safety, disconnect the car’s battery. This prevents any electrical issues while you’re working.
- Drain the Coolant: Place a coolant catch pan under the radiator and remove the radiator cap. Open the drain valve to release the coolant. You may need to drain part of the coolant to make space for the new thermostat.
Step 2: Locate the Thermostat
The thermostat is typically located where the upper radiator hose connects to the engine. It’s housed in a metal or plastic casing. Depending on your car model, you may need to remove some parts to access it (e.g., the air intake or other engine components).
- Tip: If you’re unsure of the thermostat’s location, consult your car’s manual or look for diagrams online specific to your make and model.
Step 3: Remove the Old Thermostat
- Loosen the Clamps: Use pliers to remove the hose clamps that hold the upper radiator hose in place. Slide the hose off gently.
- Unbolt the Thermostat Housing: Using a socket wrench, remove the bolts securing the thermostat housing. Be careful, as some coolant may spill when you remove the housing.
- Take Out the Old Thermostat: With the housing removed, pull out the old thermostat. Take note of how the thermostat was positioned, as you’ll need to place the new one the same way.

Step 4: Install the New Thermostat
- Clean the Housing: Before inserting the new thermostat, make sure the housing is clean of any old gasket material and debris. This ensures a proper seal and prevents leaks.
- Place the New Thermostat: Position the new thermostat in the housing, matching it to the direction of the old one. Ensure the thermostat’s small valve is facing the engine.
- Install a New Gasket (If Necessary): If your new thermostat didn’t come with a gasket, you’ll need to apply a new one to prevent leaks. Make sure it’s positioned properly in the housing.
Step 5: Reassemble and Secure Everything
- Reattach the Housing: Once the new thermostat is in place, carefully align the thermostat housing back onto the engine. Tighten the bolts using a wrench to secure it in place.
- Reconnect the Radiator Hose: Slide the radiator hose back onto the housing and secure it with the hose clamp.
- Refill the Coolant: Using a funnel, refill the coolant reservoir with the recommended coolant for your car. Keep an eye out for any leaks while you’re refilling.
Step 6: Test the New Thermostat
- Reconnect the Battery: Once everything is back in place, reconnect the battery.
- Start the Engine: Turn on the car and let it run. Monitor the temperature gauge to ensure the engine reaches its normal operating temperature. The thermostat should open and allow coolant to circulate, preventing the engine from overheating.
- Check for Leaks: Inspect the thermostat housing and hoses to make sure there are no coolant leaks.

Common Mistakes to Avoid When Replacing a Thermostat
Replacing your thermostat is a relatively simple task, but it’s easy to make mistakes if you’re not careful. To ensure a smooth, successful repair, here are some common pitfalls to avoid. 
1. Not Choosing the Right Replacement Thermostat
One of the biggest mistakes is using the wrong thermostat for your car. Different vehicles require different thermostat sizes and temperature ratings.
- Tip: Always double-check your car’s manual or consult with an auto parts store to make sure you’re getting the correct replacement part. Using the wrong thermostat could cause improper engine cooling or damage.
2. Skipping the Gasket Replacement
When replacing the thermostat, you may think the old gasket is still good to use. However, old gaskets can become brittle, cracked, or compressed, leading to leaks.
- Tip: Always replace the thermostat gasket when installing a new one. If your thermostat didn’t come with a new gasket, make sure to purchase one separately.
3. Not Bleeding the Cooling System
After replacing the thermostat, air can get trapped in the cooling system, causing improper coolant circulation and potential overheating.
- Tip: Be sure to bleed the cooling system to release any trapped air. This ensures that the coolant can flow properly throughout the engine.
4. Over-tightening the Bolts
It’s easy to get carried away when tightening the bolts on the thermostat housing, but over-tightening can strip the threads or crack the housing.
- Tip: Use a torque wrench to ensure you’re tightening the bolts to the manufacturer’s recommended specifications.
5. Not Checking for Leaks After Installation
Even after everything is back together, it’s essential to check for leaks. Small leaks can sometimes go unnoticed, leading to coolant loss and engine overheating.
- Tip: After reinstalling everything, start the engine and let it run for a few minutes. Check the thermostat housing and hoses for any signs of coolant leaks. If you spot a leak, turn off the engine and tighten the bolts or replace any damaged parts.
6. Failing to Refill the Coolant Properly
After replacing the thermostat, it’s easy to forget to fill the coolant to the right level or use the wrong type. This can lead to engine damage or cooling issues.
- Tip: Always refill the coolant to the proper level and make sure you’re using the right type for your car. If you’re unsure, check the car’s manual or ask at your local auto parts store.
7. Ignoring Signs of Bigger Problems
While replacing a faulty thermostat might solve overheating issues, it’s important to remember that other cooling system problems can mimic thermostat failure.
- Tip: If you continue to experience overheating after replacing the thermostat, consider having the radiator, water pump, or hoses inspected for potential issues.
Avoiding these common mistakes will help ensure that your thermostat replacement goes smoothly and that your engine stays cool and healthy. By taking your time and following the steps carefully, you can prevent bigger issues down the road.

Maintenance Tips to Prevent Thermostat Failures
Once you’ve replaced your thermostat, keeping it—and your car’s cooling system—in good shape is key to preventing future failures. Here are some simple maintenance tips to help you avoid thermostat problems and keep your engine running smoothly. 
1. Regularly Check Coolant Levels
Low coolant levels are one of the main causes of thermostat failure. If the coolant is low, the thermostat can’t regulate the temperature properly, which leads to overheating.
- Tip: Make it a habit to check your coolant level every few months, especially before long trips. Top it off if necessary, using the recommended coolant for your car.
2. Flush Your Cooling System Periodically
Over time, coolant can become contaminated or lose its effectiveness, which can clog the radiator and lead to thermostat malfunctions.
- Tip: Have your cooling system flushed every 30,000 to 50,000 miles (or as recommended by your vehicle’s manufacturer) to keep it working efficiently and prevent thermostat failure.
3. Replace Old or Leaky Hoses
Worn-out hoses can cause coolant leaks, which can lead to a malfunctioning thermostat or engine overheating.
- Tip: Inspect your radiator hoses for cracks or leaks regularly. Replace any damaged hoses to ensure the cooling system operates at full capacity.
4. Check the Radiator Cap
The radiator cap plays an essential role in maintaining proper coolant pressure. If it’s damaged or worn out, it can cause coolant loss or air to enter the system, both of which can lead to thermostat issues.
- Tip: Inspect the radiator cap for wear and replace it if necessary. Make sure it’s sealing properly to prevent coolant leakage.
5. Monitor Engine Temperature
Keep an eye on your car’s temperature gauge and listen for any unusual noises from the engine.
- Tip: If you notice the engine temperature fluctuating or if the heater blows cold air unexpectedly, check the thermostat before it causes more serious damage.
6. Fix Overheating Issues Immediately
If your car starts to overheat, don’t ignore it. Continuing to drive while the engine is overheating can damage the thermostat and other parts of the cooling system.
- Tip: If your car overheats, pull over and let the engine cool down. Check the coolant levels and thermostat, and get the issue fixed before driving again.
7. Use the Right Coolant
Using the wrong type of coolant can cause damage to your car’s cooling system, including the thermostat.
- Tip: Always use the type of coolant specified in your car’s owner’s manual. Mixing different types of coolant can cause chemical reactions that damage the system.

By following these simple maintenance steps, you can keep your thermostat—and your car’s cooling system—working efficiently for the long term. Taking proactive care of your car’s cooling system will not only prevent thermostat failures but also protect your engine from expensive damage down the road. 
Replacing a faulty thermostat may seem like a daunting task, but with the right tools, a little patience, and the steps outlined in this guide, you can tackle it with confidence. By understanding the thermostat’s role in your car’s cooling system, properly checking for issues, and following the correct replacement procedure, you’ll ensure your engine stays cool and runs smoothly for years to come. 
Regular maintenance, such as checking coolant levels, flushing the cooling system, and inspecting hoses, can go a long way in preventing thermostat failures and avoiding costly repairs. By taking these steps, you’re not just fixing a part—you’re investing in the longevity of your vehicle.
Now that you know how to check and replace a thermostat, you can save money on repairs and gain more control over your car’s performance. Whether you’re a beginner or a seasoned DIYer, this simple yet essential task is well within your reach. 
Don’t let a faulty thermostat leave you stranded on the side of the road. Keep an eye on your car’s cooling system and address any issues promptly. Happy driving!
