You’re midway through a plumbing retrofit or irrigation system upgrade, staring at mismatched pipe diameters that threaten to derail your project with leaks, reduced flow, or unnecessary bulk. The frustration is real—wasted time sourcing parts, potential water damage from poor fits, and the risk of code violations if you improvise. But what if a simple, compact fitting could bridge that gap efficiently? Enter the pipe bushing PVC, a versatile reducer component that’s often overlooked in favor of bulkier alternatives like couplings or adapters.
As mechanical engineers with decades of experience designing fluid transport systems—from residential plumbing to industrial process piping—we know that selecting the right PVC fittings isn’t just about convenience; it’s about optimizing flow efficiency, minimizing pressure drops, and ensuring long-term system integrity. In this comprehensive guide, we’ll demystify the PVC pipe bushing: its precise definition, key differences from similar fittings, ideal applications based on pressure ratings and fluid dynamics, sizing considerations aligned with ASTM standards, a foolproof step-by-step installation process using solvent cement welding, common pitfalls to avoid, and advanced engineering tips for high-performance setups. Whether you’re a DIY homeowner tackling a garden sprinkler line, a professional plumber retrofitting a pool pump, or an engineering student learning pipe network design, this article provides the in-depth insights you need to make informed decisions and execute flawless installations.
By grounding our advice in principles like the Darcy-Weisbach equation for head loss calculations and real-world case studies from Schedule 40 and 80 PVC systems, we’ll go beyond surface-level tutorials to deliver actionable value that prevents costly mistakes and enhances system reliability.
What Is a PVC Pipe Bushing?
At its core, a pipe bushing PVC—often referred to as a PVC reducer bushing—is a specialized fitting designed to connect pipes or components of different diameters in a compact, inline manner. Unlike a standard coupling that joins two pipes end-to-end, a bushing features a spigot (male) end on one side and a socket (female, or slip) end on the other. The spigot inserts directly into a larger fitting, valve, or pipe socket, while the socket accepts a smaller diameter pipe, effectively reducing the flow path without adding significant length to the assembly.
Anatomically, a typical Schedule 40 PVC pipe bushing might measure just 1-2 inches in overall length, with the spigot end tapered slightly for easy insertion and the socket end beveled for smooth solvent welding. Materials are molded from virgin PVC resin, ensuring chemical resistance and compliance with NSF/ANSI 61 for potable water applications. Common configurations include:
- Spigot x Slip: The standard for solvent-weld PVC systems, ideal for permanent, leak-proof joints in low- to medium-pressure setups.
- Spigot x FPT (Female Pipe Thread): Combines solvent weld with threaded connections, useful for attaching to metal components like brass valves.
- MPT (Male Pipe Thread) x Slip: Threaded on the larger end for hybrid systems.
Why the “bushing” nomenclature? It stems from historical mechanical engineering terms where bushings serve as adapters or liners in machinery. In plumbing, it’s essentially a reducer that “bushes” into an existing socket, distinguishing it from tapered reducers that provide gradual transitions.
For visual clarity, imagine a 2-inch x 1-inch PVC pipe bushing: The 2-inch spigot fits snugly into a 2-inch tee or elbow socket, while the 1-inch slip end glues to a 1-inch pipe. This design minimizes protrusion and maintains a clean, professional look in tight spaces.
PVC Pipe Bushing vs. Reducing Coupling/Reducer: Key Differences
Confusion between PVC pipe bushings and reducing couplings (or reducers) is rampant among beginners, leading to suboptimal designs that increase turbulence, head loss, or even system failures under pressure. As engineers, we emphasize that the choice impacts fluid velocity, erosion risk, and overall hydraulic efficiency—principles governed by the continuity equation (A1V1 = A2V2), where abrupt changes in area (A) can spike velocity (V) and cause issues like cavitation in pumped systems.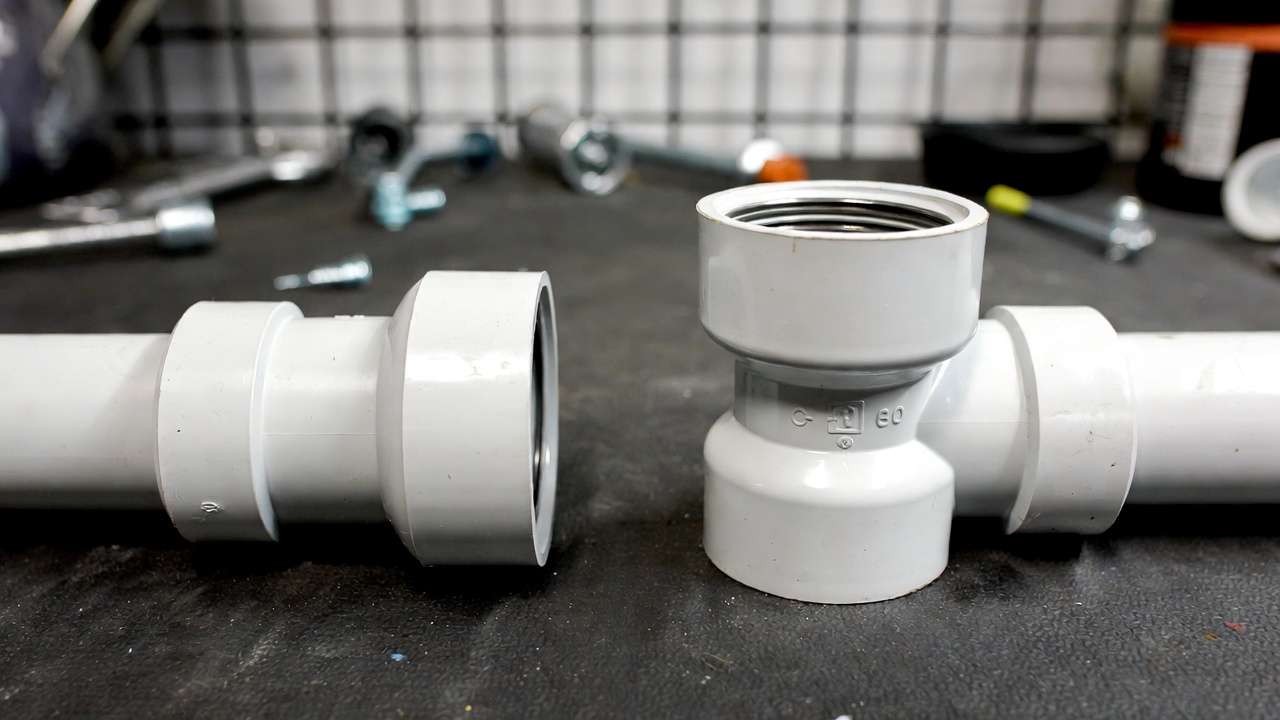
Here’s a detailed side-by-side comparison to clarify:
| Feature | PVC Pipe Bushing | Reducing Coupling/Reducer |
|---|---|---|
| Connection Style | Spigot (male) into larger fitting/socket; slip (female) for smaller pipe | Slip (female) over both pipe ends |
| Space Required | Minimal—fits inside an existing fitting, adding little to no length | Longer—spans the full transition between two pipes, often 3-6 inches |
| Flow Path Smoothness | Potential for a step change at the reduction point, which may introduce minor turbulence | Often tapered for smoother flow; concentric designs minimize velocity spikes |
| Best For | Retrofitting existing fittings, tight spaces like valve manifolds or pump outlets | New installations in straight runs where gradual flow transition is critical |
| Pressure Drop Impact | Slightly higher due to abrupt reduction (calculate via K-factor loss coefficients: ~0.5-1.0 for bushings) | Generally lower (K-factor ~0.1-0.5 for tapered reducers) |
| Cost and Availability | Lower cost (typically $0.50-$2 per unit); widely available in hardware stores | Slightly higher ($1-$5); more specialized |
| Code Restrictions | Permitted in pressure piping (e.g., irrigation); restricted in some drainage/vent applications per IPC due to potential ledge formation | Preferred in drainage for smoother solids passage; no major restrictions |
From an engineering lens, bushings shine in scenarios where space constraints outweigh minor flow inefficiencies. For instance, in a high-flow irrigation manifold, a bushing might introduce a negligible 0.2-0.5 psi drop at 5-10 GPM, per Hazen-Williams formula adaptations for PVC (C=150). However, for high-velocity systems (>5 ft/s), opt for reducers to avoid erosion on the step edge.
When to Use a PVC Pipe Bushing (Common Applications)
Selecting a pipe bushing PVC hinges on your system’s requirements for pressure, flow rate, and spatial layout. In mechanical engineering design, we prioritize fittings that balance cost, durability, and performance—avoiding overkill like using a full reducer when a bushing suffices.
Pressure Piping and Irrigation Systems: Bushings are indispensable for connecting pumps to distribution lines. For example, reduce from a 1.5-inch pump outlet to 1-inch laterals using a 1.5″ x 1″ spigot x slip bushing. This maintains compact manifolds, reducing material costs by 20-30% compared to threaded adapters.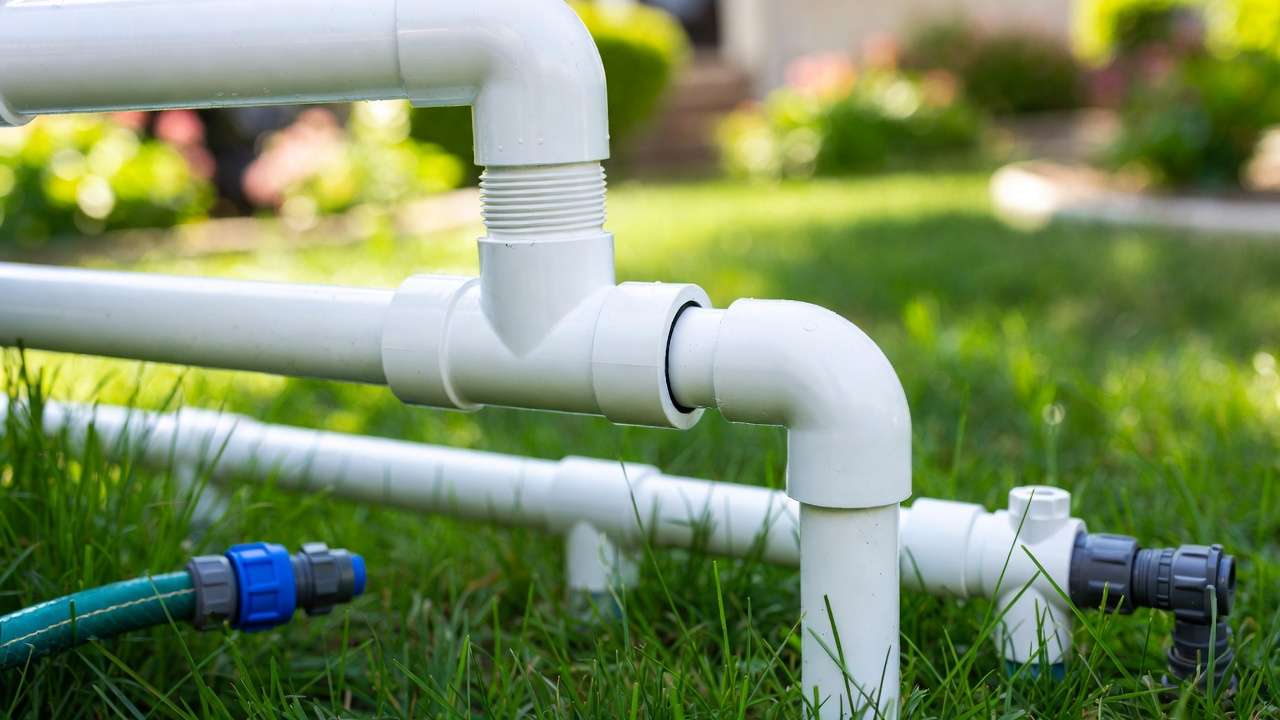
Plumbing Retrofits: In bathroom or kitchen upgrades, bushings adapt existing stub-outs. Say you’re installing a new faucet with 1/2-inch inlets onto 3/4-inch supply lines—a threaded spigot x FPT bushing ensures a secure, vibration-resistant joint without re-piping.
Pool and Spa Equipment: Here, bushings facilitate connections like filter-to-pump or heater bypasses. In a variable-speed pump setup, a bushing minimizes fittings in the return line, preserving energy efficiency (critical as pumps account for 40% of pool energy use per DOE stats).
Industrial or Low-Pressure Process Piping: For chemical transfer or condensate drainage, bushings handle reductions in non-corrosive environments. Use Schedule 80 variants for pressures up to 200-300 PSI at 73°F.
When not to use: In gravity-fed drainage or waste-vent systems, codes like the International Plumbing Code (IPC) may prohibit bushings if installed with the reduction facing upstream, as it creates a ledge for solids buildup. Always check local building codes and flow direction—bushings perform best reducing from large to small in pumped or pressurized lines.
Expert tip: For borderline cases, model your system in software like EPANET to simulate pressure drops; a bushing often proves sufficient for flows under 15 GPM.
Understanding PVC Bushing Sizing and Specifications
Proper sizing is non-negotiable—mismatches lead to leaks, stress fractures, or inefficient flow. PVC bushings follow nominal pipe sizes (NPS), but remember: “1-inch” refers to compatibility, not exact ID/OD. For Schedule 40 PVC (most common for residential), a 1-inch pipe has an OD of 1.315 inches and ID of 1.049 inches.
Common sizes include 3/4″ x 1/2″, 1″ x 3/4″, up to 4″ x 3″. Refer to this excerpt from a standard sizing chart:
| Nominal Size (in) | Spigot OD (in) | Socket ID (in) | Wall Thickness (in) | Max Pressure (PSI at 73°F) |
|---|---|---|---|---|
| 1 x 3/4 | 1.315 | 1.050 | 0.133 | 480 |
| 2 x 1.5 | 2.375 | 1.900 | 0.154 | 330 |
| 3 x 2 | 3.500 | 2.375 | 0.216 | 260 |
Pressure and temperature ratings derate per ASTM D1785: At 100°F, expect 50-70% of room-temp capacity. For Schedule 80, ratings jump 20-50% due to thicker walls.
Material specs: Virgin PVC offers excellent resistance to acids, bases, and salts but degrades under UV or hydrocarbons. Gray PVC is UV-stabilized for outdoor use; white for indoor/potable.
LSI integration: When selecting, consider pipe schedule compatibility, solvent cement type (e.g., medium-bodied for Sch 40), and system velocity limits (ideally 5 ft/s max to prevent water hammer).
PVC Pipe Bushing Explained: What It Is, When to Use It, and Proper Installation Guide (Continued from previous section)
Step-by-Step Guide: How to Properly Install a PVC Pipe Bushing
Correct installation is where most failures occur—even the best PVC pipe bushing will leak or crack if the solvent weld is rushed or surfaces are contaminated. Solvent cement welding creates a true chemical fusion: the primer softens the PVC surfaces, the cement dissolves them further, and when pressed together, the molecules interlock as the solvent evaporates, forming a joint stronger than the pipe itself.
Tools and Materials Needed
- PVC primer (purple for visibility)
- Medium-bodied PVC cement (clear or blue, rated for your schedule and pipe size)
- Utility knife or deburring tool
- Measuring tape and marker
- Clean rag or paper towels
- Sandpaper (220-grit) or PVC chamfer tool (optional but recommended)
- Gloves and eye protection
- Pipe cutter or hacksaw with miter box for clean square cuts
Preparation Steps
- Dry-fit the entire assembly first. Insert the bushing’s spigot end into the receiving fitting (tee, elbow, valve, etc.) and slide the smaller pipe into the bushing socket. Mark alignment points with a marker.
- Cut pipes square using a pipe cutter—never a hacksaw without a guide, as angled cuts prevent full insertion and create stress risers.
- Deburr and chamfer all cut edges: Remove sharp burrs with a utility knife or deburring tool, then lightly chamfer the outer edge of the pipe and spigot (30–45° bevel) to ease insertion and prevent cement scraping.
- Clean all mating surfaces thoroughly with a clean, dry rag. Any oil, dirt, or moisture will prevent proper fusion.
Detailed Installation Process
- Apply primer generously but not excessively to both the outside of the bushing spigot and the inside of the receiving fitting/socket. Also prime the outside of the smaller pipe and the inside of the bushing socket. The primer should look wet and glossy; re-apply if it dries too quickly.
- Immediately apply PVC cement in the same pattern: a continuous bead on the spigot and a ring inside the fitting, plus the same on the smaller pipe and bushing socket. Use enough to form a small bead at the joint when inserted, but avoid puddling excess cement inside the flow path.
- Quickly insert the bushing spigot into the receiving fitting with a ¼-turn twist while pushing firmly until it bottoms out (typically ½–¾ inch insertion depth depending on size). Hold for 10–15 seconds to prevent push-back from solvent pressure.
- Insert the smaller pipe into the bushing socket using the same ¼-turn insertion and firm push. Hold another 10–15 seconds.
- Wipe away any excess cement immediately with a rag to keep the exterior clean and prevent drips from restricting flow or creating stress points.
- Support the assembly (use clamps or blocks) and allow full cure time before pressurizing:
- 15–30 minutes for initial set (no movement)
- 2 hours for handling strength
- 24 hours for full pressure rating (or follow manufacturer’s chart for temperature-adjusted cure times)
Engineering Notes on Solvent Welding The fusion relies on tetrahydrofuran (THF) in the cement softening PVC to a depth of 0.010–0.020 inches. Insufficient primer or cold temperatures (<40°F) slow evaporation and weaken joints. Excessive cement can create internal beads that reduce flow area and promote turbulence. Always work in a well-ventilated area—THF fumes are volatile.
Troubleshooting Common Issues
- Leak at joint → Usually poor surface prep or insufficient insertion depth. Cut out and redo.
- Cracked fitting after pressurization → Over-insertion force or thermal stress from rapid temperature changes.
- Restricted flow → Excess cement bead inside; inspect with a borescope if suspected.
Common Mistakes and How to Avoid Them
- Skipping the dry-fit step Consequence: Discovering misalignment after cement is applied—joint must be cut out and replaced. Engineer fix: Always dry-fit and mark everything before priming.
- Using too much or too little cement Consequence: Too much creates internal restrictions or weak spots; too little results in incomplete fusion. Engineer fix: Follow the “pea-sized bead” rule per fitting size and practice on scrap pieces.
- Installing bushings backward or in drainage lines where prohibited Consequence: Creates an upstream ledge that traps debris in DWV systems. Engineer fix: Confirm flow direction (large to small) and check local plumbing codes (e.g., IPC 705.7.3 restricts certain bushing orientations in drainage).
- Not deburring or chamfering edges Consequence: Sharp edges scrape cement away, creating channels for leaks. Engineer fix: Make chamfering a non-negotiable step.
- Pressurizing too soon Consequence: Joint separation under hydrostatic test pressure. Engineer fix: Use temperature-adjusted cure charts from manufacturers like Oatey or Weld-On.
Advanced Tips from Mechanical Engineers
- Minimizing pressure drop: For critical flow applications, lightly chamfer the internal step at the reduction point after installation (if accessible) to reduce turbulence. In high-flow systems, calculate equivalent length (bushings ≈ 1–2 ft of straight pipe) and compare against reducers.
- Pressure testing protocol: After 24-hour cure, perform a hydrostatic test at 1.5× operating pressure (e.g., 100 psi test for 60 psi system) for at least 15 minutes. Monitor for drops and check all joints visually.
- When to choose alternatives: If flow velocity exceeds 5 ft/s or you need a smoother transition, use a concentric reducing coupling or fabricated reducer instead. For threaded transitions in mixed-material systems, consider union-style adapters over bushings to allow future disassembly.
- Thermal expansion consideration: PVC expands ~3–5× more than steel. In long runs or hot climates, include expansion loops or flexible couplings downstream of bushings to prevent stress cracking.
- Maintenance inspection: In industrial settings, schedule annual visual checks and occasional borescope inspections of bushing joints for signs of stress whitening or micro-cracks.
Frequently Asked Questions (FAQs)
What is the main difference between a PVC pipe bushing and a reducer? A bushing installs inside an existing fitting (spigot x slip), making it compact for retrofits, while a reducer is a standalone piece (slip x slip) that joins two pipes directly with a smoother transition.
Can I use a PVC pipe bushing in Schedule 80 systems? Yes—Schedule 80 bushings are available and rated higher (up to 50% more pressure capacity). Ensure the bushing matches the schedule of the pipes and fittings.
How do I know what size PVC bushing I need? Match the spigot size to the existing fitting/pipe you’re reducing from, and the socket size to the smaller pipe you’re connecting. Use nominal sizes (e.g., 2″ x 1″) and verify actual OD/ID from sizing charts.
Is a PVC pipe bushing safe for potable drinking water? Yes, when marked NSF/ANSI 61 certified (most reputable brands are). Avoid non-certified bushings for drinking water lines.
Why did my PVC bushing installation leak after a few days? Most likely causes: inadequate surface cleaning, insufficient primer/cement, rushed insertion without full bottoming, or curing too quickly in cold weather. Cut out and re-do the joint properly.
Can I glue a metal pipe into a PVC bushing? No—solvent cement only works on PVC-to-PVC. Use threaded bushings (FPT or MPT ends) or transition unions for metal-to-PVC connections.
Conclusion
The pipe bushing PVC is one of the most elegant and space-efficient tools in the mechanical engineer’s plumbing arsenal—when used correctly, it delivers reliable diameter transitions with minimal added fittings, lower material costs, and clean system layouts. By understanding its mechanics, choosing the right type and size, following rigorous solvent-weld procedures, and applying preventive design principles, you can avoid the common failures that plague amateur installations.
Next time you face a diameter mismatch in your irrigation line, pool plumbing, or process piping project, reach for a PVC pipe bushing with confidence. Assess your flow requirements, check local codes, and install methodically—you’ll end up with a stronger, more efficient system.
Have questions about a specific bushing application in your project? Drop them in the comments below. For more in-depth mechanical engineering guides on PVC systems, fluid flow optimization, pressure vessel design basics, and more, explore the rest of Mech Tips Zone.
Stay engineered, Mech Tips Zone Team