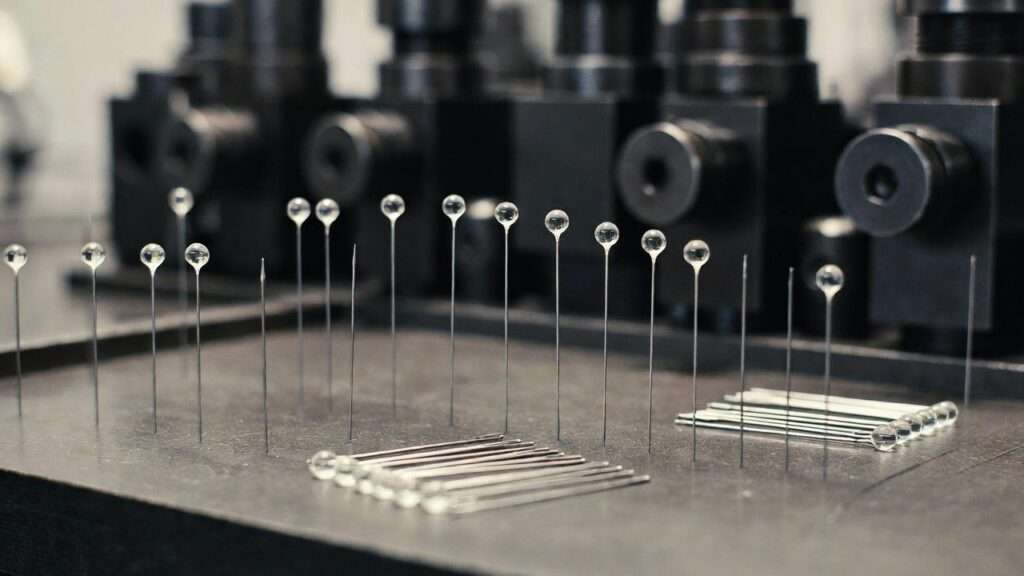
Imagine fumbling with a stubborn piece of fabric, trying to align seams perfectly, only for your pins to bend, snag, or leave unsightly holes. It’s a common frustration for sewists and crafters alike, but what if I told you that the humble sewing pin is a masterpiece of mechanical engineering? These tiny tools, often overlooked, embody principles of materials science, precision manufacturing, and design optimization that rival components in high-tech machinery. In this comprehensive guide, we’ll dive deep into sewing pins, exploring their anatomy, production processes, types, and applications—all from a mechanical engineering lens. Whether you’re a hobbyist tackling delicate silks or a professional engineer drawing inspiration from everyday fasteners, understanding sewing pins can elevate your projects and prevent common pitfalls like fabric damage or inefficient pinning.
As a mechanical engineer with over 15 years of experience in precision manufacturing and materials selection, I’ve analyzed countless fasteners, from industrial dowel pins to these fabric essentials. Sewing pins aren’t just sharp sticks; they’re engineered for specific tolerances, shear strength, and durability to handle diverse fabrics without compromise. By the end of this article, you’ll know how to select the best pins for your needs, avoid costly mistakes, and appreciate the engineering ingenuity behind them. Let’s pin down the details.
What Are Sewing Pins? A Mechanical Perspective
At their core, sewing pins are temporary mechanical fasteners designed to hold fabric layers in alignment during cutting, sewing, or pressing. Unlike permanent fasteners like rivets or bolts, they provide a low-force, reversible hold, piercing materials with minimal disruption. From an engineering standpoint, this requires a delicate balance: sufficient sharpness for easy insertion, enough rigidity to resist bending under load, and surface finishes that prevent snagging or corrosion.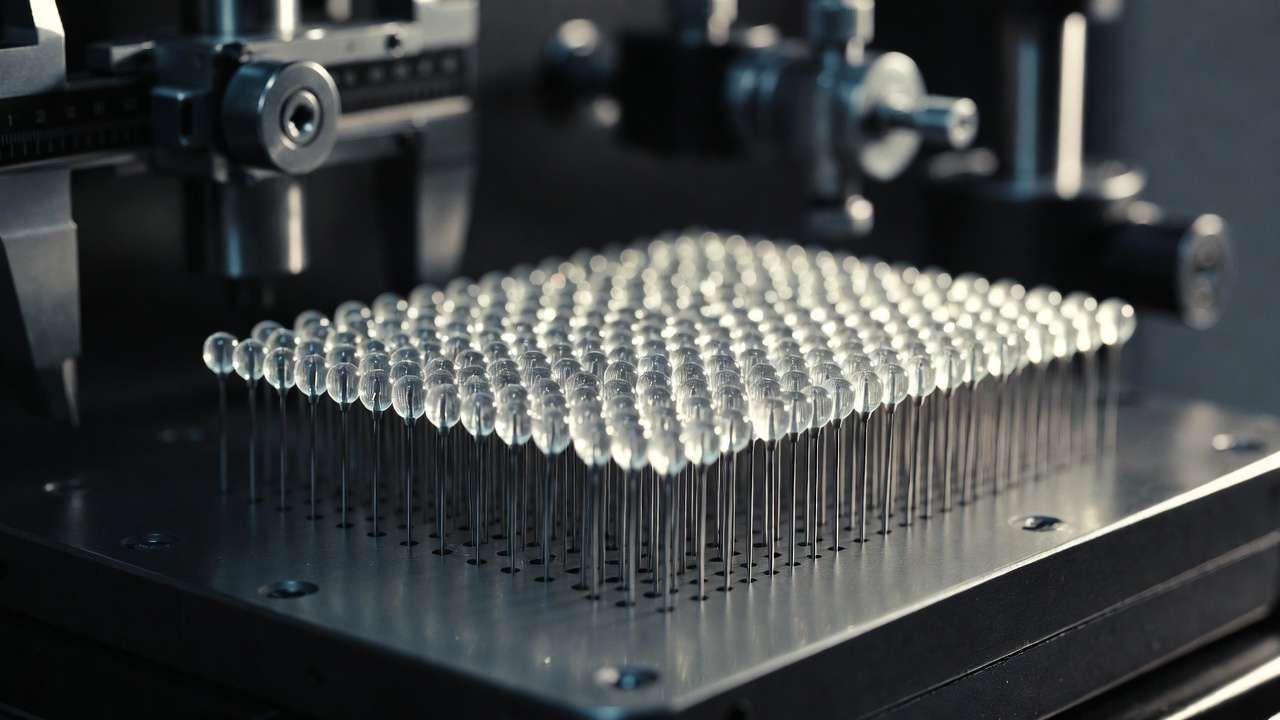
The basic anatomy of a sewing pin includes three key components:
- Shaft: Typically made from high-carbon steel or stainless steel, the shaft is the elongated body, ranging from 0.4 mm to 0.8 mm in diameter. This dimension is critical—thinner shafts (e.g., 0.5 mm for silk pins) minimize hole size in delicate fabrics, while thicker ones (0.7-0.8 mm) offer greater shear strength for heavy materials like denim or quilts. Engineers specify tolerances here to ensure uniformity; variations as small as 0.01 mm can affect performance.
- Point: The sharpened tip must achieve low insertion force while avoiding fiber breakage. Sharp points use a conical grind for piercing wovens, whereas ball-point tips (rounded to about 0.1-0.2 mm radius) slide between knit fibers, drawing parallels to ball bearings in reducing friction.
- Head: This grip point varies—glass heads withstand temperatures up to 500°C without melting, ideal for ironing, while plastic heads provide visibility but risk deformation at lower heats (around 150°C). Flat heads eliminate bulk for machine sewing or pressing.
In mechanical terms, sewing pins function like locating pins in assembly jigs: they maintain positional accuracy. For instance, their yield strength (typically 500-800 MPa for steel variants) ensures they don’t deform under the compressive forces of layered fabrics. Compared to industrial pins, sewing pins prioritize biocompatibility with textiles—nickel plating adds corrosion resistance, preventing rust stains on damp fabrics. This engineering focus solves real-world problems, such as maintaining seam integrity in high-humidity environments or ensuring pins don’t warp during heat-setting processes.
If you’ve ever wondered why some pins rust or bend easily, it’s often due to subpar material choices. High-quality pins use alloys like AISI 302 stainless steel for rust resistance, a nod to aerospace-grade materials where durability is paramount.
The Precision Manufacturing Process of Sewing Pins
The journey from raw steel to a reliable sewing pin is a testament to advanced manufacturing techniques, involving wire drawing, precision cutting, and quality controls that mirror those in automotive or electronics production. This process ensures each pin meets exacting standards for sharpness, strength, and consistency—crucial for preventing fabric tears or inconsistent holds.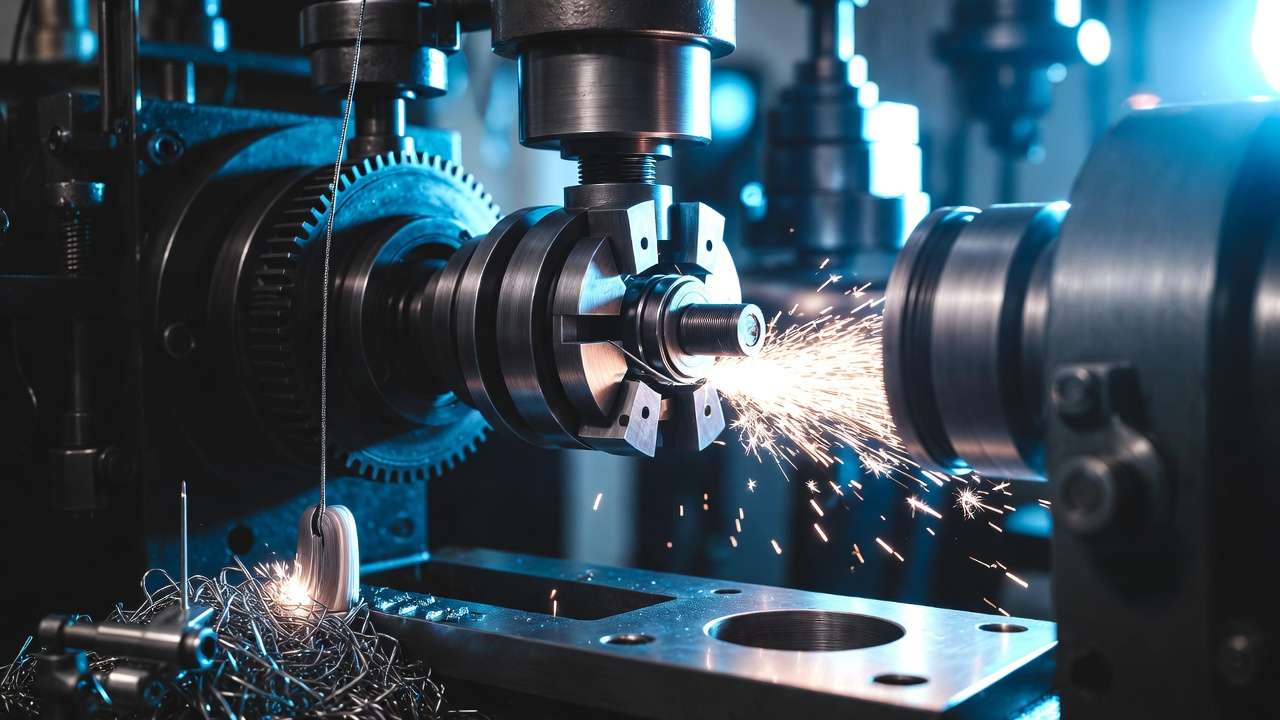
Raw Material – Steel Wire Selection
Everything starts with high-quality steel wire, typically low-carbon or stainless steel coils sourced for their ductility and hardness. Engineers select alloys based on tensile strength (around 600-900 MPa) and corrosion resistance. For nickel-plated pins, the base is carbon steel, chosen for cost-effectiveness, while stainless variants resist oxidation without plating. This step addresses needs like longevity in humid sewing rooms, where rust could ruin projects.
Wire Drawing and Straightening
The wire is drawn through progressively smaller dies to reduce diameter to precise specs—e.g., 0.5 mm for fine pins. This cold-working process increases hardness via strain hardening, similar to forging in mechanical parts. Straightening follows, using rollers to eliminate kinks, ensuring the shaft’s straightness tolerance (typically ±0.05 mm over length). Without this, pins could wobble during insertion, causing uneven fabric alignment.
Cutting to Length
High-speed rotary cutters slice the wire into segments, usually 25-50 mm long depending on pin type (e.g., longer for quilting pins). Precision here is key—length variations affect balance and usability. Automated systems handle thousands per minute, with sensors detecting defects.
Point Sharpening and Forming
Grinding wheels sharpen one end to a fine point, achieving angles of 10-15 degrees for optimal penetration. For ball-point pins, a rounding process creates a hemispherical tip to prevent snags. This step draws from tribology (friction science), minimizing drag coefficients to ease insertion into knits. Sparks from friction highlight the high-speed nature, akin to CNC machining.
Head Attachment (Glass vs. Plastic)
Heads are added via specialized methods. Glass heads involve melting glass at 800-1000°C and dripping it onto the blunt end, where it hardens in seconds, forming a heat-resistant bulb. Plastic heads are injection-molded or crimped on. This engineering choice impacts thermal properties—glass heads endure ironing without deformation, solving the problem of melted pins ruining fabrics.
Heat Treatment, Polishing, and Plating
Pins undergo annealing or tempering to balance hardness (Rockwell C 40-50) and flexibility, preventing brittleness. Tumbling in abrasive media polishes the surface to a low roughness (Ra < 0.5 μm), reducing snags. Nickel plating (5-10 μm thick) via electroplating adds shine and rust protection, a process shared with electronic connectors for durability.
Quality Control – Tolerances and Testing
Final inspections use micrometers for dimensional accuracy, bend tests for flexibility (e.g., surviving 90-degree bends without fracture), and sharpness evaluations. Batches are sampled for consistency, ensuring <1% defect rate. This rigorous QA mirrors ISO standards in mechanical engineering, guaranteeing pins perform reliably.
This manufacturing depth—spanning days for polishing alone—explains why premium pins like those from Clover or Prym outperform generics, offering sewists dependable tools that save time and reduce waste.
Types of Sewing Pins – Engineered for Specific Applications
No single pin suits all fabrics; engineers design variants to match material properties, from shear modulus in knits to tensile strength in wovens. Below, we break down key types, including specs, pros/cons, and uses. For quick reference, here’s a comparison table:
| Pin Type | Shaft Diameter (mm) | Head Material | Best For | Heat Safe? | Pros | Cons |
|---|---|---|---|---|---|---|
| Glass Head Pins | 0.5-0.6 | Glass | General sewing, pressing | Yes | Heat-resistant, visible | Can shatter if dropped |
| Ball Point Pins | 0.5-0.6 | Plastic | Knits, jerseys | No | Prevents fiber damage | Melts under iron |
| Silk/Extra-Fine Pins | 0.4-0.5 | Metal/Glass | Delicates, silks | Varies | Minimal holes | Less sturdy for thick layers |
| Quilting Pins | 0.6-0.8 | Plastic/Glass | Multi-layer quilts | Varies | Long length, strong hold | Leaves larger holes |
| T-Pins | 0.7-1.0 | Metal | Upholstery, crafts | Yes | High stability | Too thick for fine fabrics |
| Flat Head Pins | 0.5-0.6 | None/Metal | Lace, hand sewing | Yes | Ironable, no snags | Hard to grip/remove |
| Applique Pins | 0.4-0.5 | Plastic | Small areas, curves | No | Short, precise | Limited to light fabrics |
| Safety Pins | Varies | Metal | Basting, elastic | Yes | Secure, won’t fall out | Bulkier, not for pinning seams |
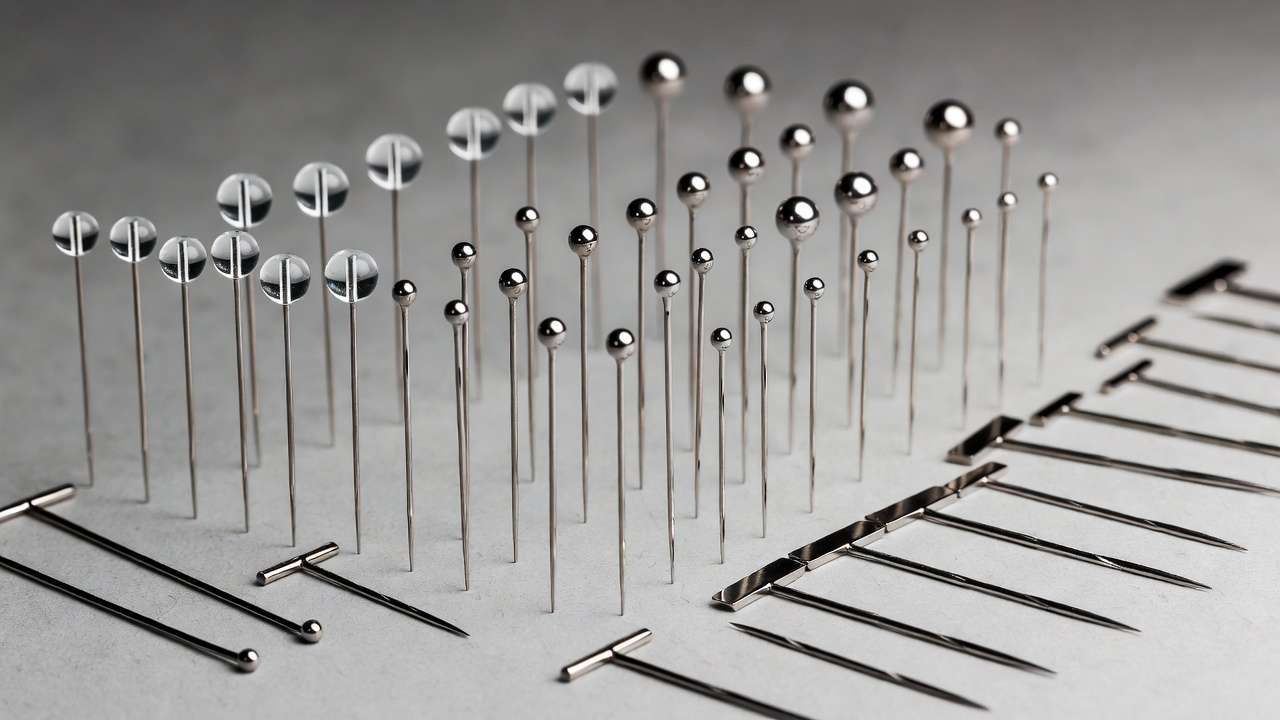
Glass Head Pins (The Precision Standard)
These are the workhorses of sewing, with nickel-plated steel shafts and glass heads for heat resistance. Ideal for pressing seams, they handle temperatures without melting, solving ironing woes. Brands like Dritz offer packs with 0.5 mm shafts, perfect for medium fabrics.
Ball Point Pins
Engineered for knits, the rounded tip (radius ~0.15 mm) glides between yarns, reducing ladder risks—a materials science triumph. Plastic heads add color for visibility, but avoid heat. Use for jerseys or stretch fabrics to maintain elasticity.
Silk Pins / Extra-Fine Pins
Ultra-thin shafts (0.3-0.4 mm) minimize puncture marks in sheers or silks. Their sharpness (ground to <5° angle) ensures clean entry, addressing the need for invisible fastening in delicate projects.
Quilting Pins
Longer (up to 50 mm) and thicker for penetrating multiple layers, these provide high shear strength. Glass or flower heads (like Clover’s) enhance grip, ideal for quilt basting.
Other Specialized Types (T-pins, Flat Heads, Twist Pins)
T-pins offer T-shaped heads for leverage in heavy materials, akin to mechanical anchors. Flat heads excel in ironing, while twist pins secure upholstery with a corkscrew design.
Materials Breakdown – Steel, Brass, Stainless, Nickel-Plated
Steel dominates for cost, but brass adds malleability. Stainless prevents rust, and nickel plating improves smoothness (friction coefficient <0.3). Trade-offs include cost vs. durability—choose based on environment.
This variety ensures you can match pins to fabric properties, preventing damage and enhancing efficiency.
Engineering Parallels: Sewing Pins vs. Mechanical Fasteners
Sewing pins share DNA with industrial fasteners, highlighting how everyday items inspire engineering innovation. The shaft’s precision-ground surface mirrors dowel pins used for alignment in gearboxes, where tolerances (±0.002 mm) ensure fit. Ball-point pins parallel ball bearings, reducing contact stress on fibers like rolling elements do in machinery.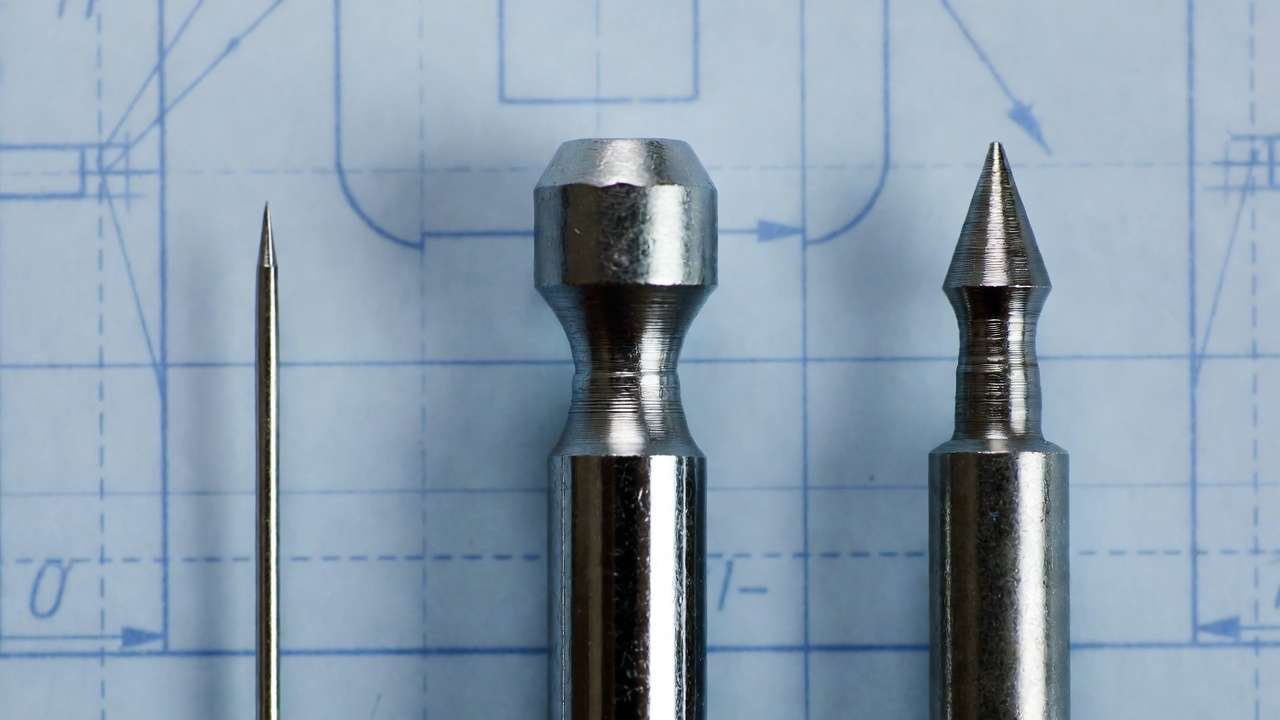
Temporary holds echo cotter pins, which secure assemblies under shear loads—sewing pins withstand similar forces in layered fabrics (up to 5-10 N). Point designs draw from taper pins, where gradual insertion minimizes material deformation. Material properties like hardness (measured on Rockwell scale) and yield strength align with roll pins, used in high-vibration applications.
These parallels underscore sewing pins as low-cost prototypes for precision manufacturing, teaching lessons in scalability and material optimization.
How to Choose the Best Sewing Pins for Your Project (Practical Guide)
Selecting pins isn’t guesswork—it’s about matching engineering specs to your needs. Solve common issues like bending or snagging with this guide.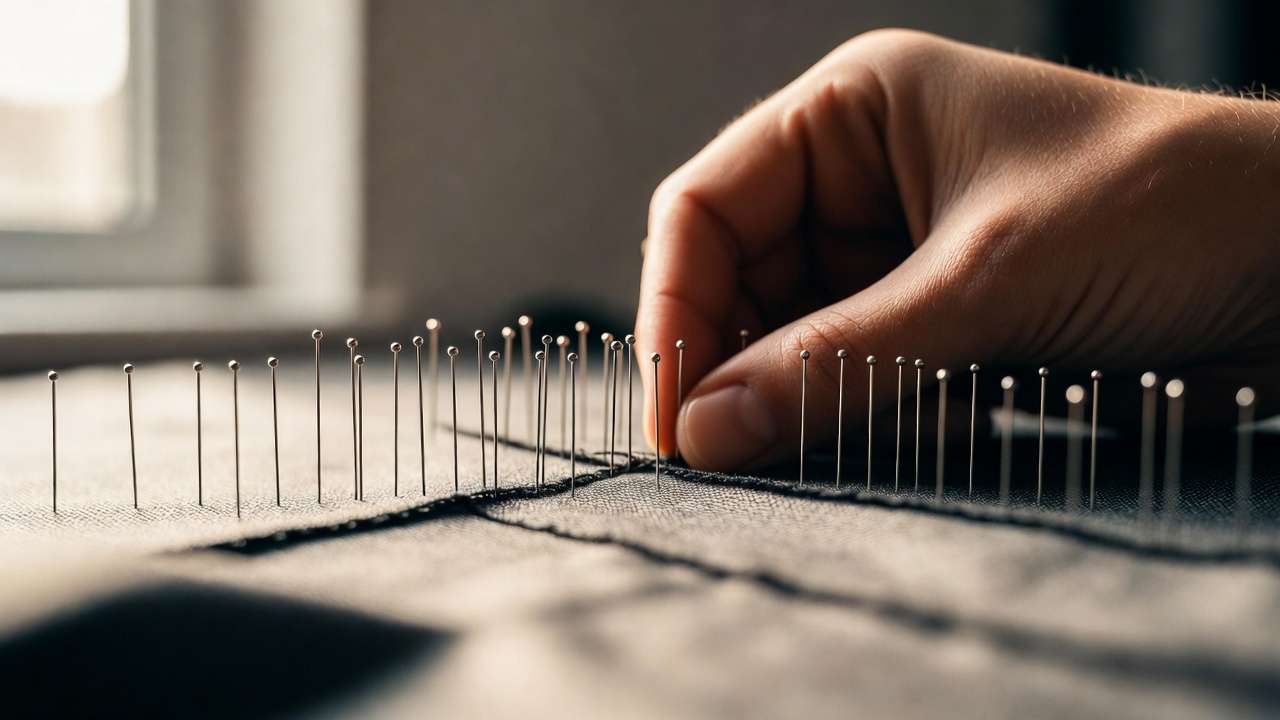
Factors to Consider – Fabric Type, Thickness, Project Stage
For thin silks, opt for 0.4 mm extra-fine pins to avoid holes. Thick quilts demand 0.8 mm quilting pins for penetration. Consider stage: Use heat-safe glass heads for pressing.
Here’s a quick chart:
| Fabric Type | Recommended Pin | Why? |
|---|---|---|
| Knits | Ball Point | Prevents snags |
| Silks | Extra-Fine | Small holes |
| Denim | Quilting | Strength |
| Lace | Flat Head | No bulk |
Top Recommendations (Updated for Current Trends)
Based on recent reviews and expert tests, top picks include:
- Clover Fine Flower Head Pins: 0.45 mm shaft, heat-resistant, sharp—ideal for precision work. Praised for durability in 2025-2026 Amazon bestsellers.
- Dritz Glass Head Pins: Affordable, rust-resistant, great for general use.
- Prym Ball Point Pins: Excellent for knits, with colorful heads for visibility.
These outperform generics in bend resistance and sharpness longevity.
Pro Tips for Precision Pinning
- Insert perpendicular to fabric for minimal distortion.
- Space pins 5-10 cm apart for even hold.
- Use magnetic cushions for organization, reducing accidental pricks.
Common Mistakes and Expert Troubleshooting
Avoid bending by matching pin thickness to fabric—use thicker for heavies. Melting heads? Switch to glass. Puckering? Opt for finer points. Rooted in engineering, these fixes ensure reliability.
Conclusion – The Unsung Engineering Marvel in Your Sewing Kit
Sewing pins exemplify elegant design: simple yet sophisticated, solving fastening challenges with precision. Apply these insights to your next project for better results.
FAQs
- Are glass head pins better than plastic? Yes, for heat; plastic for visibility.
- Why do some pins rust? Poor plating—choose nickel or stainless.
- Can sewing pins be used in prototyping? Absolutely, for temporary assemblies.
- What’s the sharpest pin type? Extra-fine silk pins.
- How to store pins? In magnetic holders for safety.
- Best pins for beginners? Glass head for versatility.
- Do pins dull over time? Yes; sharpen with emery.
- Safety pins vs. straight pins? Safety for secure holds.
- Eco-friendly options? Stainless for longevity.
- Pin alternatives? Clips for thick fabrics.