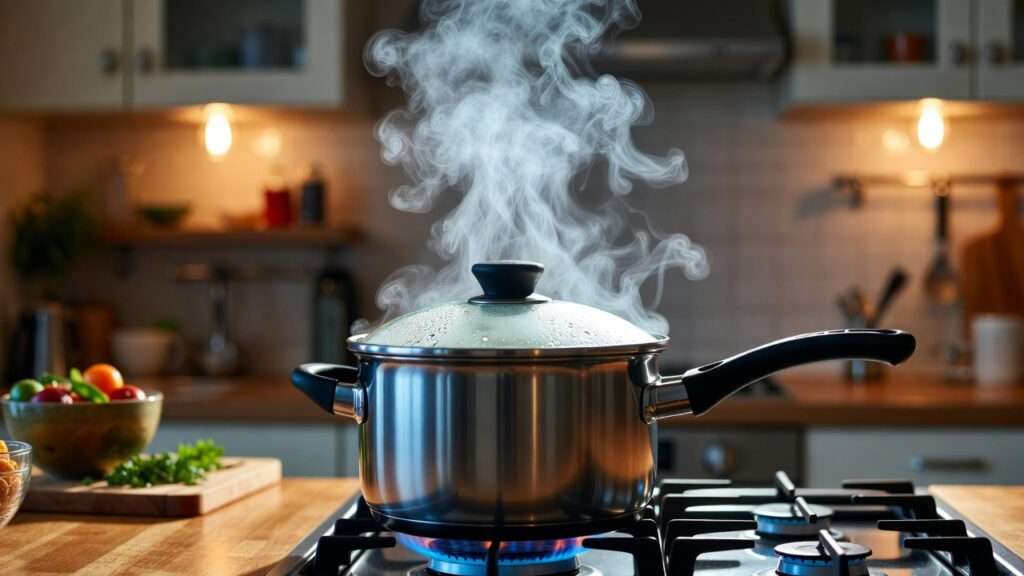
A small pan of oil left unattended on the stove can ignite in under 30 seconds, transforming into a roaring grease fire that engulfs cabinets and fills the room with thick, choking smoke. In that moment of panic, grabbing the wrong extinguisher—such as a water-based model or an improperly rated unit—can turn a manageable incident into a catastrophe by spreading flaming oil or creating a hazardous powder cloud that obscures vision and irritates airways. Cooking remains the leading cause of home fires in the United States, responsible for roughly 48% of reported home structure fires, 35% of home fire injuries, and 16% of home fire deaths according to National Fire Protection Association (NFPA) data from recent annual averages.
A kitchen fire extinguisher is your first line of defense against these prevalent hazards, engineered with specific extinguishing agents, nozzle designs, pressure vessels, and discharge characteristics to safely suppress Class B flammable liquid fires (like cooking oils and grease) and Class C energized electrical fires common in modern kitchens. From a mechanical engineering perspective, these devices rely on principles of fluid dynamics (agent discharge velocity and pattern), thermodynamics (cooling and heat absorption), chemical reaction interruption, and materials science (corrosion-resistant valves and cylinders) to deliver rapid, controlled suppression while minimizing secondary damage like residue corrosion or re-ignition.
In this in-depth engineering guide, we examine fire class chemistry, agent mechanisms, pressure system design, safe usage protocols (including the PASS technique), selection criteria backed by UL standards and NFPA recommendations, top-performing models for 2025–2026 based on independent testing and expert consensus, and rigorous maintenance practices. Our goal is to equip homeowners, apartment dwellers, and safety-conscious families with the knowledge to select, position, and operate the right unit—preventing small incidents from escalating, reducing cleanup and property damage, and potentially saving lives.
Understanding Kitchen Fire Hazards: Classes and Why Standard Extinguishers Fail
Kitchen fires present unique challenges due to the prevalence of combustible cooking media and energized equipment.
Fire Classes Relevant to Kitchens
Fire classifications define the fuel source and dictate the appropriate suppression strategy:
- Class A — Ordinary combustibles (wood, paper, cloth, some plastics). Common if dish towels or wooden utensils ignite.
- Class B — Flammable liquids and gases (cooking oils, grease, gasoline). The hallmark of most stove-top fires.
- Class C — Energized electrical equipment (toasters, microwaves, outlets). Critical in kitchens with plugged-in appliances.
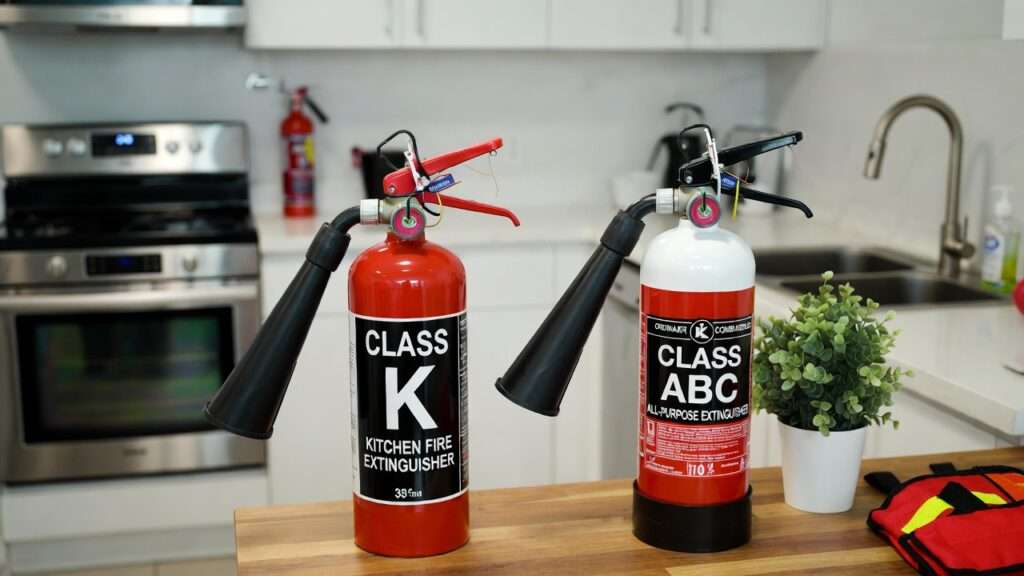
- Class K — Cooking media (animal fats, vegetable oils). Recognized separately due to high auto-ignition temperatures and re-ignition risk.
Most home cooking fires start as Class B but can involve Class C if an appliance shorts or Class A if nearby materials catch.
Why Grease Fires Are Unique
Cooking oils auto-ignite at 550–685°F (288–363°C), far higher than many other flammables. Once burning, they exhibit:
- Re-ignition propensity — Residual heat can re-light vapors after initial suppression.
- Splash/spread risk — Water application causes explosive steam expansion and oil splatter.
- Saponification potential — Certain agents react with hot fats to form a soapy blanket that cools and seals the surface.
Water-based extinguishers exacerbate grease fires by spreading fuel; standard ABC dry chemicals suppress temporarily but leave corrosive residue and allow reflash in deep oil volumes.
Common Mistakes and Consequences
- Pouring water → violent flare-up and burn injuries.
- Using ABC dry chemical on deep grease → effective short-term but messy, corrosive cleanup and re-ignition risk.
- Delaying action → fire spreads to cabinets/ceilings.
NFPA experts emphasize: For small, contained pan fires, first turn off heat and smother with a lid; reserve extinguishers for when smothering fails.
Types of Kitchen Fire Extinguishers: Engineering Breakdown
Selecting the correct extinguishing agent and delivery system is a matter of matching the mechanical and chemical properties of the device to the specific fire class and kitchen environment. Below is a detailed engineering analysis of the main types suitable for home kitchens.
Dry Chemical (ABC Multi-Purpose)
- Extinguishing Agent: Monoammonium phosphate-based powder (sometimes blended with other compounds).
- Mechanism: Interrupts the chemical chain reaction of the fire triangle (fuel, heat, oxygen) by forming a barrier between fuel and oxygen while absorbing heat.
- Typical Rating for Kitchen Use: 1A:10B:C to 3A:40B:C (higher numbers indicate greater capacity).
- Engineering Advantages:
- Broad-spectrum coverage across Class A, B, and C fires.
- High discharge velocity and range (8–15 feet typical).
- Rechargeable design with metal valve and pressure vessel (steel or aluminum cylinder rated to 175–240 psi).
- Drawbacks:
- Corrosive residue damages electronics and requires extensive cleanup.
- Powder cloud can reduce visibility and cause respiratory irritation.
- Less effective on deep grease fires due to limited cooling and saponification; high re-ignition risk in large oil volumes.
- Best Application: General home use where versatility is prioritized over specialized grease performance.
Wet Chemical (Class K or A:K)
- Extinguishing Agent: Aqueous solution of potassium acetate, potassium citrate, or potassium bicarbonate, often with surfactants for misting.
- Mechanism:
- Cools burning oil below auto-ignition temperature.
- Promotes saponification (chemical reaction forming a soapy foam layer that seals surface and prevents oxygen access).
- Gentle, low-velocity mist application minimizes splash.
- Typical Rating: 2-A:K or dedicated Class K (e.g., 1.5-gal units common in commercial settings, scaled down for homes).
- Engineering Advantages:
- Superior for Class K grease fires—prevents reflash better than any dry agent.
- Minimal residue (water-based, wipes clean easily).
- Specialized nozzle creates fine mist to avoid spreading oil.
- Drawbacks:
- Shorter range (6–10 feet) and discharge time.
- Heavier unit due to liquid content.
- Primarily focused on Class B/K; limited Class A capability in smaller home models.
- Best Application: Homes with frequent deep-frying, wok cooking, or turkey frying.
Other Options (Aerosol, Fire Blankets, Automatic Systems)
- Aerosol Kitchen Extinguishers (e.g., First Alert EZ Fire Spray):
- Compact, handheld cans with fluorinated or potassium-based agents.
- Pros: Extremely easy to aim and use, no messy powder, lightweight.
- Cons: Limited capacity (one-shot use), shorter range, not rechargeable.
- Fire Blankets:
- Fiberglass or Kevlar fabric stored in a pouch.
- Mechanism: Physically smothers oxygen supply without chemicals.
- Pros: Ideal for small pan fires, no residue, reusable after washing.
- Cons: Requires close proximity; ineffective on larger or vertical fires.
- Automatic Stove-Top Systems (less common in homes):
- Spring-loaded canopies or fusible-link activated extinguishers.
- Pros: Hands-free activation.
- Cons: Expensive, permanent installation.
Comparison Table
| Type | Rating Example | Agent Type | Best For | Pros | Cons | Approx. Cost (2025–2026) | Cleanup Effort |
|---|---|---|---|---|---|---|---|
| Dry Chemical ABC | 1A:10B:C – 3A:40B:C | Dry powder | General kitchen hazards | Versatile, long range | Corrosive residue, re-ignition risk | $30–$80 | High |
| Wet Chemical (Class K) | 2-A:K | Liquid solution | Grease/oil fires | Excellent reflash prevention, low residue | Shorter range, heavier | $60–$150 | Low |
| Aerosol Spray | 5-B:C equivalent | Pressurized aerosol | Quick, beginner use | Simple, no mess | Single-use, limited capacity | $15–$35 | Very Low |
| Fire Blanket | N/A | Fabric smothering | Small contained pan fires | No chemicals, reusable | Close proximity required | $10–$30 | None |
Step-by-Step Guide to Choosing the Best Kitchen Fire Extinguisher
Selecting the right kitchen fire extinguisher requires balancing your specific risk profile, kitchen layout, household needs, and engineering specifications. Below is a structured, practical decision framework.
Assess Your Kitchen Risks
Start by evaluating the realistic fire hazards in your space:
- Cooking habits — Do you deep-fry frequently, use a wok on high heat, or cook large volumes of oil (e.g., for holiday turkeys)? These increase Class K/B risk and favor wet chemical models.
- Appliance types — Gas stoves introduce open-flame risk; electric stoves and many small appliances (toasters, air fryers, blenders) add Class C electrical hazards.
- Household factors — Young children, elderly residents, or mobility-limited individuals may need lighter, easier-to-handle units (aerosol or compact dry chemical).
- Kitchen size and layout — Open-concept kitchens or those adjacent to living areas require longer-range units to allow safe standoff distance.
- Frequency of unattended cooking — Higher risk justifies multiple units or automatic systems.
Quick self-audit: If you fry more than once a week or have multiple high-wattage appliances, lean toward a dedicated Class K or high-rated ABC unit.
Key Engineering Specifications to Evaluate
Focus on these measurable attributes when comparing models:
- UL Rating — Look for at least 1A:10B:C for ABC units; seek explicit Class K listing (e.g., 2-A:K) for grease-heavy kitchens. Higher B numbers mean greater capacity against flammable liquids.
- Discharge Characteristics —
- Range: 8–15 ft ideal for safe distance.
- Pattern: Mist or fan-shaped nozzles reduce splash on grease fires; stream nozzles better for reach.
- Duration: 8–20 seconds typical; longer is better for larger incipient fires.
- Build Quality
- Valve: Brass or stainless steel resists corrosion better than plastic.
- Cylinder: Seamless steel or aluminum; check for rust-resistant coating.
- Gauge: Easy-to-read, color-coded (green = charged).
- Bracket: Sturdy metal with quick-release strap.
- Weight and Ergonomics — 5–10 lb units are manageable for most adults; heavier wet chemical models (10–20 lb) may require two-handed operation.
- Rechargeability — Rechargeable models are more economical long-term than disposable ones.
Sizing and Placement Recommendations
- NFPA Guidelines — Maximum travel distance to a Class K extinguisher in cooking hazard areas is 30 feet. For homes, one unit per kitchen level is standard.
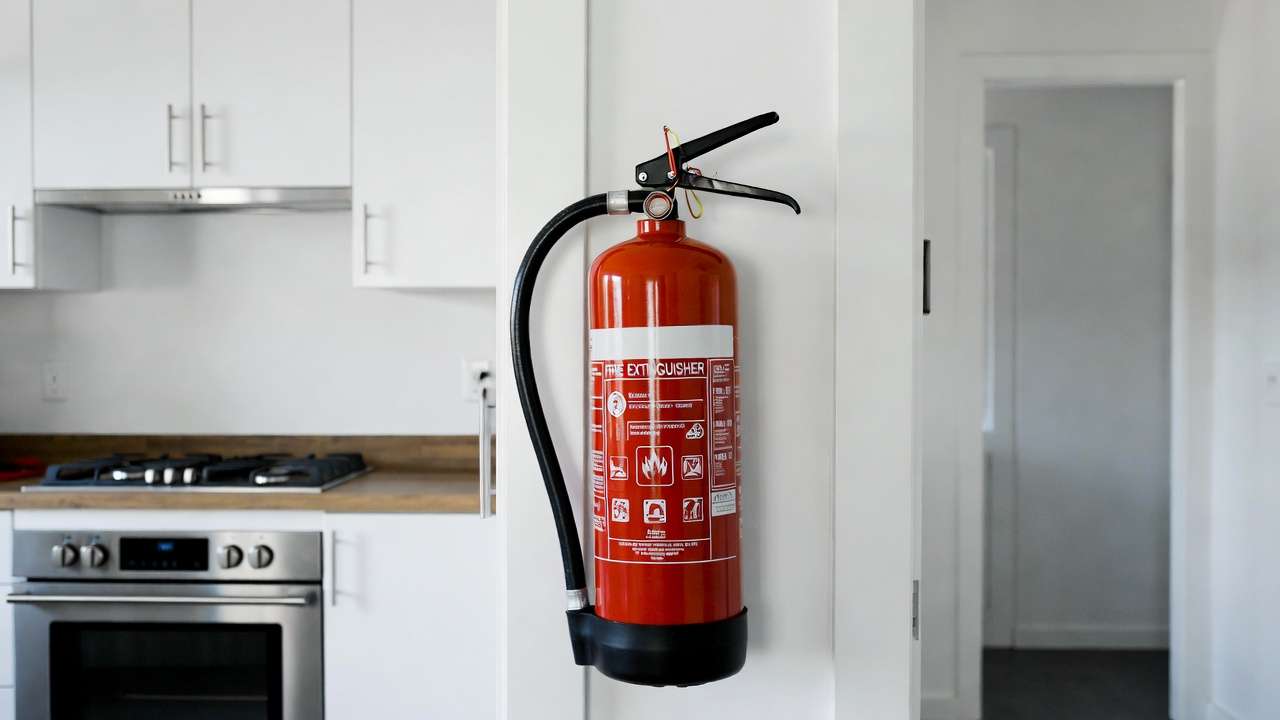
- Mounting Height — 3.5–5 feet from floor to handle (accessible to adults but out of reach of small children).
- Location — On the egress path (near exit but not directly over stove where heat can damage unit). Avoid cabinets above stove; under-sink or pantry wall is common.
- Quantity — Consider one near the main cooking area and a second near the back door or dining exit for larger homes.
Tips Box: Quick Decision Checklist
- Frequent frying → Prioritize wet chemical or high-B-rated ABC.
- Mostly baking/small appliances → Standard ABC sufficient.
- Children/pets present → Add fire blanket + aerosol backup.
- Renting → Choose wall-mount or freestanding rechargeable unit (easy to take when moving).
- Monthly test → Press test button briefly (listen for hiss); check gauge.
Real-World Example Scenarios
- Apartment dweller with electric stove, occasional pan-frying: 2.5–5 lb ABC (1A:10B:C) mounted near door + fire blanket for pans.
- Home cook who deep-fries weekly: Dedicated Class K wet chemical (e.g., 2.5-gal) near stove + ABC backup.
- Large family home with gas range: 5–10 lb high-capacity ABC (3A:40B:C) + aerosol in drawer for quick grab.
Top Kitchen Fire Extinguisher Recommendations for 2025–2026
The following recommendations are based on current (2025–2026) market availability, UL certification status, independent lab testing results, real-world user feedback from homeowners and fire safety professionals, rechargeability, residue impact, warranty terms, and overall value. Prices are approximate U.S. retail ranges and may vary by retailer and region.
Best Overall Multi-Purpose
First Alert PRO5 (or equivalent Kidde PRO 5)
- Rating: 3A:40B:C
- Type: Rechargeable dry chemical (monoammonium phosphate)
- Weight: ~9–10 lb (filled)
- Discharge: 14–16 seconds, 10–15 ft range
- Key Features: Metal valve, corrosion-resistant aluminum cylinder, large easy-read gauge, wall bracket included, 12-year limited warranty.
- Best For: Most home kitchens needing broad Class A:B:C coverage with strong capacity against grease and electrical fires.
- Approx. Price: $50–$75
- Why Recommended: High B-rating provides excellent margin for cooking oil fires; widely trusted brand with proven field performance.
Runner-Up: Kidde Pro 210 (similar specs, slightly lighter at ~7 lb, often $45–$65).
Best for Grease Fires (Dedicated Class K Focus)
Amerex B417 (or First Alert Kitchen Fire Extinguisher models rated Class K)
- Rating: 2-A:K (or equivalent home-scaled Class K wet chemical)
- Type: Wet chemical (potassium-based solution)
- Weight: 10–15 lb depending on size (2.5–5 lb agent models common for homes)
- Discharge: 10–20 seconds, 8–12 ft mist pattern
- Key Features: Low-velocity nozzle to minimize splash, saponification agent, minimal residue, 6-year warranty typical.
- Best For: Households that deep-fry, use woks, or cook large quantities of oil regularly.
- Approx. Price: $80–$140
- Why Recommended: Superior reflash prevention on Class K fires; gentler on surfaces than dry chemicals.
Alternative Compact Option: Kidde Kitchen Extinguisher (5-B:C wet chemical aerosol-style or small canister versions, $40–$70).
Best Compact / Beginner-Friendly
First Alert EZ Fire Spray (or Kidde Kitchen Fire Spray equivalents)
- Rating: Equivalent to 5-B:C
- Type: Pressurized aerosol (fluorinated or potassium-based agent)
- Weight: ~1–2 lb
- Discharge: 4–8 seconds, short range (4–6 ft)
- Key Features: One-handed operation, no messy powder, lightweight, intuitive trigger, single-use but affordable backup.
- Best For: Apartments, renters, or anyone intimidated by heavier traditional units; excellent as a secondary “quick-grab” device.
- Approx. Price: $15–$35
- Why Recommended: Extremely user-friendly; ideal for teaching family members PASS technique without complexity.
Bonus Recommendation: Fire Blanket (e.g., FireShelter or generic fiberglass blanket in pouch)
- Price: $10–$30
- Use: Smother small pan fires instantly; no training required beyond pulling and draping.
Comparison Table
| Model / Type | Rating | Agent Type | Weight (filled) | Range / Duration | Price Range | Best For | Residue / Cleanup |
|---|---|---|---|---|---|---|---|
| First Alert PRO5 | 3A:40B:C | Dry chemical | 9–10 lb | 10–15 ft / 14–16 s | $50–$75 | General kitchen use | High |
| Amerex B417 / Class K models | 2-A:K | Wet chemical | 10–15 lb | 8–12 ft / 10–20 s | $80–$140 | Frequent frying / grease fires | Low |
| First Alert EZ Fire Spray | ~5-B:C equiv. | Aerosol | 1–2 lb | 4–6 ft / 4–8 s | $15–$35 | Beginners, apartments, backup | Very Low |
| Fire Blanket | N/A | Fabric | <1 lb | Direct contact | $10–$30 | Small contained pan fires | None |
Expert Note: Rechargeable models with metal valves and high B-ratings remain the gold standard for most homes. If budget allows, pair an ABC unit with a fire blanket for layered defense.
How to Use a Kitchen Fire Extinguisher Safely: The PASS Technique and More
Even the best kitchen fire extinguisher is only effective if used correctly and at the right moment. Proper technique minimizes risk to yourself and prevents the fire from spreading.
Step-by-Step PASS Method
The NFPA-endorsed PASS acronym guides safe and efficient use:
- Pull — Pull the pin. This breaks the tamper seal and unlocks the operating lever. Most pins have a plastic tie or metal ring for easy removal.
- Aim — Aim low, at the base of the fire. For grease fires, target the near edge of the burning pan or surface rather than shooting directly into the flames—this prevents splashing hot oil.
- Squeeze — Squeeze the handles together to discharge the agent. Maintain a firm, steady grip; release to stop flow if needed.
- Sweep — Sweep from side to side across the base of the fire until it is completely out. Watch for re-ignition, especially with grease fires, as residual heat can re-light vapors.
Key safety notes:
- Stand approximately 6–10 feet away (farther if possible) to stay out of the smoke plume and allow safe retreat.
- Never turn your back on the fire—keep an exit path clear.
- After discharge, evacuate if the fire is not fully extinguished or if smoke becomes thick.
When to Use vs. When to Evacuate Immediately
Use an extinguisher only if ALL of these conditions are met:
- The fire is small and contained (e.g., in a single pan or small appliance).
- You have a clear escape route behind you.
- You are confident in your ability to operate the unit (have practiced PASS before).
- The room is not already filled with heavy smoke.
Evacuate and call emergency services (911 or local equivalent) if:
- The fire is spreading rapidly or larger than a wastebasket.
- You cannot reach the extinguisher quickly.
- Smoke is thick or black (indicating toxic gases).
- You feel unsure or panicked.
Expert Insight: Statistics show that attempting to fight a fire that is already too large is a leading cause of civilian fire injuries. When in doubt—get out, stay out, and call for help.
Grease Fire-Specific Tactics
For stove-top grease fires (the most common kitchen scenario):
- First action — Turn off the heat source immediately (burner knob or unplug appliance). Do NOT move the pan—this can spread burning oil.
- Smother attempt — Slide a metal lid or larger pot over the pan to cut off oxygen. Leave it in place until completely cool (30+ minutes). Never use glass lids—they can shatter from thermal shock.
- If smothering fails — Use a Class K wet chemical extinguisher (preferred) or ABC dry chemical as a last resort. Apply in short bursts using the PASS method, targeting the pan edge to avoid splashing.
- Never — Use water, flour, baking soda in large quantities, or attempt to carry the pan outside. These actions frequently cause severe burns or fire spread.
Pro Tip: Keep a dedicated metal lid (slightly larger than your largest frying pan) near the stove for instant access—often more effective and safer than an extinguisher for incipient grease fires.
Practice and Preparedness
- Conduct annual “dry runs” with family members: Demonstrate PASS using an empty extinguisher (never discharge unnecessarily).
- Ensure everyone over age 12 knows the location and basic operation.
- Install interconnected smoke alarms and test monthly—early detection often prevents the need for an extinguisher altogether.
Maintenance, Inspection, and Replacement Guidelines
A kitchen fire extinguisher is a mechanical life-safety device that can sit unused for years—yet it must perform flawlessly the one time it is needed. Proper maintenance ensures reliability, prevents corrosion or pressure loss, and extends service life.
Monthly/Annual Checks (Homeowner Level)
Perform these simple inspections yourself:
- Pressure Gauge — Confirm the needle is in the green “charged” zone. If it’s in the red or missing, the unit is under-pressurized and unreliable.
- Physical Condition — Inspect for:
- Dents, rust, or corrosion on the cylinder.
- Cracked or missing plastic safety seals/pins.
- Damaged or missing discharge hose/nozzle.
- Loose or missing mounting bracket.
- Accessibility — Ensure the extinguisher is not blocked by appliances, pots, or clutter. It should be reachable in under 10 seconds.
- Quick Test — Briefly press the test button (if equipped) to hear a short hiss—do NOT fully discharge. This confirms the valve operates.
Frequency recommendation: Monthly visual check + quick test; annual thorough inspection.
Professional Servicing and Hydrostatic Testing
Rechargeable extinguishers require periodic professional attention:
- Recharge — Any unit that has been used (even partially discharged) must be recharged by a certified technician. Dry chemical units lose pressure and agent integrity after discharge.
- Hydrostatic Testing — The pressure vessel must be hydrostatically tested to verify cylinder integrity:
- Dry chemical (ABC) steel/aluminum cylinders: Every 12 years.
- Wet chemical units: Every 5 years (more frequent due to liquid corrosion potential).
- Test involves filling with water under high pressure and checking for leaks or deformation.
- Service Interval — NFPA recommends professional inspection annually for commercial settings; for homes, combine with smoke alarm battery changes or every 3–5 years if no professional service is readily available.
Find a local fire equipment service company or check with retailers like Home Depot, Lowe’s, or First Alert/Kidde authorized dealers.
Shelf Life, Replacement Triggers, and Disposal
- Typical Service Life:
- Rechargeable dry chemical: 10–12 years from manufacture date (stamped on cylinder collar).
- Wet chemical: 5–10 years.
- Disposable/aerosol units: 6–12 years.
- Replace Immediately If:
- Gauge shows recharge needed.
- Unit has been used (even briefly).
- Cylinder is rusted, dented, or valve is damaged.
- Manufacture date exceeds recommended life and no recent hydrostatic test.
- Residue or agent appears caked/clumped inside (visible through sight glass on some models).
- Disposal:
- Never throw in household trash.
- Take to local fire department (many accept free drop-off), hazardous waste facility, or retailer recycling program.
- Some manufacturers offer mail-back or trade-in programs.
Pro Tip: Photograph the manufacture date and last service tag when you purchase/install the unit. Set calendar reminders for annual checks and replacement consideration.
Frequently Asked Questions (FAQs)
Here are answers to the most common questions homeowners ask about kitchen fire extinguishers, based on NFPA guidelines, UL standards, and practical field experience.
Is a Class K extinguisher necessary for home kitchens? Not strictly required for most residences, but highly recommended if you frequently deep-fry, use large amounts of cooking oil, or prepare foods like turkey or doughnuts. NFPA primarily mandates Class K for commercial kitchens due to higher volume and risk, but many fire safety experts advise home users with regular high-heat oil cooking to choose a wet chemical Class K unit or at least a high-B-rated ABC extinguisher. For occasional cooking, a standard multi-purpose ABC (minimum 1A:10B:C) is sufficient and more versatile.
Can I use an ABC extinguisher on a grease fire? Yes, but with limitations. An ABC dry chemical extinguisher will usually suppress a small grease fire by interrupting the chemical reaction. However, it provides less cooling and no saponification, so there is a higher chance of re-ignition compared to a wet chemical Class K unit. For small, contained pan fires, try smothering with a lid first. If you must use an extinguisher on grease, discharge in short bursts from the side and be prepared for possible reflash. Cleanup will be messier due to corrosive powder residue.
How often should I replace my kitchen fire extinguisher? Replace (or professionally service) according to these timelines:
- If used at all → recharge immediately by a certified technician.
- If never used → inspect annually; replace or hydrostatically test at 10–12 years for dry chemical units, 5–10 years for wet chemical, depending on manufacturer date and condition.
- Immediate replacement triggers: gauge in red, visible rust/damage, missing parts, or manufacture date older than recommended life without recent service. Most home units last 10–15 years with proper care.
What’s the difference between dry chemical and wet chemical extinguishers?
- Dry chemical (ABC): Uses a fine powder (monoammonium phosphate) to smother and interrupt fire chemically. Versatile for A, B, and C fires; long range; but leaves corrosive, hard-to-clean residue and offers limited cooling/reflash protection on grease fires.
- Wet chemical (Class K/A:K): Uses a liquid potassium-based solution discharged as a fine mist. Cools the fire, saponifies hot oils into a soapy blanket to seal out oxygen, and prevents re-ignition far better on grease fires. Leaves minimal residue (mostly water-soluble) but has shorter range and is heavier. Choose dry chemical for general coverage; wet chemical for frequent grease cooking.
Where exactly should I mount my kitchen fire extinguisher? Mount it 3.5–5 feet from the floor (handle height) on a wall near an exit path but not directly above the stove (to avoid heat damage). Common locations:
- On the wall near the kitchen door or egress route.
- Inside a pantry or cabinet (if clearly marked and quickly accessible).
- Avoid: Over the stove, inside drawers, or blocked by appliances. NFPA recommends maximum travel distance of 30 feet in hazard areas; for most homes, one well-placed unit covers the kitchen adequately.
Can children or elderly people safely use a kitchen fire extinguisher? Many modern units (especially 5–10 lb ABC models and aerosol sprays) are manageable for teens and capable adults. However, for young children or mobility-limited individuals:
- Keep a lightweight aerosol spray or fire blanket as a first-line option.
- Teach PASS technique in advance.
- Emphasize evacuation first—never expect anyone to fight a fire if they feel unsafe or unsure.
Conclusion
A kitchen fire extinguisher is far more than a household safety checkbox—it is a carefully engineered device whose pressure vessel, valve design, extinguishing agent chemistry, and discharge dynamics are all optimized to address the rapid, high-heat nature of cooking fires. By understanding fire class distinctions, agent performance differences, proper selection criteria, the PASS technique, and ongoing maintenance requirements, you can dramatically improve your ability to contain a small incident before it becomes a devastating blaze.
Cooking fires remain preventable with vigilance, but when they occur, the right tool used correctly saves lives, limits property damage, and reduces cleanup stress. Take a moment today to:
- Locate or purchase a suitable unit (start with a rechargeable ABC 1A:10B:C minimum, plus a fire blanket if you cook with oil).
- Mount it properly and mark its location for all household members.
- Practice the PASS method as a family drill.
- Integrate it with working smoke alarms and a clear evacuation plan.
Fire safety is ultimately about preparation and knowledge. With the engineering insights in this guide, you now have the tools to make an informed, confident choice that protects what matters most.