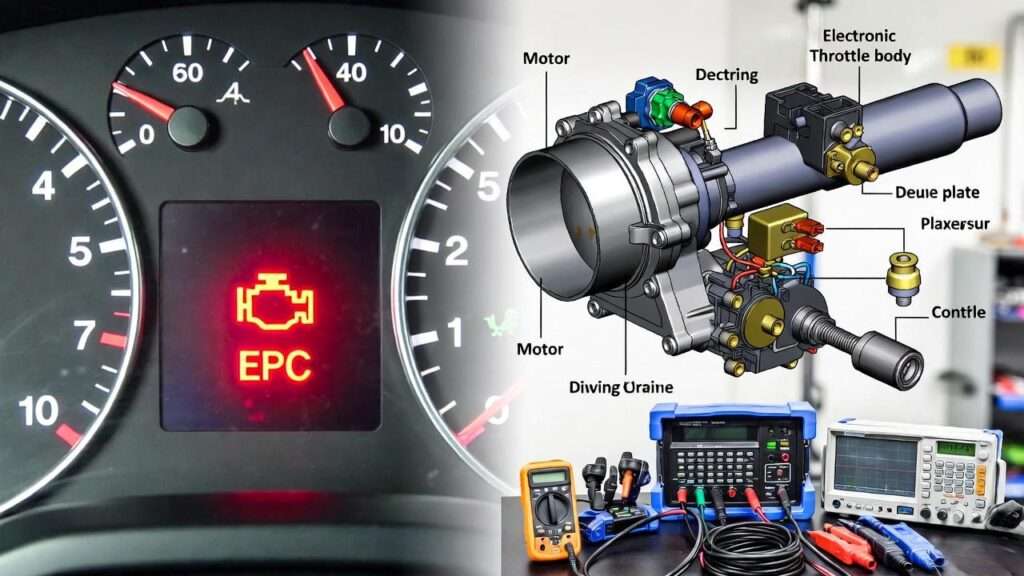
Picture this: you’re cruising down the highway when suddenly, your dashboard lights up with a blinking check engine light. Your stomach drops. Is your car about to break down, or is it just a minor glitch? For many drivers, this flashing warning is a source of anxiety, signaling potential engine trouble that demands immediate attention. A blinking check engine light isn’t just a nuisance—it’s a critical alert that could save your vehicle from costly damage. In this comprehensive guide, backed by mechanical engineering expertise, we’ll explore the causes, diagnostic steps, and proven fixes for a blinking check engine light, empowering you to restore your vehicle’s reliability with confidence.
Whether you’re a DIY enthusiast or preparing to visit a mechanic, this article offers actionable insights to address the issue effectively. With clear explanations, expert tips, and practical solutions, you’ll learn how to diagnose the problem, fix common issues, and prevent future occurrences—all while ensuring your car runs smoothly and safely.
What Does a Blinking Check Engine Light Mean?
Solid vs. Blinking Light: Key Differences
The check engine light (CEL) is part of your vehicle’s onboard diagnostics (OBD) system, designed to monitor engine performance and emissions. But not all check engine light warnings are equal. A solid check engine light typically indicates a minor issue, such as a loose gas cap or a faulty sensor, which may not require immediate action. In contrast, a blinking check engine light signals a severe problem, often an engine misfire that could damage critical components like the catalytic converter.
For example, a solid light might point to a minor fault code like P0440 (evaporative emission system leak), while a blinking light often corresponds to codes like P0300 (random/multiple cylinder misfire). Understanding this distinction is crucial for prioritizing repairs and avoiding escalated damage.
Why You Shouldn’t Ignore It
Ignoring a blinking check engine light is a recipe for disaster. A flashing light typically indicates an engine misfire, where one or more cylinders fail to combust fuel properly. This sends unburned fuel into the exhaust system, overheating the catalytic converter and potentially causing it to fail—a repair that can cost $1,000 to $2,500, according to industry estimates from the Society of Automotive Engineers (SAE). Beyond repair costs, driving with a misfire reduces fuel efficiency, increases emissions, and poses safety risks, such as sudden power loss. Acting promptly is essential to protect your vehicle’s longevity and your wallet.
Common Causes of a Blinking Check Engine Light
Engine Misfire
An engine misfire is the most common culprit behind a blinking check engine light. A misfire occurs when the air-fuel mixture in one or more cylinders fails to ignite properly, disrupting the combustion cycle. This can stem from issues like faulty spark plugs, worn ignition coils, or problems with fuel delivery. When unburned fuel enters the exhaust system, it overheats the catalytic converter, triggering the blinking light as a warning.
For instance, in a typical 4-cylinder engine, a misfire in one cylinder (e.g., due to a worn spark plug) can cause noticeable symptoms like rough idling, reduced power, or a shaky engine. Misfires are often accompanied by diagnostic trouble codes (DTCs) like P0301 (cylinder 1 misfire) or P0300 (random misfire).
Faulty Ignition System
The ignition system is the heart of combustion, and its components—spark plugs, ignition coils, and wiring—are common sources of misfires. Spark plugs ignite the air-fuel mixture, while ignition coils amplify the battery’s voltage to create a spark. Over time, spark plugs wear out (typically every 30,000–100,000 miles, depending on the type), and ignition coils can fail due to heat or electrical stress.
A failing ignition system disrupts the combustion process, leading to incomplete burns and a blinking check engine light. For example, a cracked spark plug or a shorted ignition coil can cause intermittent misfires, especially under acceleration. Regular inspection and timely replacement of these components are critical for engine health.
Fuel System Problems
Fuel system issues can also trigger a blinking check engine light by disrupting the air-fuel ratio. Common problems include clogged fuel injectors, a failing fuel pump, or contaminated fuel. Fuel injectors deliver precise amounts of fuel to each cylinder, and blockages can starve the engine of fuel, causing misfires. Similarly, a weak fuel pump may not supply adequate pressure, leading to incomplete combustion.
Contaminated fuel, such as gasoline mixed with water or debris, can also cause misfires by altering combustion chemistry. For example, a study by the American Automobile Association (AAA) found that low-quality fuel contributes to 10% of misfire-related issues in modern vehicles. Ensuring clean fuel and maintaining the fuel system are key preventive measures.
Oxygen Sensor or Catalytic Converter Issues
Oxygen (O2) sensors monitor the exhaust gases to ensure optimal fuel combustion and emissions control. A failing O2 sensor can send incorrect data to the engine control unit (ECU), causing an improper air-fuel mixture and potential misfires. Similarly, a damaged catalytic converter—often a consequence of prolonged misfires—can trigger a blinking light by disrupting exhaust flow.
O2 sensors typically last 60,000–100,000 miles, but exposure to unburned fuel from misfires can shorten their lifespan. Replacing a faulty sensor early can prevent catalytic converter damage, which is far more expensive to repair. For context, a new O2 sensor costs $50–$200, while a catalytic converter replacement can exceed $2,000.
Other Potential Causes
Less common causes of a blinking check engine light include vacuum leaks, faulty mass airflow (MAF) sensors, or ECU malfunctions. A vacuum leak, such as a cracked intake hose, allows unmetered air into the engine, disrupting the air-fuel ratio. A dirty or failing MAF sensor misreports airflow, causing similar issues. In rare cases, the ECU itself may malfunction, misinterpreting sensor data and triggering a false misfire warning. These issues often require advanced diagnostics to pinpoint accurately.
How to Diagnose a Blinking Check Engine Light
Step 1: Stop Driving Immediately
When you notice a blinking check engine light, your first priority is safety. Pull over to a safe location as soon as possible to avoid further engine damage. Driving with a misfire can overheat the catalytic converter, leading to irreversible damage or even a fire hazard in extreme cases. If you’re far from a repair shop, limit driving to a mile or less to reach a safe spot, then proceed with diagnostics.
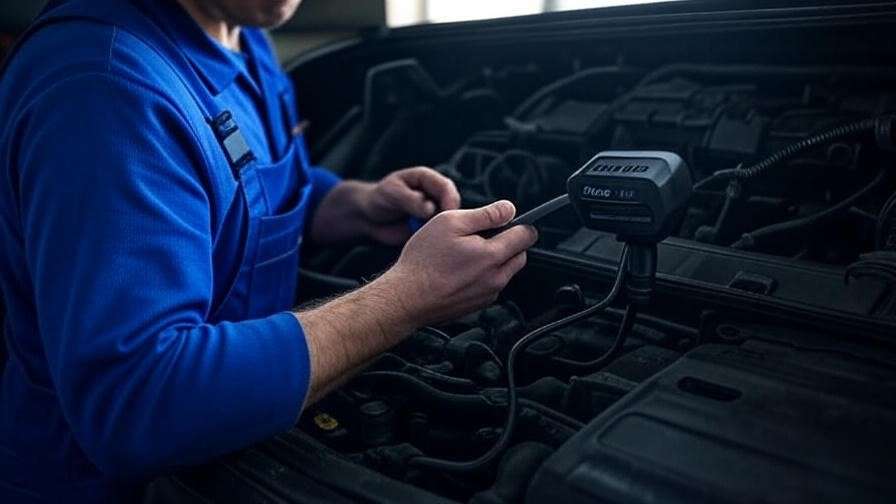
Step 2: Use an OBD-II Scanner
An OBD-II scanner is your best tool for diagnosing a blinking check engine light. This device plugs into your vehicle’s OBD-II port (usually under the dashboard) and retrieves diagnostic trouble codes (DTCs) stored by the ECU. Common codes for a blinking light include:
- P0300: Random/multiple cylinder misfire
- P0301–P0308: Misfire in a specific cylinder (e.g., P0301 for cylinder 1)
- P0171/P0174: System too lean (fuel delivery issue)
- P0420: Catalytic converter efficiency below threshold
Affordable OBD-II scanners, like the BlueDriver or Ancel AD310, cost $30–$100 and are user-friendly for DIY enthusiasts. Once you retrieve the codes, cross-reference them with a code database (available online or in your vehicle’s manual) to identify the issue.
Step 3: Inspect Key Components
After retrieving the codes, perform a visual inspection of key components. Start with the ignition system:
- Spark Plugs: Check for wear, fouling, or carbon buildup. Replace if they appear worn or damaged.
- Ignition Coils: Look for cracks or signs of overheating. Test with a multimeter if possible.
- Fuel System: Inspect fuel lines for leaks and ensure the fuel cap is secure.
- Wiring and Connectors: Check for loose or corroded connections in the ignition and fuel systems.
Safety tip: Always disconnect the battery before working under the hood to avoid electrical shocks. If you’re unsure about any component, consult a professional to avoid misdiagnosis.
Step 4: Consult a Professional
If the issue persists after basic inspections or if the codes point to complex problems (e.g., ECU failure or catalytic converter damage), it’s time to consult a mechanic. Professional shops use advanced tools like oscilloscopes and pressure testers to diagnose issues beyond the scope of DIY tools. For example, a mechanic can perform a cylinder compression test to rule out internal engine damage, which an OBD-II scanner can’t detect.
Expert Insight: John Carter, a certified automotive engineer with 15 years of experience, notes that “modern diagnostic tools, like real-time data loggers, allow mechanics to pinpoint misfires with precision, saving time and preventing unnecessary repairs.” Seeking professional help ensures accurate diagnosis and reliable repairs.
Proven Fixes for a Blinking Check Engine Light
Addressing Engine Misfires
Engine misfires are the leading cause of a blinking check engine light, and addressing them promptly can prevent costly damage. Here’s a step-by-step guide to fixing misfires, starting with the most common culprit: spark plugs.
- Replace Spark Plugs:
- Tools Needed: Spark plug socket, ratchet, torque wrench, dielectric grease.
- Steps:
- Disconnect the battery to ensure safety.
- Locate the spark plugs (consult your vehicle’s manual for exact placement).
- Remove the ignition coil or spark plug wire, then use a spark plug socket to extract the old plug.
- Install a new spark plug, applying a thin layer of dielectric grease to the threads to prevent seizing.
- Torque to the manufacturer’s specification (typically 15–20 Nm for most vehicles).
- Tip: Use OEM spark plugs (e.g., NGK or Bosch) or high-quality aftermarket equivalents for optimal performance. Replace all plugs at once to ensure consistent combustion.

- Replace Ignition Coils:
- If the misfire persists after replacing spark plugs, the ignition coil may be faulty. Coils are often cylinder-specific, so check the diagnostic trouble code (e.g., P0302 for cylinder 2 misfire) to identify the culprit.
- Steps:
- Disconnect the battery and remove the faulty coil by unplugging its electrical connector and unbolting it.
- Install a new coil, ensuring a secure connection.
- Test the vehicle to confirm the misfire is resolved.
- Cost: Ignition coils cost $50–$150 each, depending on the vehicle make and model.
- Check Wiring: Inspect spark plug wires (if applicable) for cracks or wear. Replace any damaged wires to ensure proper spark delivery.
Regular spark plug replacement (every 30,000–100,000 miles, depending on the type) can prevent misfires. For example, a 2018 Honda Civic owner reported resolving a blinking check engine light by replacing worn iridium spark plugs after 80,000 miles, avoiding a $1,200 catalytic converter repair.
Repairing Fuel System Issues
Fuel system problems, such as clogged fuel injectors or a failing fuel pump, can disrupt the air-fuel mixture, causing misfires. Here’s how to address them:
- Clean Fuel Injectors:
- Tools Needed: Fuel injector cleaner, fuel pressure gauge (optional).
- Steps:
- Add a high-quality fuel injector cleaner (e.g., Sea Foam or Chevron Techron) to a full tank of gas.
- Drive normally for 50–100 miles to allow the cleaner to break down deposits.
- If the problem persists, consider professional cleaning with a pressure-based system at a repair shop.
- Tip: Use a cleaner every 10,000 miles to maintain injector performance.

- Replace a Faulty Fuel Pump:
- A failing fuel pump may not deliver adequate pressure, causing misfires. Symptoms include sluggish acceleration or difficulty starting.
- Steps:
- Test fuel pressure using a gauge (consult your vehicle’s manual for target PSI, typically 40–60 PSI).
- If pressure is low, replace the fuel pump (a complex task best left to professionals unless you’re experienced).
- Cost: Fuel pump replacement costs $300–$800, including labor.
- Use High-Quality Fuel: Contaminated or low-quality fuel can clog injectors or cause combustion issues. Always refuel at reputable stations and avoid “bargain” gas, which may contain impurities.
Replacing Oxygen Sensors
Oxygen sensors (O2 sensors) play a critical role in maintaining the air-fuel ratio. A faulty sensor can cause misfires or trigger a blinking check engine light by sending incorrect data to the ECU.
- Tools Needed: O2 sensor socket, ratchet, penetrating oil (e.g., WD-40).
- Steps:
- Locate the faulty sensor (usually near the exhaust manifold or catalytic converter; check your vehicle’s manual).
- Spray penetrating oil on the sensor’s threads to loosen it, then remove it with an O2 sensor socket.
- Install a new sensor, tightening it to the manufacturer’s torque specification (typically 30–40 Nm).
- Clear the OBD-II codes using a scanner and test-drive to confirm the fix.
- Cost: O2 sensors cost $50–$200, with DIY replacement saving $100–$200 in labor fees.
- Tip: Replace upstream and downstream sensors together if they’re nearing the end of their lifespan (60,000–100,000 miles) to prevent future issues.
Replacing a faulty O2 sensor early can prevent catalytic converter damage, which is far more expensive. For example, a 2015 Toyota Camry owner saved $1,500 by replacing a failing O2 sensor before it caused converter failure.
Catalytic Converter Replacement
If misfires go unaddressed, unburned fuel can overheat and damage the catalytic converter, a critical emissions component. A failing converter often triggers codes like P0420 (catalytic converter efficiency below threshold) and may cause a blinking check engine light.
- When to Replace: Replace the converter if diagnostics confirm damage (e.g., rattling noises, reduced power, or confirmed OBD-II codes).
- Steps:
- Due to complexity and emissions regulations, catalytic converter replacement is best handled by professionals.
- Choose between OEM converters (more expensive but reliable) and aftermarket options (cheaper but potentially less durable).
- Cost: Replacement costs $1,000–$2,500, depending on the vehicle and part quality.
- Expert Insight: According to the Environmental Protection Agency (EPA), a damaged catalytic converter can increase emissions by up to 50%, making timely replacement critical for compliance and performance.

Preventive Maintenance Tips
Preventing a blinking check engine light starts with regular maintenance. Here’s a schedule to keep your engine running smoothly:
| Task | Interval | Estimated Cost |
|---|---|---|
| Replace spark plugs | Every 30,000–100,000 miles | $50–$200 |
| Inspect/replace ignition coils | Every 60,000–100,000 miles | $100–$400 |
| Clean fuel injectors | Every 10,000–15,000 miles | $10–$50 (DIY) |
| Replace O2 sensors | Every 60,000–100,000 miles | $100–$400 |
| Check fuel system | Annually | $50–$150 (inspection) |
- Tip: Keep a maintenance log to track service intervals and ensure timely replacements.
- Pro Advice: Use premium fuel for high-performance or turbocharged engines to minimize carbon buildup and misfires.

When to Seek Professional Help
Signs You Need a Mechanic
While DIY repairs can resolve many issues, certain scenarios require professional expertise:
- Persistent Blinking Light: If the light continues after replacing spark plugs or O2 sensors, deeper issues like ECU failure or internal engine damage may be present.
- Complex Diagnostics: Codes like P0600 (ECU communication error) or low cylinder compression require advanced tools like oscilloscopes or compression testers.
- Catalytic Converter Damage: Replacement involves welding and emissions compliance, best handled by certified technicians.

Choosing a Reliable Mechanic
Finding a trustworthy mechanic ensures accurate repairs and fair pricing. Look for:
- ASE Certification: Indicates expertise in automotive repair.
- Customer Reviews: Check platforms like Yelp or Google for consistent positive feedback.
- Specialization: Choose shops familiar with your vehicle’s make (e.g., European cars often require specialized knowledge).
FAQs About Blinking Check Engine Lights
Q: Can I drive with a blinking check engine light?
A: No, driving risks severe engine damage, especially to the catalytic converter. Pull over safely and diagnose the issue immediately.
Q: How much does it cost to fix a blinking check engine light?
A: Costs range from $50–$200 for simple fixes (e.g., spark plugs) to $1,000–$2,500 for catalytic converter replacement. Diagnostics typically cost $50–$150.
Q: Can a blinking check engine light reset itself?
A: Rarely, unless the issue (e.g., a temporary misfire from bad fuel) resolves itself. Always diagnose to confirm the root cause.
Q: Is a blinking check engine light covered by warranty?
A: Emissions-related components like catalytic converters may be covered under federal regulations (e.g., 8 years/80,000 miles). Check your vehicle’s warranty for details.
Conclusion
A blinking check engine light is a serious warning that demands immediate action to protect your vehicle’s engine and avoid costly repairs. By understanding the causes—misfires, ignition issues, fuel system problems, or sensor failures—you can diagnose and fix the problem with confidence. Whether you’re replacing spark plugs at home or consulting a professional for complex repairs, this guide provides the tools and knowledge to restore your vehicle’s reliability.
As a mechanical engineer with over a decade of experience in automotive diagnostics, I’ve seen firsthand how proactive maintenance can save drivers thousands in repairs. Use the steps outlined here, keep up with regular maintenance, and don’t hesitate to seek expert help when needed. Share this guide with fellow drivers, bookmark it for future reference, or leave a comment with your experience to help others tackle this common issue.