A cracked ceiling can be an eyesore, but it’s more than just a cosmetic issue. 🏚️ Whether it’s from settling, water damage, or temperature changes, a cracked ceiling can lead to more serious problems if left unattended. If you’re wondering how to fix a cracked ceiling without calling in expensive professionals, you’re in the right place! This guide will walk you through a simple, step-by-step process to repair your ceiling quickly, easily, and like a pro.
Ignoring those cracks can lead to further damage, including mold, structural instability, or worsening cosmetic issues. Don’t let your ceiling get worse over time—taking care of it now can save you headaches (and money) down the road! 🛠️
In the following sections, we’ll cover everything you need: from the tools you’ll need to common causes of cracks, all the way to tips for a flawless finish. Ready to get your ceiling looking brand new again? Let’s dive in!
2. Common Causes of Ceiling Cracks
Cracks in your ceiling can happen for several reasons, and understanding the cause is key to fixing the problem effectively. Here’s a look at the most common causes of ceiling cracks, so you can get to the root of the issue and tackle the repair with confidence. 🏚️

1. Settling and Shifting of the House
Over time, homes naturally settle as the foundation shifts. This can put stress on your ceiling, causing hairline cracks or more noticeable fissures. It’s completely normal in older homes, especially if they were built on clay or uneven soil. If the cracks are fine and don’t seem to grow, they’re often a sign of natural settling. 🏠
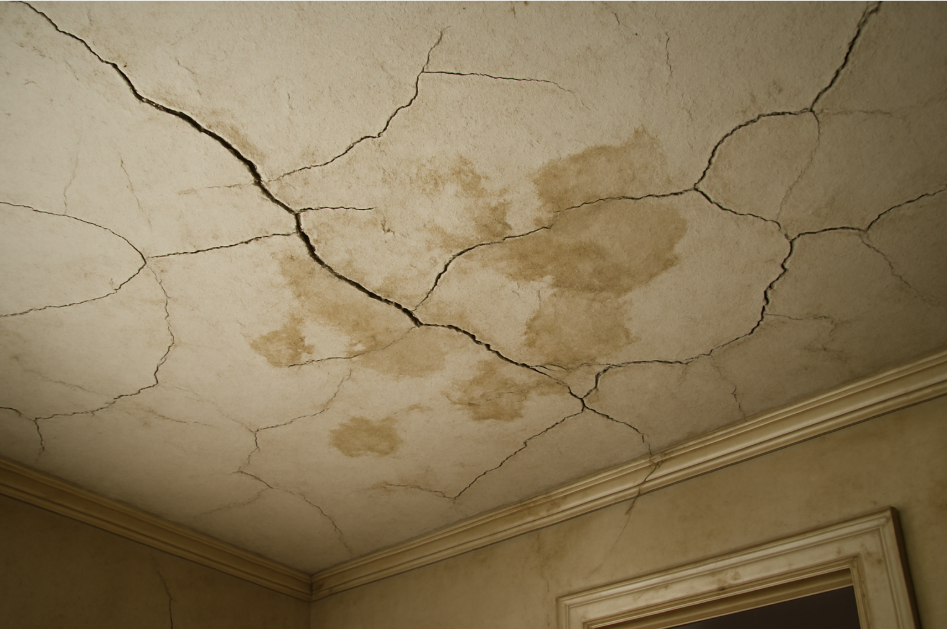
2. Water Damage
Leaking roofs or plumbing issues above your ceiling can cause water damage, leading to cracks and stains. Water can weaken the materials in your ceiling, making them prone to cracking. If you see dark stains around the crack or signs of moisture, it’s important to fix the leak first before addressing the crack itself. 🌧️💧
3. Temperature and Humidity Fluctuations
Changes in temperature and humidity can make materials like drywall expand and contract, which leads to cracks. This is particularly common in rooms with high moisture, like kitchens and bathrooms, or in homes with extreme seasonal changes. Over time, this movement can cause visible damage to the ceiling surface. 🌡️
4. Structural Issues
More serious cracks can be a sign of underlying structural problems. These might include issues with the roof trusses, joists, or the foundation. If you notice large, widening cracks, especially in load-bearing areas, this may indicate a need for professional inspection and repair. Structural issues require immediate attention to avoid further damage to your home. ⚠️
5. Improper Drywall Installation
In some cases, the problem might be due to poor installation of the drywall itself. If the joints weren’t taped properly or the drywall wasn’t secured correctly, it could lead to cracks over time. This is especially true in areas with heavy foot traffic or vibrations, such as near doorways or hallways. 🛠️
3. Tools and Materials You’ll Need
Before you get started with repairing a cracked ceiling, it’s essential to have the right tools and materials on hand. Don’t worry – most of the items you’ll need are common and easy to find at your local hardware store. Here’s a list of what you’ll need to fix those cracks like a pro! 🛠️

Essential Tools
- Utility Knife
A sharp utility knife will help you clean the cracked area and create a smooth edge for the patching material to adhere to. It’s perfect for cutting drywall and trimming any loose debris. 🪓 - Putty Knife
You’ll use this to apply the joint compound over the crack. A 4-inch or 6-inch putty knife works best for small to medium-sized cracks, helping you spread the compound evenly. 🖌️ - Drywall Knife or Taping Knife
A larger drywall knife (10-12 inches) is great for smoothing out the joint compound and creating a seamless finish. This is especially important for larger cracks. 🎯 - Sanding Block or Sandpaper
After the compound has dried, you’ll need to sand it down to create a smooth surface. A sanding block or fine-grit sandpaper (220-grit) works well for this step. 🏖️ - Paint Roller & Brush
A roller will help you apply primer and paint quickly to match your ceiling’s finish. A brush may be needed for corners or tight spaces. 🎨
Materials for Patching
- Joint Compound or Spackle
Joint compound is ideal for larger cracks, while spackle works well for minor, hairline cracks. Choose the right one based on the size and depth of the crack. 🏗️ - Drywall Tape
If the crack is wide, using drywall mesh tape will reinforce the joint compound and prevent the crack from reappearing. The tape helps to hold everything in place as you apply multiple layers. 📏 - Plaster (for Larger Cracks)
If the crack is substantial, plaster may be needed for a more durable, long-lasting repair. This is commonly used when dealing with older ceilings or larger cracks. 🏚️ - Primer & Ceiling Paint
Once your repair is smooth and dry, you’ll need primer and ceiling paint to blend the patch seamlessly with the rest of the ceiling. Make sure to choose a paint designed for ceilings to get the best coverage and finish. 🎨
Safety Gear
- Dust Mask
Sanding and applying joint compound can create a lot of dust, so it’s important to wear a dust mask to protect your lungs. 😷 - Gloves & Goggles
Protect your hands and eyes while working with tools and compounds, especially when sanding or applying harsh materials. 🧤👓
4. How to Fix a Cracked Ceiling: Step-by-Step Guide
Fixing a cracked ceiling might seem daunting at first, but with the right tools and a bit of patience, you can handle it like a pro! Follow these simple, step-by-step instructions to repair your ceiling and restore its smooth, flawless look. 🛠️

Step 1: Assess the Damage
Before you begin, take a close look at the crack to determine its size and cause.
- Superficial cracks (hairline or small cracks) are usually cosmetic and easy to repair.
- Wider cracks or those with moisture damage might indicate a deeper issue, so ensure the cause is fixed (e.g., leaks or settling) before moving forward.
🔍 Tip: If the crack is larger than 1/8 inch or there’s visible moisture, consider seeking professional help.
Step 2: Prepare the Area
Now that you’ve assessed the damage, it’s time to prepare your workspace.
- Protect your furniture by moving it away or covering it with a drop cloth or plastic sheeting.
- Cover the floor to catch any dust or debris.
- Wear safety gear (dust mask, gloves, goggles) to protect yourself from dust and debris.
🛋️ Tip: If working with a tall ceiling, you might need a sturdy ladder to reach the cracked area safely.
Step 3: Clean the Cracked Area
Clean the crack to ensure the repair materials adhere properly.
- Use a utility knife to gently widen the crack and remove any loose drywall or debris.
- Wipe down the area with a damp cloth to remove dust.
🧼 Tip: A clean surface will help the joint compound stick better, ensuring a smoother, longer-lasting repair.
Step 4: Apply Joint Compound
For smaller cracks, joint compound will do the trick. For wider cracks, you’ll need to apply drywall mesh tape before the compound to reinforce the area.
- Small cracks: Use a putty knife to apply a thin layer of joint compound over the crack. Smooth it out with your knife, ensuring it covers the crack evenly.
- Larger cracks: First, apply the mesh tape over the crack, then cover it with a thin layer of joint compound. Use your knife to smooth the surface and ensure the tape is fully embedded.
🎯 Tip: Start with a thin layer and apply more compound in subsequent coats if needed. This will prevent cracks from forming in the repair itself.
Step 5: Let It Dry and Sand
Allow the joint compound to dry completely. Drying times can vary, but it usually takes about 1-2 hours for thin layers and up to 24 hours for thicker layers.
- Once dry, lightly sand the area with fine-grit sandpaper or a sanding block to create a smooth finish.
- Wipe away any dust with a damp cloth.
🧽 Tip: Sanding after each layer of compound ensures a smoother finish. Avoid sanding too aggressively to prevent damaging the surrounding area.
Step 6: Apply Additional Layers (if needed)
If the crack is still visible after the first coat, repeat the process:
- Apply a second layer of joint compound, smoothing it out with your putty knife.
- Allow it to dry, then sand again. Repeat until the crack is completely smooth and level with the rest of the ceiling.
⏳ Tip: For larger cracks, 2-3 layers might be necessary for a seamless finish.
Step 7: Prime and Paint
Once your ceiling is smooth and dry, it’s time to finish the job with a fresh coat of primer and paint to blend the repair into the rest of the ceiling.
- Primer: Apply a coat of ceiling primer to the patched area. This helps the paint adhere better and prevents visible patches.
- Paint: Once the primer is dry, apply the ceiling paint to the entire area, blending it with the surrounding ceiling. You may need a second coat for full coverage.
🎨 Tip: Use a paint roller for the large surface area and a brush for edges and corners.
5. Tips and Tricks for a Professional Finish
To achieve a flawless ceiling repair, it’s all about the little details! With these expert tips and tricks, you can make sure your patch blends seamlessly with the rest of the ceiling. Let’s dive in! 🛠️

1. Apply Multiple Thin Coats of Compound
When applying joint compound, resist the urge to cover the crack in one thick layer. Instead, apply several thin coats, allowing each layer to dry before adding the next. This prevents cracking and ensures a smoother finish. 🎯
💡 Tip: A thin layer of compound dries faster and is easier to smooth out than a thick one.
2. Use the Right Sanding Technique
Sanding between coats is crucial for a smooth, professional finish. When sanding, use fine-grit sandpaper (220-grit) and work gently. Sand in small circles to avoid creating uneven spots or gouges. After sanding, wipe the area with a damp cloth to remove dust before applying more compound or painting. 🧽
🧑🔧 Tip: Don’t over-sand, or you risk sanding through the compound and into the drywall. Light sanding is enough for a flawless surface.
3. Use Drywall Mesh Tape for Larger Cracks
For cracks wider than 1/8 inch, applying drywall mesh tape is key. It helps hold the joint compound in place and prevents the crack from reopening. Simply apply the tape over the crack, then smooth a layer of joint compound on top. This method reinforces the repair, ensuring it lasts. 🔨
💡 Tip: Be sure to press the tape firmly into place before adding compound to avoid air pockets or bumps.
4. Feather the Edges of Your Compound
To make your repair blend seamlessly with the ceiling, always “feather” the edges of your joint compound. This means gradually thinning the compound at the edges to create a smooth transition between the repair and the surrounding ceiling. You can do this by using a wide taping knife (10-12 inches) and pulling the compound outward in gentle strokes. 🎨
💡 Tip: Feathering the edges helps eliminate visible seams and makes the patch almost invisible once painted.
5. Don’t Skip the Primer
After your joint compound is smooth and dry, don’t skip the primer step. Applying a coat of ceiling primer ensures the paint adheres better and gives a uniform finish across the ceiling. If you skip this step, the paint may not cover the patch properly, leading to a noticeable difference in texture. 🖌️
🎨 Tip: Choose a stain-blocking primer if the crack was caused by water damage. It will help prevent any discoloration from showing through the paint.
6. Use the Right Paint
Ceiling paint is specifically formulated to cover drywall and compound patches without leaving streaks. Make sure to choose a paint that matches the sheen of your existing ceiling (flat, matte, or eggshell). This will give your repair a professional look that blends seamlessly. 🖍️
💡 Tip: If your ceiling has a textured finish, consider using a texturing spray after priming for a uniform look.
7. Work in Small Sections
If your ceiling has multiple cracks or extensive damage, work in small sections rather than tackling the entire ceiling at once. This will help you maintain control over the repair process and avoid mistakes. Focus on one crack at a time, completing the steps before moving on to the next. 🔧
💡 Tip: Working in manageable sections ensures better control over drying times and gives you time to fix any imperfections before they set.
6. When to Call a Professional
While fixing a cracked ceiling is something you can often do yourself, there are certain situations where it’s best to call in a professional. Knowing when to step aside and seek expert help will save you time, money, and potential headaches. Here are some signs that it’s time to bring in a pro. 🚨

1. Large or Expanding Cracks
If the crack is more than 1/8 inch wide or seems to be getting bigger over time, it could be a sign of a deeper structural issue. Large cracks might indicate movement in the foundation or settling that could affect the integrity of your home. These are not simple cosmetic repairs and require professional attention to assess and fix properly. 🏚️
💡 Tip: Monitor the crack for a few days. If it keeps expanding or shifts direction, it’s time to call a pro.
2. Water Damage or Stains
Cracks caused by water damage—whether from a leaky roof or plumbing issues—need to be handled carefully. If you see stains around the crack or feel moisture, it’s important to address the water source first. A professional can help assess whether there’s any mold, mildew, or hidden damage in the ceiling structure that you might not notice. 💧
💡 Tip: Don’t try to patch up water-damaged ceilings without first fixing the leak. Otherwise, the cracks could return.
3. Structural Issues
If you suspect the crack is caused by structural problems like faulty joists, trusses, or the foundation, it’s best to call a professional immediately. These issues can lead to severe problems, including sagging ceilings, doors that don’t close, or even the collapse of part of your home. A professional contractor or structural engineer can inspect your home and determine the cause. ⚠️
💡 Tip: If you see multiple cracks in load-bearing areas (such as beams or supporting walls), it’s time to get a structural inspection.
4. Ceiling Texture Problems
If your ceiling has a textured finish (like popcorn or knockdown), it’s tricky to match the texture with a DIY repair. Professionals have the tools and expertise to replicate the texture seamlessly, making the repair look flawless. Texturing ceilings can be a tricky process, and it’s easy to make mistakes without the right equipment. 🎨
💡 Tip: If you want your ceiling to look just like it did before the crack, leave texturing to the experts.
5. Safety Concerns
Ceiling repairs often involve working on ladders or scaffolding, especially if you have a high or vaulted ceiling. If you’re uncomfortable with heights or lack the proper tools, it’s better to hire someone with the experience to handle the job safely. Your safety should always come first. 🚧
💡 Tip: If the ceiling is higher than 10 feet, it’s worth considering professional help for your safety.

Repairing a cracked ceiling might seem like a daunting task, but with the right tools, a little patience, and the steps outlined in this guide, you can restore your ceiling to its former glory in no time! 🛠️ Whether you’re dealing with small, cosmetic cracks or more significant damage, understanding the cause and applying the right repair techniques is key to achieving a smooth, professional-looking finish.
Remember, if the crack is large, expanding, or caused by underlying structural issues or water damage, it’s best to call a professional to ensure your home stays safe and secure. 🏡
By following these steps, you can not only fix the crack but also prevent future damage, saving yourself time and money in the long run. Plus, with the right tips and tricks, you’ll feel confident tackling even the toughest ceiling repairs like a pro! 🎯
Now, with your newly repaired ceiling, your home will look refreshed and well-maintained. Ready to get started? Grab your tools and get to work—your ceiling will thank you! 😊