You can usually fix a leaking shower head yourself with basic tools and parts. However, if the leak persists or you suspect more complex issues with the plumbing or valve, it’s a good idea to hire a plumber. Professional help ensures the problem is fully addressed without causing further damage.
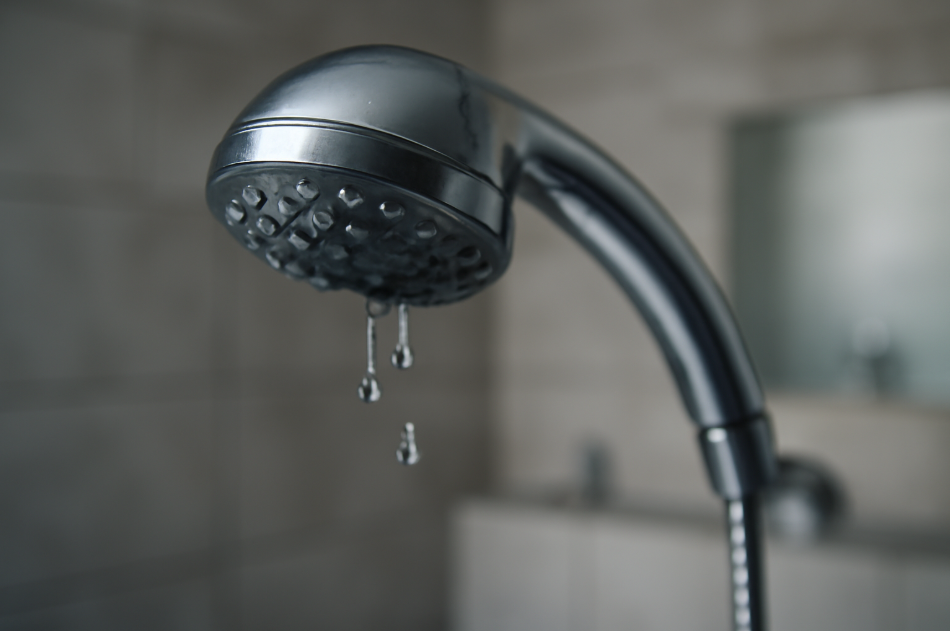
How to Fix a Dripping Shower Head: A Step-by-Step Guide to Stop the Leak and Save Water
Are you tired of the constant drip, drip, drip from your shower head? Not only is it annoying, but that steady stream of water could be costing you more than you think—both in wasted water and higher utility bills. 
In this step-by-step guide, we’ll show you exactly how to stop that leak, saving water and money while restoring your peace and quiet. Whether you’re a beginner or just someone looking for a simple solution, you’ll find practical tips, helpful insights, and easy-to-follow instructions to tackle the issue like a pro.
By the end of this article, you’ll have the confidence to fix your shower head yourself—no plumber required. Ready to stop the drip? Let’s dive in!
Table of Contents
ToggleUnderstanding the Common Causes of a Dripping Shower Head
If your shower head is dripping, it’s likely due to one or more common issues. Understanding the root cause of the leak will help you pinpoint the problem and fix it efficiently. Let’s go over the most frequent culprits behind a dripping shower head:
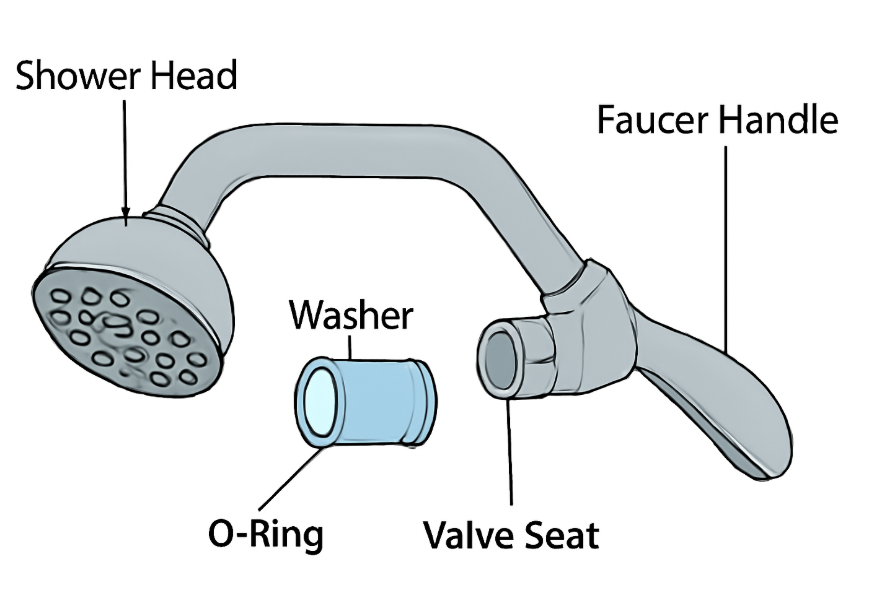
Worn-Out Washer or O-Ring
Over time, the washers and O-rings inside your shower head can become worn out or damaged. These small rubber components create a seal to prevent leaks, but they lose their effectiveness with age. When they crack, harden, or wear down, water begins to slip through, causing that frustrating drip.
- How to fix it: Replace the washer or O-ring. It’s an easy, affordable fix that can be done in just a few minutes.
Corroded or Damaged Valve Seat
The valve seat is a critical part of your shower faucet. It ensures that water flows correctly when the faucet is turned on. If the valve seat becomes corroded or damaged—often due to hard water deposits—it can create gaps, leading to leaks.
- How to fix it: Inspect the valve seat for any signs of corrosion. You might be able to clean it with a small wire brush, but if the damage is severe, replacing the valve seat might be necessary.
Loose or Faulty Faucet Handle
A loose faucet handle can result in water seeping through even when the shower is supposed to be off. If your handle isn’t turning completely or feels wobbly, this could be the problem.
- How to fix it: Tighten the handle with a wrench. If it’s too damaged, you may need to replace the handle or other faucet components.
Mineral Buildup
If you live in an area with hard water, mineral deposits like calcium and lime can accumulate inside the shower head and plumbing. This buildup not only clogs the showerhead but can also affect seals and cause leaks.
- How to fix it: Clean the shower head by soaking it in vinegar overnight to break down the mineral buildup. Regular maintenance can help prevent this from happening again.
High Water Pressure
Sometimes, high water pressure can be the culprit. Excessive pressure causes water to push through seals and joints, resulting in leaks at the showerhead.
- How to fix it: Install a water pressure regulator to ensure your system isn’t working under too much strain. This can help prevent future issues.
Tools and Materials You’ll Need
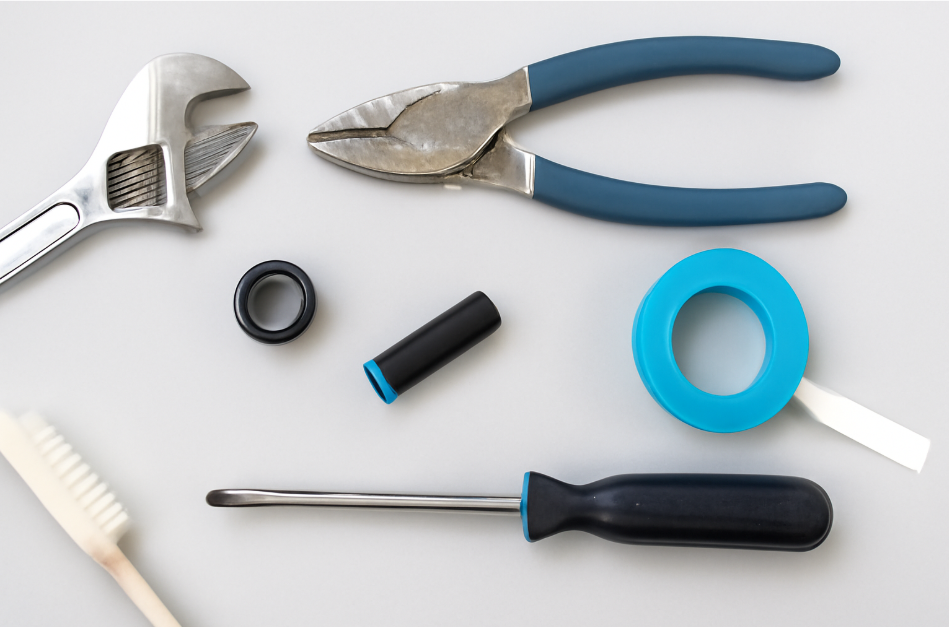
Before you dive into fixing that dripping shower head, it’s important to gather the right tools and materials. Having everything you need at hand will make the process quicker and smoother. Let’s take a look at what you’ll require:
Essential Tools:
- Adjustable Wrench
An adjustable wrench is perfect for loosening and tightening showerhead components without damaging them. It’s a must-have for removing the showerhead or faucet parts. - Pliers
Pliers come in handy for gripping and unscrewing stubborn parts that the wrench can’t handle. They’re especially useful for loosening the faucet handle or gripping tight connections. - Screwdriver (Flathead and Phillips)
You’ll likely need a flathead or Phillips screwdriver to remove screws from the showerhead or faucet handle. It’s a good idea to have both types on hand to cover all your bases. - Cleaning Brush or Cloth
If you find mineral buildup or grime in your showerhead, a small cleaning brush or soft cloth will help you scrub away the debris. A toothbrush can also work well for cleaning hard-to-reach spots.
Replacement Parts:
- Shower Head Washers or O-Rings
If the cause of the drip is a damaged washer or O-ring, you’ll need replacements. These parts are inexpensive and easy to find at most hardware stores. Make sure to match the size of your current washers to avoid any leaks. - Plumber’s Tape
Plumber’s tape (also called Teflon tape) is used to create a tight seal between threaded connections. It helps prevent leaks and ensures that your new washers or O-rings fit snugly in place. - Valve Seat (If Necessary)
If your shower head’s valve seat is damaged, you might need to replace it. This is more of a rare fix, but if you notice corrosion or a rough surface, it may be time for a new valve seat.
Safety Tips:
- Turn Off the Water Supply
Always make sure to turn off the water supply before you start working on your shower head. This prevents water from gushing out unexpectedly and keeps the area dry. - Wear Safety Gloves
It’s a good idea to wear safety gloves to protect your hands from sharp edges or any debris that might be hiding around your showerhead or faucet.
Step-by-Step Guide to Fix a Dripping Shower Head
Fixing a dripping shower head is easier than you might think. With the right tools and a bit of patience, you can tackle this common problem yourself and stop the leak in no time! Follow these simple steps to fix your shower head and save both water and money.
Turn Off the Water Supply
Before you do anything, make sure to turn off the water supply to your shower. This prevents any accidental water flow while you’re working and avoids unnecessary mess.
- Tip: You can usually find the shut-off valve near the water heater or under the sink. If you can’t locate it, simply turn off the main water supply to your home.
Remove the Shower Head
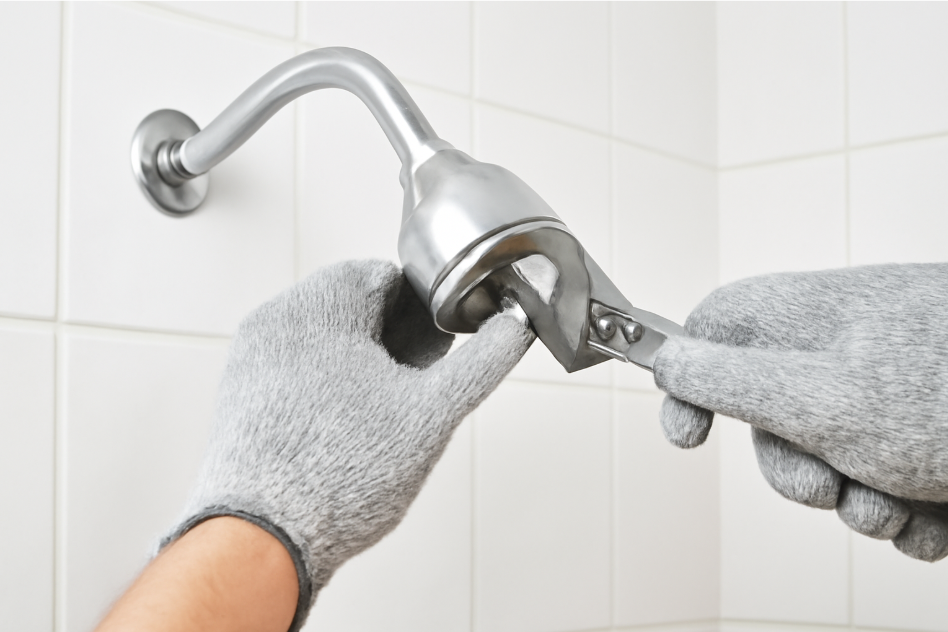
Now that the water is off, you’ll need to remove the shower head to inspect the parts inside.
- How to do it:
- Use your adjustable wrench or pliers to carefully unscrew the shower head from the pipe. Be sure not to damage the threads.
- If the shower head is stuck, wrap a cloth around it to avoid scratching the finish while you grip it with the wrench.
Pro tip: If the shower head is too tight, use some penetrating oil and let it sit for a few minutes before trying again.
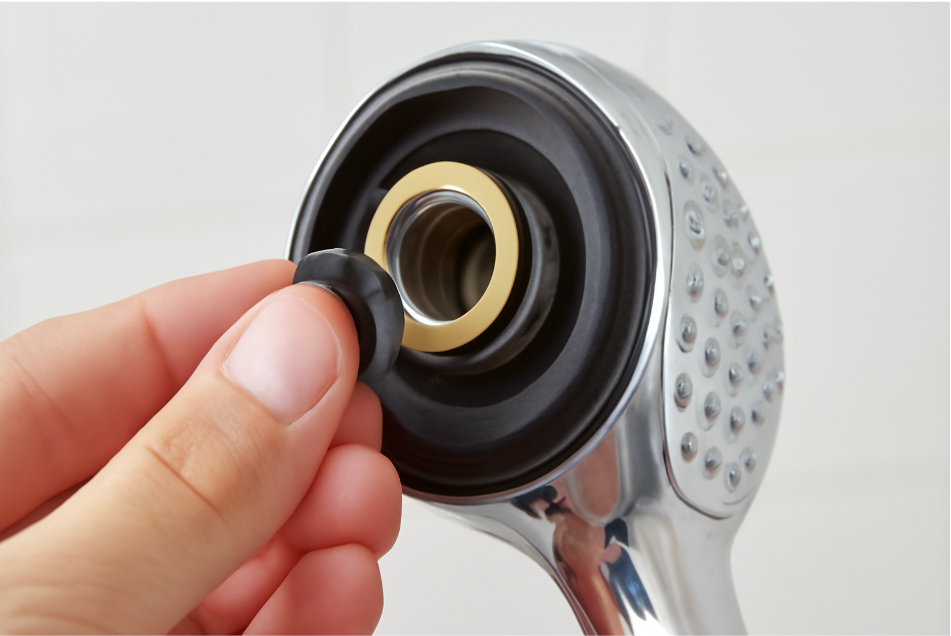
Inspect the Shower Head and Components
Once the shower head is removed, it’s time to check for any obvious signs of damage or wear.
- Look for:
- Worn washers or O-rings: These rubber seals help prevent leaks. If they look cracked or brittle, they need replacing.
- Mineral buildup: If you notice white or greenish deposits, it’s likely mineral buildup from hard water.
- Corrosion or damage: Check the valve seat (inside the shower faucet) for any roughness or corrosion.
- Tip: If you see mineral deposits, soak the shower head in vinegar overnight to dissolve them. This will help restore water flow.
Replace the Washer or O-Ring (If Necessary)
If the washer or O-ring is damaged, it’s time for a replacement.
- How to do it:
- Remove the old washer/O-ring carefully.
- Replace it with a new one of the same size. Make sure it fits snugly to avoid any gaps where water can leak through.
- Pro tip: If you’re unsure of the size, take the old washer to the hardware store to match it up with the right replacement.
Reassemble the Shower Head
After replacing the washer or cleaning the shower head, it’s time to reassemble everything.
- How to do it:
- Apply plumber’s tape around the threads of the pipe (if needed) to ensure a tight seal.
- Screw the shower head back onto the pipe and tighten it gently with your hands. Use the wrench for a final snug fit, but avoid overtightening.
Turn On the Water Supply and Test
Now, it’s time to test your work. Turn the water supply back on and check for any leaks around the shower head.
- What to check for:
- Ensure that no water is dripping from the shower head or faucet.
- If water is still leaking, check the washer/O-ring installation again or inspect the valve seat for damage.
- Tip: If the problem persists after replacing the washer and cleaning, the valve seat or faucet handle might be the culprit.
Tips to Prevent Future Drips
Now that your shower head is fixed, let’s make sure you don’t run into the same problem again. By following these simple tips, you can keep your shower head in top condition and prevent future leaks.
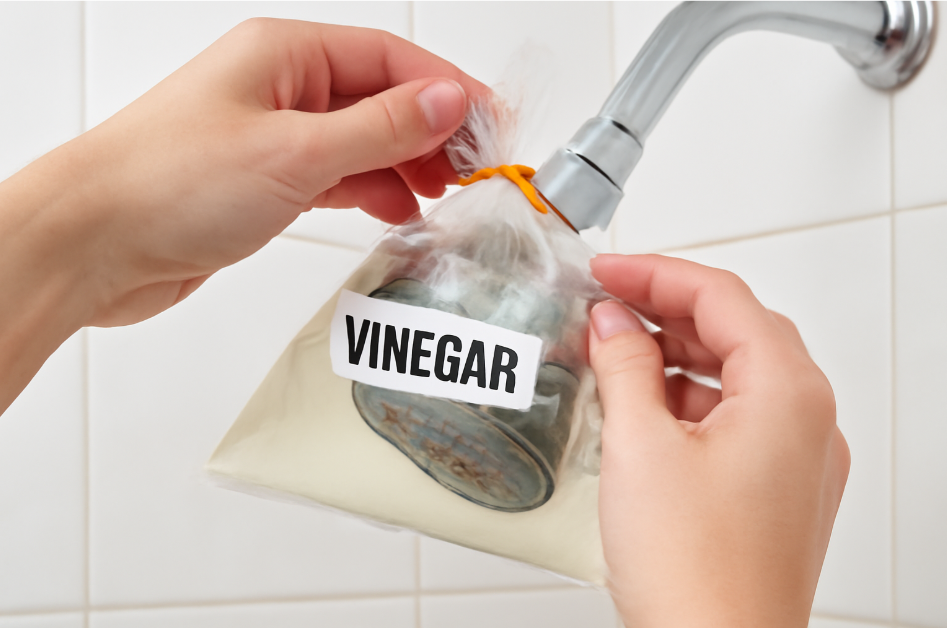
Regularly Clean Your Shower Head
Mineral buildup from hard water is one of the most common causes of leaks. Cleaning your shower head regularly helps prevent this and keeps water flowing smoothly.
- How to do it: Soak your shower head in vinegar for 1–2 hours once a month to dissolve any mineral deposits.
- Pro tip: If you don’t want to remove the shower head, tie a plastic bag filled with vinegar around it and let it soak.
Check Washers and O-Rings Annually
Over time, washers and O-rings can wear out, causing leaks. Regularly inspecting these components helps you catch problems early before they turn into drips.
- When to check: Once a year, or if you notice any signs of wear (cracking, brittleness, or water leaks).
- How to do it: Remove the shower head, check the washers/O-rings, and replace them if they look damaged.
Install a Water Softener
If you live in an area with hard water, mineral deposits can build up quickly and cause long-term damage to your shower head. Installing a water softener can reduce the effects of hard water, keeping your shower head and plumbing system in better condition.
- How to do it: Consult with a plumber to install a water softener for your home. This will reduce mineral buildup and improve water flow over time.
Keep an Eye on Water Pressure
Excessive water pressure can stress your shower head and its seals, leading to leaks. If you notice a sudden increase in pressure, it could be time to check your system.
- How to do it: Install a pressure regulator to ensure that your home’s water pressure stays within the recommended range (usually 40-60 psi). This helps protect your shower head and other plumbing fixtures.
Don’t Over-Tighten
While it’s important to ensure that your shower head is properly secured, overtightening can damage the components and create leaks. Be gentle when tightening the shower head back into place.
- Tip: Hand-tighten the shower head and only use a wrench for a final snug fit if necessary.
Troubleshooting Common Issues
If your shower head is still dripping after following the steps to fix it, don’t worry—there are a few common issues that could be causing the problem. Here are some troubleshooting tips to help you identify and fix the issue.
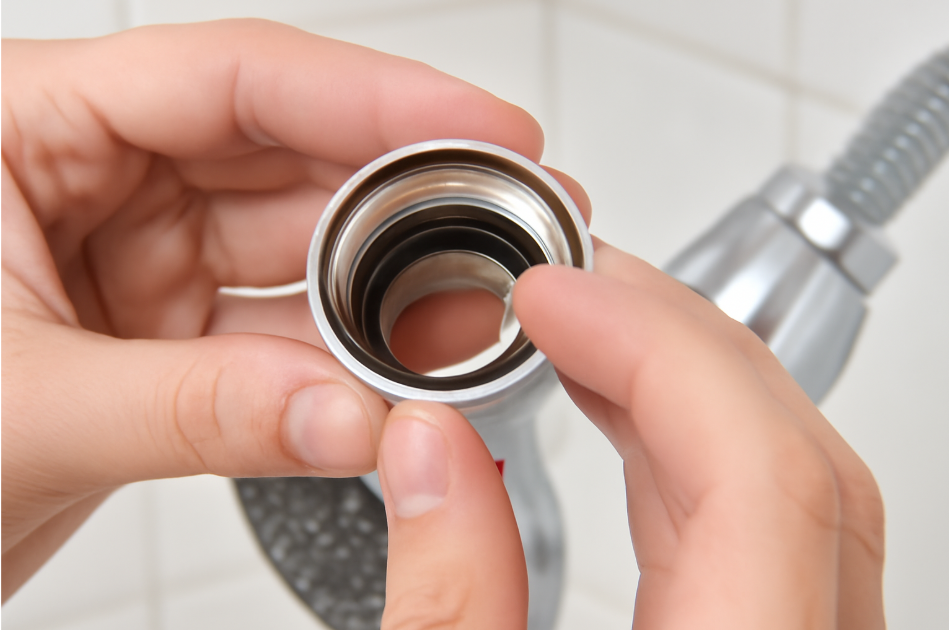
Persistent Drip After Replacing the Washer/O-Ring
If you replaced the washer or O-ring but the drip continues, it could be due to a few reasons:
- Washer/O-ring not seated properly: Double-check that the new washer is installed correctly and sits snugly in place. A misaligned washer can still allow water to leak.
- Wrong size washer/O-ring: Ensure the replacement part is the same size as the original. Even a small difference can cause leakage.
How to fix it: Remove the shower head again, carefully inspect the washer/O-ring, and ensure it’s seated correctly. If the washer looks slightly damaged or worn out, replace it with a new one.
Leaking from the Faucet Handle
If water is leaking from the faucet handle rather than the shower head, the issue might be with the valve seat or the faucet cartridge.
- Possible cause: A worn-out valve seat or a damaged faucet cartridge can lead to leaks at the handle.
How to fix it: You may need to replace the faucet cartridge or the valve seat. If you’re not sure how to do this, it’s best to consult a professional plumber to avoid causing further damage.
Mineral Buildup in the Plumbing
If your shower head is clean, but the drip persists, mineral buildup in the pipes could be restricting water flow and affecting the seals.
- Possible cause: Hard water deposits inside the pipes or valve seat.
How to fix it: Clean the valve seat or soak the showerhead in vinegar as previously suggested. If mineral buildup is deep inside the plumbing, you may need a plumber to clean the pipes or install a water softener.
High Water Pressure
Excessive water pressure can put strain on your shower head, seals, and pipes, causing leaks. If the water pressure in your home is too high, it could be the source of the problem.
- How to check: You can purchase a water pressure gauge to check the pressure. If it’s above the recommended 60 psi, it might be time to install a water pressure regulator.
How to fix it: Install a pressure regulator to reduce the pressure to safe levels. This can help prevent leaks and protect your shower and other plumbing fixtures.
Old or Damaged Shower Head
If you’ve done everything correctly and the drip still won’t stop, your shower head may simply be too old or damaged to function properly.
- Possible cause: Cracks or internal damage that prevents a proper seal.
How to fix it: If all else fails, it might be time to replace the shower head. Modern, high-quality shower heads are built to last and are often designed to prevent mineral buildup.

You’ve successfully learned how to fix a dripping shower head and prevent future leaks. By understanding the common causes of a shower head leak and following the simple steps in this guide, you’ve saved yourself both time and money. Whether it was a worn-out washer, mineral buildup, or high water pressure, you now have the knowledge and confidence to tackle this problem on your own.
Remember, regular maintenance and inspections can keep your shower in top shape for years to come. By cleaning your shower head, checking the washers and O-rings, and managing water pressure, you can enjoy a drip-free shower and lower utility bills.
No need to call a plumber for every little leak—now you know how to handle it like a pro! Keep your tools handy, and don’t let the drip get you down. Happy showering!
Is your bathroom or kitchen floor suddenly feeling uneven? Or maybe you’ve noticed that a tile in your hallway has started to lift up, making you trip over it? 
By the end of this guide, you’ll not only know how to fix loose tiles but also understand what causes them and how to prevent the issue from cropping up again in the future. So, keep reading and get ready to tackle this home improvement project with confidence!
1. Understanding the Causes of Loose Tiles
Before you dive into fixing your loose tiles, it’s important to understand what might have caused them in the first place. Identifying the root cause will help you choose the right solution and prevent it from happening again. Let’s take a look at the most common reasons why tiles become loose.
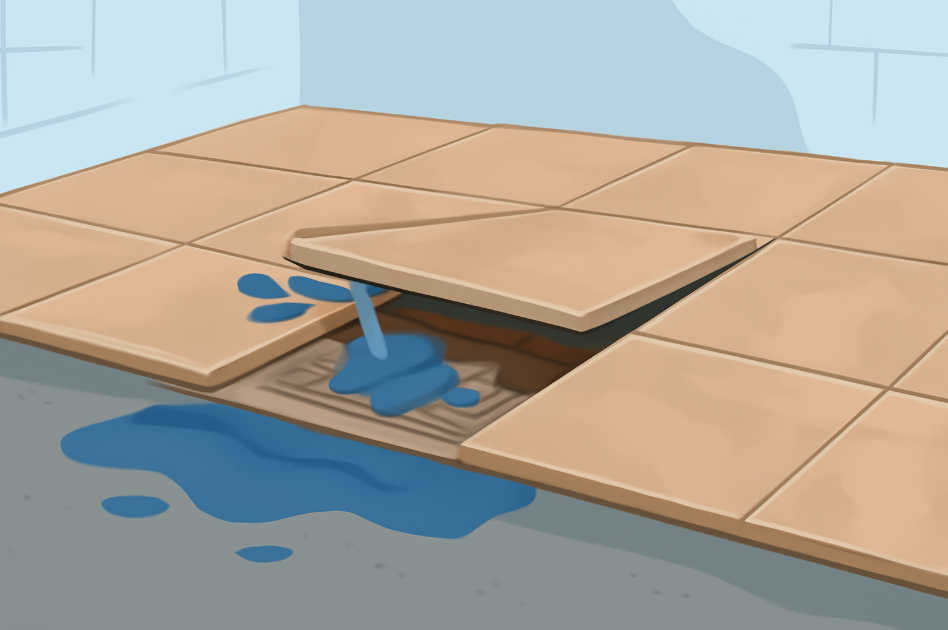
1. Water Damage 
Water is one of the biggest culprits behind loose tiles, especially in areas like bathrooms and kitchens. When water seeps underneath the tiles, it can break down the adhesive or grout holding them in place. This leads to the tiles loosening over time. Leaky pipes, excessive moisture, or even spills that aren’t cleaned up promptly can all contribute to water damage.
How to prevent it: Always check for any leaks and ensure your bathroom or kitchen is properly ventilated to reduce moisture buildup.
2. Improper Installation 
Sometimes, loose tiles happen simply because they weren’t installed correctly in the first place. Using the wrong adhesive or not applying enough adhesive can cause the tiles to lose their grip. Additionally, improper spacing between tiles can lead to weak spots where tiles are more likely to shift or loosen.
How to prevent it: If you’re doing a DIY tile installation, make sure to follow the manufacturer’s instructions for adhesive and grout. If you’re hiring a professional, ensure they’re experienced and use the right materials for the job.
3. Natural Wear and Tear 
Over time, the grout and adhesive that hold your tiles in place naturally break down due to regular use. Foot traffic, heavy furniture, and even everyday movement can cause wear and tear, making the adhesive weaker. This is especially common in high-traffic areas like hallways, kitchens, and entryways.
How to prevent it: Regularly inspect your floors for any cracks or shifts in the tiles, and address minor issues before they turn into bigger problems.
4. Temperature Changes 
Extreme temperature fluctuations can also cause tiles to expand and contract. This movement can lead to the grout or adhesive weakening, making tiles loosen. This is often a problem in homes with high humidity or homes exposed to significant temperature changes.
How to prevent it: Use temperature controls in your home and ensure your tiles are suitable for the specific climate of your area. Consider using expansion joints for larger areas.
5. Subfloor Problems 
If the subfloor beneath the tile isn’t solid or has deteriorated, the tile can shift and become loose. This is a more serious problem, often caused by water damage or the subfloor being improperly installed.
How to prevent it: If you’re dealing with large areas of loose tiles or suspect subfloor damage, it’s best to consult a professional. Fixing the subfloor may require replacing or reinforcing it.
2. Tools and Materials You’ll Need
Before you get started with repairing your loose tiles, it’s important to gather the right tools and materials. Having everything ready will make the process go smoothly, and you’ll avoid interruptions halfway through. Here’s a list of the essentials you’ll need to get the job done like a pro.
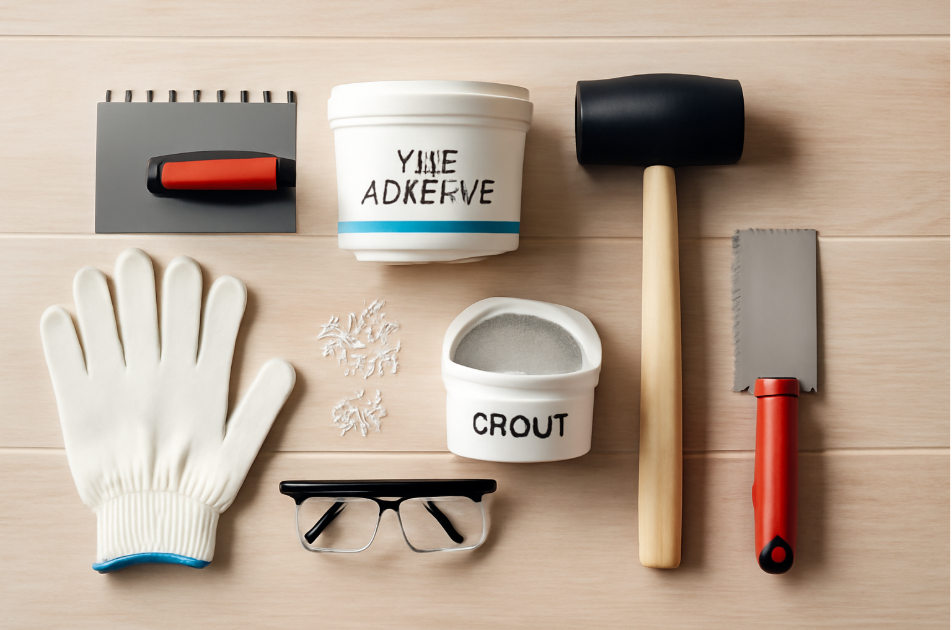
1. Tile Adhesive or Mortar
To secure the loose tile back in place, you’ll need strong adhesive. Tile adhesive (or thin-set mortar) is perfect for bonding the tile to the surface. Be sure to choose an adhesive that’s suitable for the type of tile and area you’re working on (e.g., waterproof adhesive for bathrooms).
2. Grout
Once the tile is fixed in place, you’ll need grout to fill in the spaces between the tiles. It seals the edges and provides a smooth, finished look. Choose a grout color that matches your existing grout for a seamless finish. Don’t forget to get the right type—sanded grout for wider gaps and unsanded grout for narrow ones.
3. Notched Trowel
A notched trowel is an essential tool for spreading the adhesive evenly on the surface. The notches create grooves in the adhesive, helping it bond securely with the tile. This ensures the tile stays in place once you set it down.
4. Rubber Mallet
A rubber mallet will help you gently tap the tile into place without damaging it. This is important because tapping too hard with a regular hammer can crack or break the tile.
5. Tile Cutter
If you need to cut a tile to fit, a tile cutter will be your best friend. You can also use a wet saw for larger, thicker tiles. Tile cutters are relatively easy to use and can help you make precise cuts for edges or corners.
6. Tile Spacer
Tile spacers are small, plastic pieces that help you maintain even gaps between tiles. They ensure that your grout lines are consistent and the overall pattern looks neat and uniform. This is especially important for DIYers who may not be as experienced with spacing.
7. Utility Knife
A utility knife is useful for cutting grout lines or trimming any excess adhesive around the tile edges. It’s also great for removing old grout if needed.
8. Cleaner or Degreaser
Before you begin, you’ll need to clean the surface to remove dirt, dust, and old adhesive. A cleaner or degreaser will ensure the surface is smooth and ready for the new adhesive to bond.
9. Safety Gear (Gloves, Safety Glasses)
Safety is always a priority! Wear gloves to protect your hands from sharp edges and safety glasses to shield your eyes from debris. These simple items will keep you safe while working.
3. Step-by-Step Guide to Repair Loose Tiles
Now that you’ve gathered all the necessary tools and materials, it’s time to get your hands dirty! 
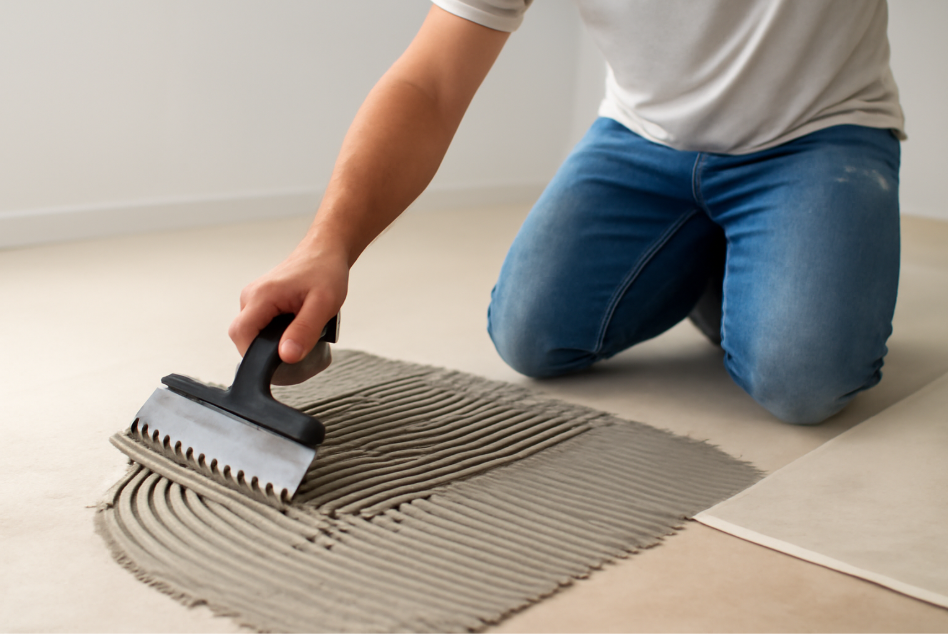
Step 1: Remove the Loose Tile
First things first, you’ll need to take out the loose tile carefully. Follow these steps:
- Cut the grout: Use a utility knife to score the grout around the loose tile. This helps to separate the tile from the surrounding ones without damaging them.
- Pry the tile up: Gently insert a flathead screwdriver or a pry bar under the tile. Work slowly and carefully to avoid cracking the tile or damaging the surface beneath it.
- Clean the surface: Once the tile is removed, scrape off any old adhesive or grout from the floor or wall. A putty knife or scraper works well for this. Clean the area thoroughly with a degreaser or cleaner to ensure the new adhesive bonds properly.
Step 2: Apply New Adhesive
Now that the surface is prepped, it’s time to apply the fresh adhesive. Follow these steps:
- Spread the adhesive: Using a notched trowel, spread the tile adhesive (or thin-set mortar) evenly over the surface. Hold the trowel at a 45-degree angle to create ridges in the adhesive, which help the tile bond securely.
- Don’t overapply: Be sure not to apply too much adhesive. The layer should be thick enough to bond the tile but not so thick that it pushes out the sides.
Step 3: Place the Tile
This is where the magic happens! Here’s how to set your tile back in place:
- Press the tile down: Carefully place the tile onto the adhesive and press it down firmly. Use a rubber mallet to tap the tile gently into place. This ensures the tile is level and securely attached.
- Use spacers: If the tiles around it need a uniform gap, place tile spacers between them. This will help you maintain an even grout line for a professional finish.
Step 4: Re-grout Around the Tile
Once your tile is in place and the adhesive has dried (usually after 24 hours), it’s time to add new grout. Here’s how to do it:
- Mix the grout: Follow the instructions on the grout package to prepare it. It should have a paste-like consistency.
- Apply the grout: Using a rubber float, apply the grout over the tile and into the gaps around it. Hold the float at a 45-degree angle to press the grout in evenly.
- Clean the grout: After applying, use a damp sponge to wipe off any excess grout from the tile surface. Be careful not to remove grout from the gaps. Let the grout set for a few minutes, then wipe again with a clean sponge to smooth it out.
Step 5: Seal the Grout
Once the grout has fully dried (usually 24-48 hours), it’s time to seal it to protect it from moisture and stains:
- Apply grout sealer: Use a grout sealer to coat the grout lines. This helps prevent water from seeping in and causing damage or discoloration.
- Let it dry: Allow the sealer to dry completely before using the area again.
4. Common Mistakes to Avoid
When repairing loose tiles, even small mistakes can lead to bigger problems down the line. To ensure your repair is long-lasting and looks great, here are some common errors to watch out for — and how to avoid them.
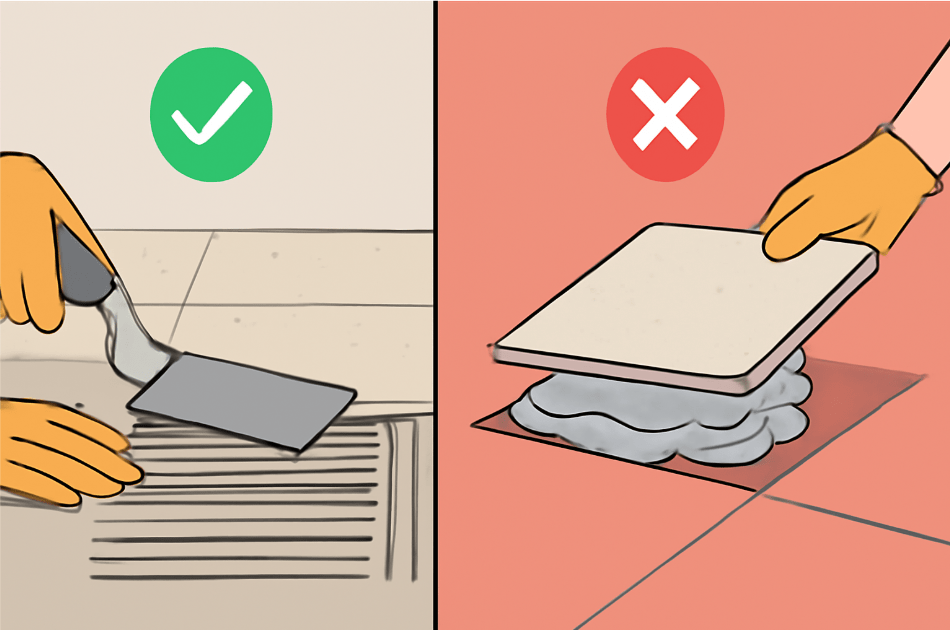
1. Using the Wrong Adhesive
Not all adhesives are created equal, and using the wrong one can lead to tiles coming loose again in no time. For example, using wall adhesive for floor tiles or a fast-drying adhesive that doesn’t allow enough time to adjust the tile can be problematic.
Solution: Always choose the right adhesive for the specific type of tile and the surface you’re working on. For high-moisture areas like bathrooms, make sure to pick a waterproof adhesive.
2. Skipping Surface Preparation
A clean, smooth surface is essential for a strong bond between the tile and the adhesive. If you skip cleaning the area or fail to remove old adhesive, dirt, or grout, the new tile may not adhere properly.
Solution: Take the time to thoroughly clean the surface before applying new adhesive. Scrape away any debris, old adhesive, or grout residue. This ensures the best bond possible.
3. Applying Too Much Adhesive
While it might seem like applying a thick layer of adhesive will secure the tile better, it can actually cause unevenness. Excessive adhesive can spill out when you press the tile down, leading to a messy job and uneven gaps.
Solution: Apply the adhesive evenly with a notched trowel, and avoid using too much. The goal is to cover the area with a thin, even layer, leaving enough space for the tile to bond firmly.
4. Not Giving Enough Drying Time
Patience is key when working with tile adhesive and grout. Rushing through the drying process can lead to tiles that aren’t properly set or grout that hasn’t cured fully. This can cause your tile to shift or crack soon after the repair.
Solution: Follow the recommended drying times on the adhesive and grout packages. Typically, you’ll need 24 hours for the adhesive and an additional 24-48 hours for the grout to fully cure.
5. Neglecting to Use Tile Spacers
If you don’t use tile spacers, you risk having uneven grout lines, which can make your floor or wall look unprofessional. Spacers also ensure that each tile is aligned properly, creating a neat, cohesive look.
Solution: Always use tile spacers between your tiles to maintain consistent gaps. This will give your work a polished finish, making it look like you hired a pro.
6. Not Sealing the Grout
Grout is porous, which means it can absorb water and dirt over time, causing stains or damage. Not sealing the grout after your repair will leave it vulnerable to moisture and staining, leading to more maintenance down the road.
Solution: After the grout has dried, apply a grout sealer to protect it from moisture and dirt. It’s a simple step that will help your repairs last longer and look cleaner.
5. Preventing Future Loose Tiles
Now that you’ve repaired your loose tiles, the last thing you want is for the same issue to happen again. Preventing future tile problems requires a little bit of maintenance and a few simple steps to ensure your tiles stay in place for the long haul. Here’s how to keep your tiles secure and looking great.
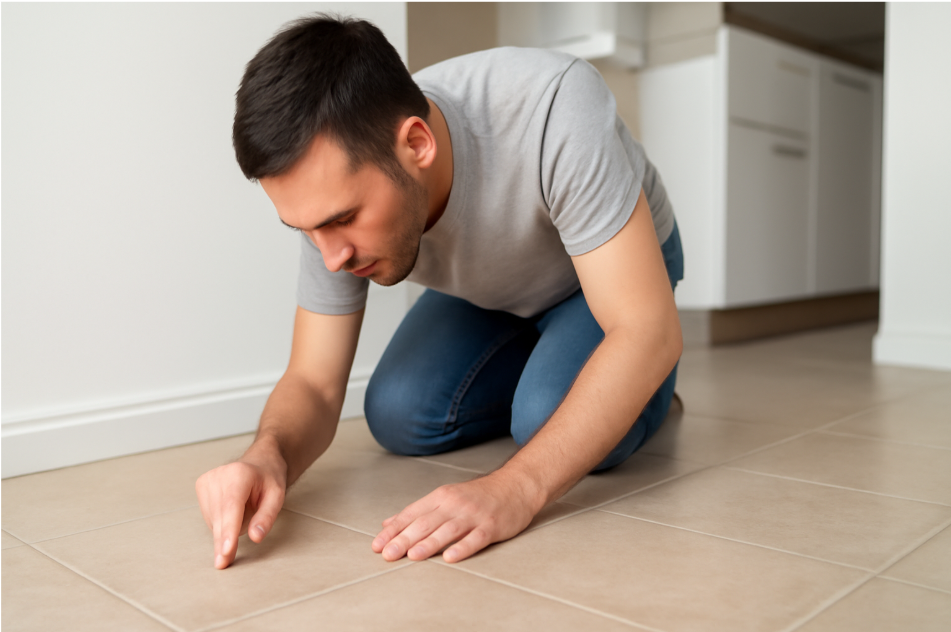
1. Regularly Check for Signs of Damage 
Tiles don’t always show obvious signs of damage right away, but small cracks or shifts can lead to bigger problems. Take a quick look at your tiles every few months to spot any signs of loosening or wear. Early detection will make repairs easier and prevent more costly fixes down the line.
Tip: Pay close attention to high-traffic areas or places with moisture exposure, like bathrooms and kitchens.
2. Ensure Proper Installation 
If you’re installing tiles yourself, make sure you’re following the correct steps and using the right materials. Poor installation is one of the leading causes of loose tiles, so it’s worth taking the time to do it right. If you’re hiring a professional, be sure to check that they’re using the correct adhesive, grout, and spacers, and that the subfloor is stable.
Tip: Avoid shortcuts—always use high-quality adhesive and grout suited to your specific needs (waterproof for wet areas, for example).
3. Seal Your Grout Regularly 
Grout can absorb moisture and dirt over time, which can weaken the bond between the tiles and the subfloor. Sealing your grout every 1-2 years helps protect it from water damage, stains, and wear.
Tip: Choose a grout sealer that matches the type of grout you’ve used and reapply it according to the manufacturer’s recommendations.
4. Control Moisture Levels 
Excess moisture is a major cause of tile damage, especially in bathrooms, kitchens, and basements. Ensure these areas are properly ventilated by using exhaust fans and dehumidifiers to reduce moisture buildup. Also, fix any leaks as soon as they appear to avoid water seepage under your tiles.
Tip: Check for leaks under sinks or behind appliances and repair them promptly to prevent water damage to your tiles.
5. Use Rugs or Mats in High-Traffic Areas 
In busy areas like hallways or entryways, heavy foot traffic can eventually lead to tile loosening. To prevent this, place rugs or mats in high-traffic zones. This not only protects your tiles but also adds a stylish touch to your space.
Tip: Choose slip-resistant mats to ensure safety, especially in bathrooms and kitchens where moisture can make surfaces slippery.
6. Avoid Heavy Impact on Tiles 
Heavy objects or excessive force can shift tiles out of place. Be mindful when moving furniture, and avoid dropping heavy items on the floor. If you have areas with heavy furniture or appliances, consider using soft pads under the legs to minimize impact on the tiles.
6. When to Call a Professional
While repairing loose tiles can often be a straightforward DIY task, there are certain situations where it’s best to call in a professional. Knowing when to seek expert help can save you time, effort, and money in the long run. Here are a few scenarios where it’s a good idea to get professional assistance.
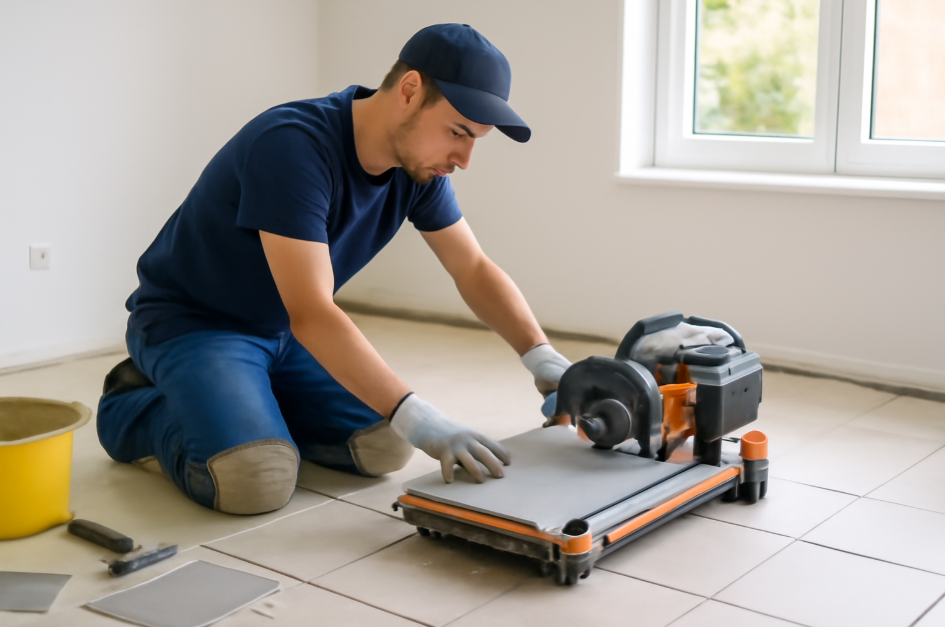
1. Extensive Tile Damage or Multiple Loose Tiles
If you’re dealing with more than just a single loose tile or if several tiles are coming loose across a large area, the problem might be more complex than a simple fix. Multiple loose tiles often indicate an underlying issue, such as water damage, subfloor instability, or improper installation.
When to call a pro: If the problem involves multiple tiles or spans a large area, a professional will have the tools and expertise to assess the situation and provide a more permanent solution.
2. Subfloor Damage or Structural Issues
Sometimes, loose tiles are a sign of deeper issues, like damage to the subfloor or structural problems within the walls or flooring. This can be caused by moisture, improper installation, or age-related wear. If you suspect your subfloor is damaged or compromised, it’s important to address it before retiling.
When to call a pro: If the tiles aren’t the only issue, and there’s a possibility of damage to the subfloor or structural integrity, a professional can help fix the root cause and prevent future problems.
3. Poor Initial Installation
If your tiles were installed poorly (e.g., with the wrong adhesive, incorrect spacing, or on an unstable surface), you may face recurring issues. Repairing poor installation yourself might only be a temporary solution, as the same mistakes could happen again.
When to call a pro: If you’re not sure whether the tiles were installed properly in the first place or if you’re experiencing ongoing problems after repairs, a professional will ensure that everything is installed correctly and up to code.
4. Large-Scale Projects
For larger tiling projects or areas with intricate patterns (like large bathrooms, kitchens, or open-plan living spaces), handling the repairs yourself may not be practical or efficient. A professional can quickly assess the scope of the job and ensure the results are clean, precise, and long-lasting.
When to call a pro: If your repair involves multiple areas or requires specialized tools (like a tile cutter or wet saw), a professional can help complete the project faster and more effectively.
5. Time Constraints or Lack of Confidence
Not everyone has the time or experience to handle tile repairs themselves. If you’re feeling overwhelmed by the task or simply don’t have the time to commit to it, hiring a professional can take the pressure off your shoulders and ensure the job is done correctly.
When to call a pro: If you’re short on time or unsure of your skills, a professional can get the job done right, freeing you up to focus on other tasks.
Fixing loose tiles doesn’t have to be a daunting task! With the right tools, a little patience, and the step-by-step guidance provided in this article, you can easily repair loose tiles and restore the beauty of your floors and walls. 
Remember, prevention is just as important as repair. By staying on top of maintenance and addressing issues early, you can avoid future tile troubles and keep your home looking pristine. And if the job ever feels too overwhelming, don’t hesitate to reach out to a professional for help. They’ll ensure that your tiles are securely in place and that any underlying issues are properly addressed.
With these tips in hand, you’re now ready to confidently tackle your loose tile repair project. Good luck, and happy fixing!
Frequently Asked Questions (FAQs)
1. Why is my shower head dripping even when it's turned off?
A dripping shower head is usually caused by a worn-out rubber washer or a faulty valve. Over time, these parts can degrade from constant use or mineral buildup, leading to leaks. To fix this, you’ll need to replace the damaged parts or clean out any debris obstructing the valve.
2. How can I fix a dripping shower head myself?
To fix a dripping shower head, start by turning off the water supply. Use a wrench to remove the shower head, inspect for worn washers or mineral buildup, and replace any damaged parts. Cleaning or replacing the valve or O-rings may also be necessary to stop the leak.
3. What tools do I need to fix a leaking shower head?
To fix a leaking shower head, you’ll need basic tools like an adjustable wrench, plumber’s tape, a screwdriver, and replacement parts such as washers or O-rings. Having a small brush to clean mineral deposits is also helpful.
4. How can I clean a shower head to stop the drip?
If the drip is caused by mineral buildup, remove the shower head and soak it in a mixture of white vinegar and water for about an hour. After soaking, use a soft brush to scrub away any remaining deposits. This can often fix a dripping problem without needing replacements.
5. Can a leaking shower head cause water damage?
Yes, a constant leak can waste water and potentially lead to water damage, especially if the leak is not addressed. Over time, moisture can damage walls, ceilings, or flooring around the shower. Fixing the leak promptly can prevent more expensive repairs down the road.
6. How do I know if I need to replace my shower valve?
If replacing the shower head parts doesn’t stop the drip, it might be the shower valve causing the issue. Signs that the valve needs replacement include persistent leaks after replacing washers and O-rings or difficulty turning the water on and off. In this case, you may need to hire a plumber for a valve replacement.
7. How can I prevent my shower head from dripping in the future?
To prevent future drips, regularly clean your shower head to avoid mineral buildup, and replace the washers and O-rings every couple of years. Using a water softener can also help reduce buildup in areas with hard water, extending the life of your shower head.


