Have you ever experienced your lights flickering or a sudden power outage that leaves your entire home in darkness?  The culprit could be a faulty circuit breaker, a common yet easily overlooked issue that can lead to bigger problems if not addressed. Understanding how to replace a faulty circuit breaker is an essential skill every homeowner should know. Not only can it save you from calling an expensive electrician, but it also empowers you to take control of your home’s electrical safety
  .
.
In this guide, we’ll walk you through the process step by step, breaking down each part of the replacement so even beginners can follow along. From identifying the faulty breaker to installing the new one, we’ve got you covered! By the end, you’ll feel confident and capable, knowing that you can safely and effectively handle this task yourself. Keep reading to learn how you can prevent potential hazards and restore power to your home in no time!
2. What Is a Circuit Breaker and Why Does It Fail?
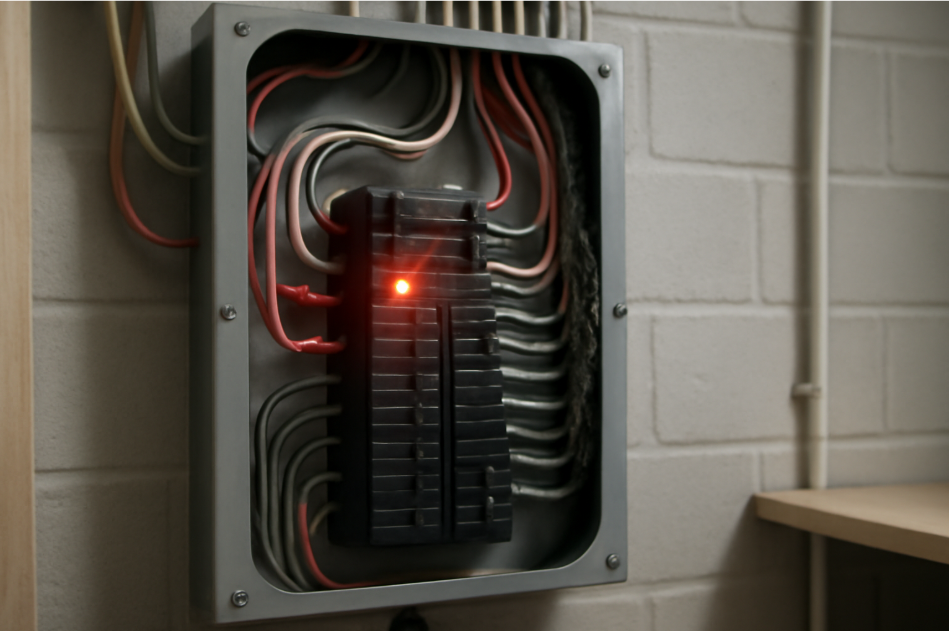
A circuit breaker is a safety device in your home’s electrical panel that automatically shuts off power when it detects an overload, short circuit, or fault. Think of it as a safety valve for your home’s electrical system—if something goes wrong, the breaker “trips” to prevent damage and keep you safe  .
.
Why Does a Circuit Breaker Fail?
Over time, circuit breakers can fail for a variety of reasons, usually related to wear and tear. Here are the most common causes:
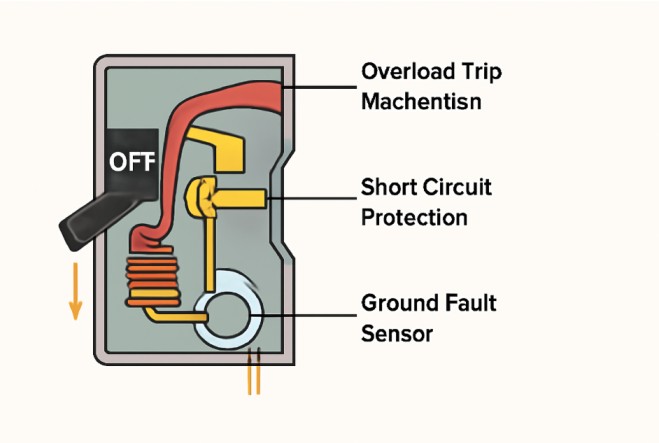
- Overloaded Circuits: When too many appliances or devices are plugged into the same circuit, it can overload the breaker, causing it to trip. If this happens too often, the breaker may become worn out and need replacing .
- Short Circuits: A short circuit happens when a live wire touches a neutral wire, causing an electrical surge. This can trip the breaker instantly, and if left unchecked, can damage the breaker itself
 .
. - Ground Faults: This occurs when a live wire comes into contact with the ground or a grounded surface. The breaker trips to prevent shock hazards. While rare, repeated ground faults can stress the breaker and cause failure over time.
- Aging or Wear: Like all things, circuit breakers wear out as they age. Continuous use can make the internal components less reliable, and eventually, the breaker may fail to trip when needed, risking further electrical issues or even fire
 .
.
In short, circuit breakers fail because of stress, damage, or simply getting old. Regular maintenance and knowing the signs of a faulty breaker can help prevent bigger issues down the road. If your breaker isn’t responding to trips or shows signs of wear, it’s time for a replacement to ensure your home stays safe and functional.
3. How to Identify a Faulty Circuit Breaker
Knowing how to identify a faulty circuit breaker is key to maintaining your home’s electrical safety. A malfunctioning breaker can cause power outages, fires, or damage to your appliances, so it’s crucial to spot the problem early. Here are the top signs to look out for:

1. Flickering Lights or Power Surges 
If your lights are flickering, buzzing, or dimming, it could indicate an issue with the circuit breaker. Frequent power surges or fluctuations in power often point to a faulty breaker that isn’t regulating power properly.
2. Breaker Tripping Frequently
If a specific breaker trips often and won’t stay in the “on” position, it could mean the breaker is worn out or defective. Sometimes, an overload or short circuit might cause this, but if it’s happening repeatedly without a clear cause, it’s time for a replacement.
3. The Breaker Feels Hot to the Touch
If you feel heat coming from a breaker, it’s an immediate red flag. A breaker should never feel hot when working correctly. Heat can be a sign of an overload or internal damage to the breaker itself.
4. Visible Damage or Burn Marks 
Inspect your circuit breaker for any visible damage. Look for burn marks, discoloration, or any unusual smells around the breaker panel. These signs can indicate serious internal issues and require immediate attention.
5. No Power Despite Resetting the Breaker
If you reset the breaker but still have no power in a particular part of your home, it could mean the breaker is no longer working properly. A faulty breaker may fail to restore power even after a reset.
6. Strange Smells or Sparks
If you notice a burning smell or see any sparks near the breaker, stop and turn off the main power immediately! This is a clear indication of a serious issue, and you should not attempt to fix it without professional help.
By recognizing these signs, you can determine if the breaker needs replacement. Remember, safety is always the top priority, so if you’re unsure about what’s going on, don’t hesitate to call a licensed electrician.
4. Safety Precautions Before Replacing a Circuit Breaker
When it comes to working with electricity, safety should always come first. Replacing a circuit breaker is a manageable task for homeowners, but there are essential safety precautions you must follow to protect yourself and your property. Here’s what you need to do before you start:
1. Turn Off the Main Power Supply
Before doing any work, cut the power to the entire house by turning off the main power supply. This will ensure that you’re not dealing with live wires when you open the breaker panel. This step is non-negotiable for your safety.
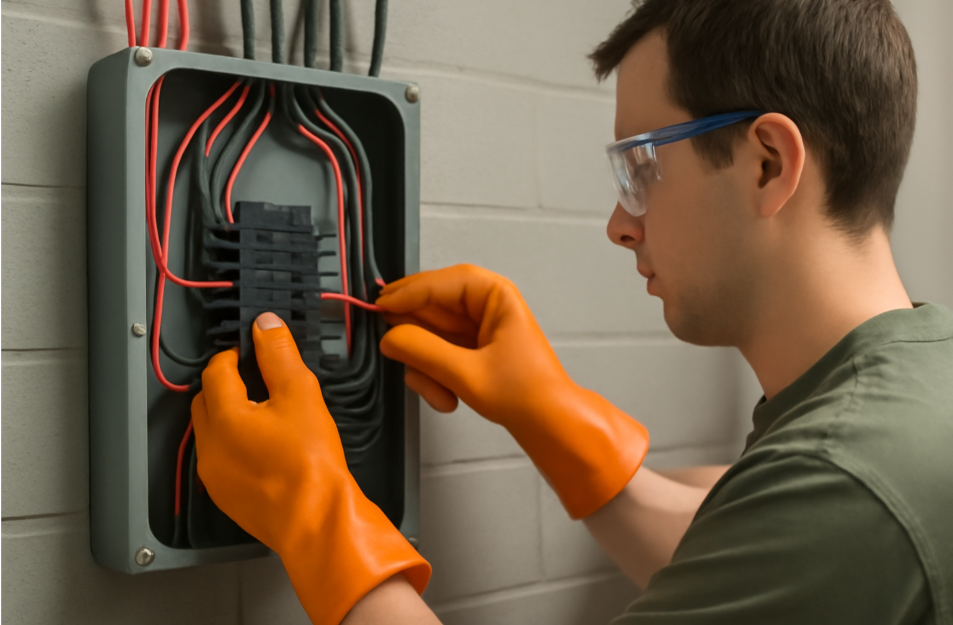
2. Wear Protective Gear 
Even if you’re just replacing a breaker, it’s important to wear insulated gloves to protect yourself from accidental electrical contact. Safety goggles are also recommended to shield your eyes from any sparks or debris that could fly up when working with the breaker panel.
3. Use Insulated Tools 
Ensure that all the tools you use, like screwdrivers and pliers, are insulated to prevent electrical shock. These tools are designed with rubber coatings to ensure that no electricity can pass through if they come in contact with a live wire.
4. Test for Power 
After turning off the main power supply, it’s always good practice to use a voltage tester or multimeter to check if the breaker panel is fully de-energized. This extra step will give you peace of mind before you start working.
5. Keep the Area Dry 
Make sure the area around the breaker panel is dry before you begin. If you’re working in a damp environment or it’s a rainy day, it’s better to postpone the work or have the area dry and clear of any water. Water and electricity do not mix!
6. Clear the Work Area 
Ensure the area around the panel is clean and free from any clutter or flammable materials. This will not only make the job easier but also prevent accidental fire hazards. Safety is always about preparation!
7. Ensure Proper Ventilation 
If you’re working in an enclosed space like a basement or utility room, make sure the area is well-ventilated. This helps in case of any fumes or overheating, and it will also help you stay comfortable while working.
By following these precautions, you significantly reduce the risk of injury or damage during the process. Remember, electrical work can be dangerous, but with the right precautions, you can handle this task safely and confidently. 
5. Tools and Materials You Will Need
Before you start replacing your circuit breaker, it’s important to gather the right tools and materials. Having everything ready ensures the job goes smoothly and safely. Here’s a list of what you’ll need:
1. Insulated Screwdriver
You’ll need a screwdriver to remove the screws holding the circuit breaker in place. Make sure it’s insulated to prevent electrical shock if it accidentally touches live wires.
2. Voltage Tester
A voltage tester helps you check if the power is completely turned off. Always double-check before you start working! It’s a small but crucial tool to ensure your safety during the job.
3. Replacement Circuit Breaker
You’ll need a new circuit breaker that matches the specifications of the old one. Pay attention to the amperage rating and type of breaker (e.g., single-pole or double-pole) to ensure compatibility with your electrical panel.
4. Wire Strippers 
Wire strippers are used to remove the insulation from electrical wires. You’ll need these if you have to adjust or reattach wires to the new breaker.
6. Step-by-Step Guide to Replacing a Faulty Circuit Breaker
Replacing a faulty circuit breaker may seem daunting, but with the right tools and safety precautions, you can easily handle it yourself. Here’s a clear and easy-to-follow guide to help you through the process:
Step 1: Turn Off the Main Power
Before starting any work, shut off the main power to your home by flipping the main breaker. This is crucial to ensure you’re not dealing with live wires while working on the faulty circuit breaker.
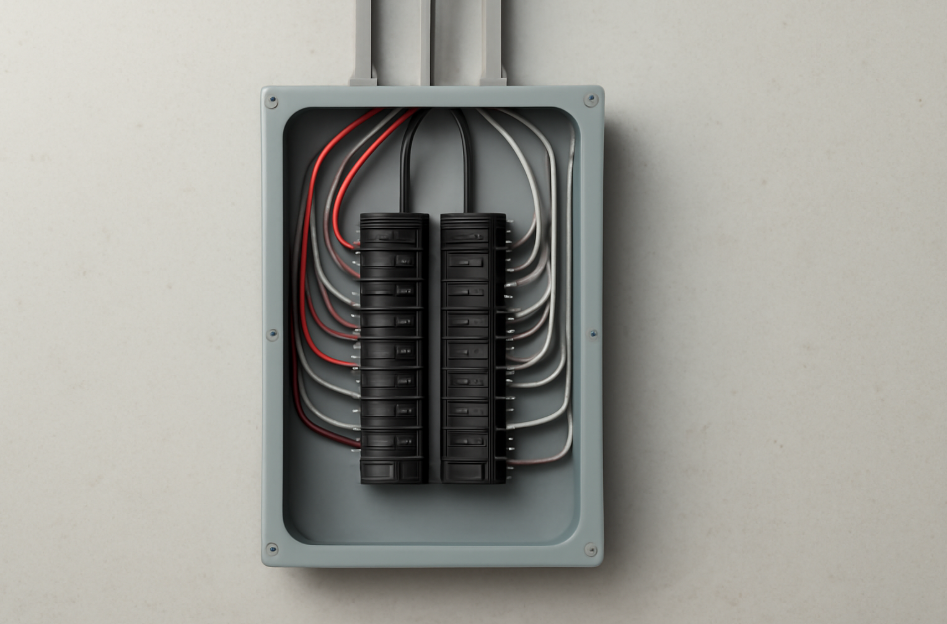
Step 2: Remove the Panel Cover
Use a screwdriver to remove the screws holding the electrical panel cover in place. Set the cover aside and take a moment to look inside the panel. You should see the rows of breakers—locate the one that is faulty.
Step 3: Identify the Faulty Breaker 
Look for the tripped breaker. It may be in the “off” position, or it might be visibly damaged or hot to the touch. If you’re unsure, use a voltage tester to check if the circuit is still live. Once identified, make a note of its amperage and type.
Step 4: Disconnect the Faulty Breaker
Using your insulated screwdriver, remove the screws or fasteners that hold the faulty breaker in place. Carefully pull it away from the panel. If it’s attached by wires, gently loosen the screws holding the wires in place, and remove them. Be careful not to let any wires touch each other or any metal parts in the panel.
Step 5: Install the New Circuit Breaker 
Take your new circuit breaker and line it up in the slot where the old one was. Secure it in place by snapping it into the panel. If necessary, tighten the screws holding it in place, ensuring it’s firmly attached.
Step 6: Reconnect the Wires 
Now, reattach the wires to the new breaker. Match the wires to the same terminals as the old breaker (usually labeled). Use your screwdriver to secure the wires firmly in place. Ensure there are no loose connections.
Step 7: Turn the Power Back On 
With the breaker securely installed, flip the main power back on. Then, flip your newly installed breaker to the “on” position. You should hear a small click as it resets.
Step 8: Test the New Breaker 
Finally, test the new breaker by turning on lights or appliances connected to that circuit. If the power is restored and everything works as expected, your replacement was successful!
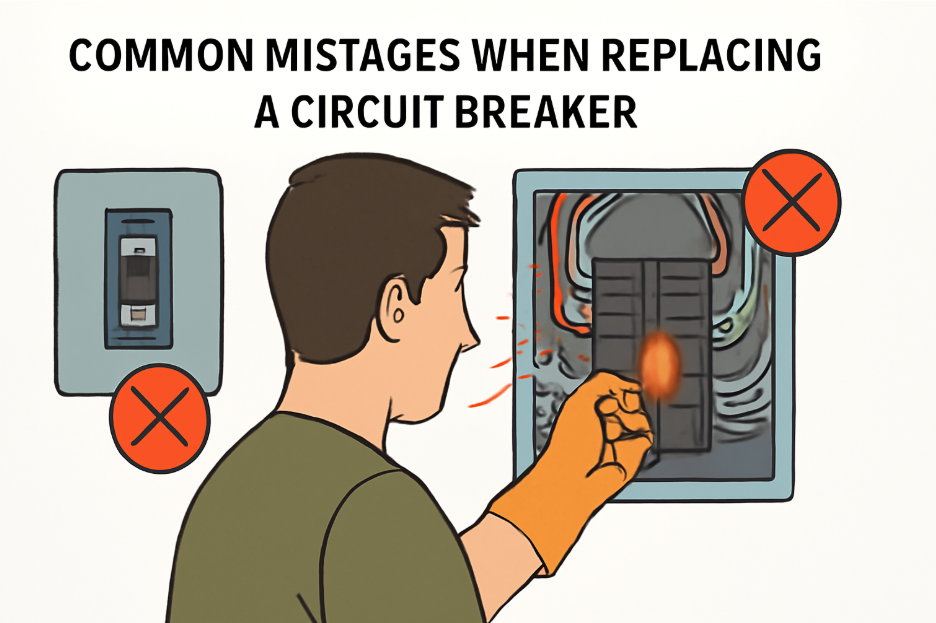
7. Common Mistakes to Avoid
Replacing a faulty circuit breaker is relatively simple, but there are a few common mistakes that can cause serious problems if not avoided. Here are the top things to watch out for:
1. Not Turning Off the Main Power
It might seem like a no-brainer, but skipping this step is a huge safety risk. Always turn off the main power before working on your circuit breaker. Even a small shock can cause serious injury, and you don’t want to risk electrocution.
2. Using the Wrong Type of Breaker
Not all circuit breakers are the same. Check the amperage and type of the breaker you’re replacing to ensure compatibility. A breaker with the wrong rating can cause overheating, fires, or damage to your home’s wiring. Always match the specifications!
3. Ignoring Visible Damage
If you notice burn marks, discoloration, or a burnt smell around the breaker panel, this could indicate a more serious issue than just a faulty breaker. Don’t ignore it—these signs could mean wiring damage or an electrical fault that needs professional attention.
4. Over-tightening the Wires
When connecting the wires to the new breaker, don’t overtighten them. Tightening the screws too much can damage the wire or the breaker itself, potentially leading to future problems. Ensure the wires are snug but not overly tight.
5. Failing to Test the Breaker 
Once you’ve replaced the breaker, it’s essential to test it before closing the panel. If you don’t, you might miss an issue that prevents the breaker from working correctly. Turn on appliances or lights connected to the circuit to confirm everything is working properly.
6. Not Keeping the Area Clean
A cluttered or dirty work area can be dangerous. Remove any debris or flammable materials from around your breaker panel before starting. This simple step minimizes the risk of accidents or fire hazards.
7. Replacing a Breaker Without Understanding the Cause
If the breaker keeps tripping after replacement, it could indicate a deeper problem in your electrical system, such as a wiring fault or overload. Don’t just replace the breaker and walk away—if the issue persists, consider calling a licensed electrician to inspect your system.
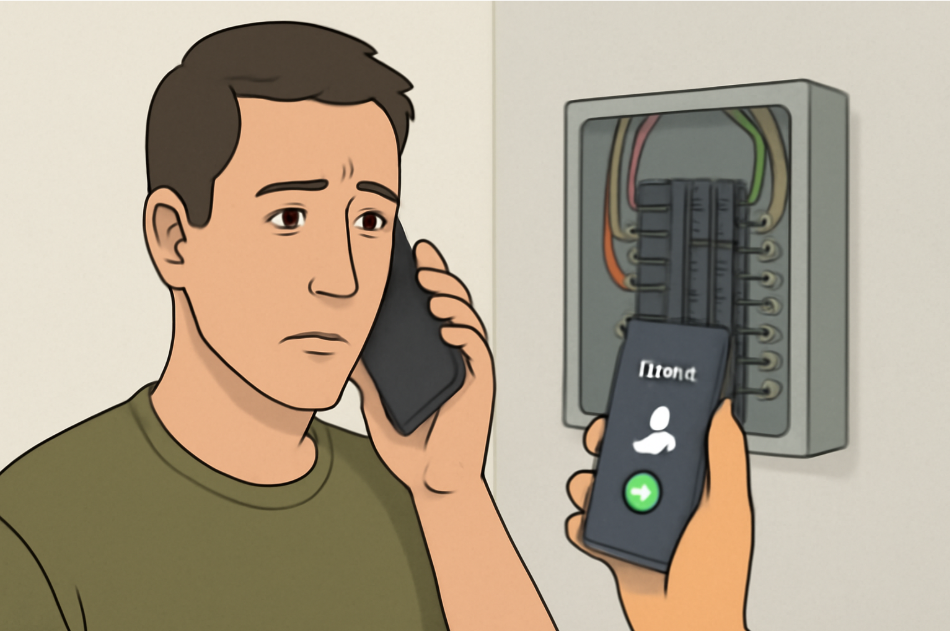
8. When to Call a Professional
While replacing a faulty circuit breaker is a manageable DIY task, there are certain situations where it’s best to call a professional electrician. Here’s when you should seek expert help:
1. If You’re Unsure About Your Electrical Skills
If you’re not comfortable working with electricity or don’t fully understand the steps, it’s safer to hire a licensed electrician. Electrical work can be dangerous if not done correctly, and a professional can ensure everything is done to code.
2. If the Breaker Keeps Tripping After Replacement
If you’ve replaced the breaker but it continues to trip, the problem may not be the breaker itself. This could indicate a deeper issue in your wiring, such as a short circuit or overload. An electrician can diagnose and fix the root cause of the issue.
3. If You Notice Severe Electrical Damage
If you spot burnt wires, melted insulation, or smoke around your electrical panel, don’t attempt to fix it yourself. These are signs of potentially hazardous electrical damage, and only a professional should handle the repairs to avoid fire risks.
4. If You’re Dealing with Multiple Faulty Breakers 
If several breakers in your home are malfunctioning, it could indicate a systemic issue within your electrical panel or wiring. A professional can inspect the entire system to identify the cause and fix it properly.
5. If You’re Not Sure About the Correct Breaker Type
Circuit breakers come in various types and amperage ratings. If you’re unsure about the correct breaker to use, a licensed electrician can help you select the right one to ensure safety and compatibility with your home’s electrical system.
6. If You Smell Burning or Hear Strange Noises 
If you smell burning or hear crackling or popping sounds coming from your breaker panel, stop immediately. These are signs of an overheating breaker or faulty wiring, both of which need urgent attention from an expert to prevent damage or fire.
Replacing a faulty circuit breaker is a straightforward task that can save you time and money, but it’s important to follow the proper steps and take the necessary precautions to ensure safety. By understanding how to replace a faulty circuit breaker, you’re empowering yourself to handle small electrical issues at home, without the need to call an electrician every time something goes wrong.
In this guide, we’ve covered everything from identifying faulty breakers to the tools you’ll need, along with step-by-step instructions to make the replacement process smooth and easy. Remember, safety always comes first—never skip turning off the power, use the right tools, and avoid over-tightening wires.
If you run into issues or feel unsure at any point, don’t hesitate to reach out to a professional. Better safe than sorry!
We hope this guide has helped you feel more confident in replacing your circuit breaker. With these tips in mind, you’re now ready to tackle this home maintenance task on your own, ensuring your home’s electrical system stays safe and functional.