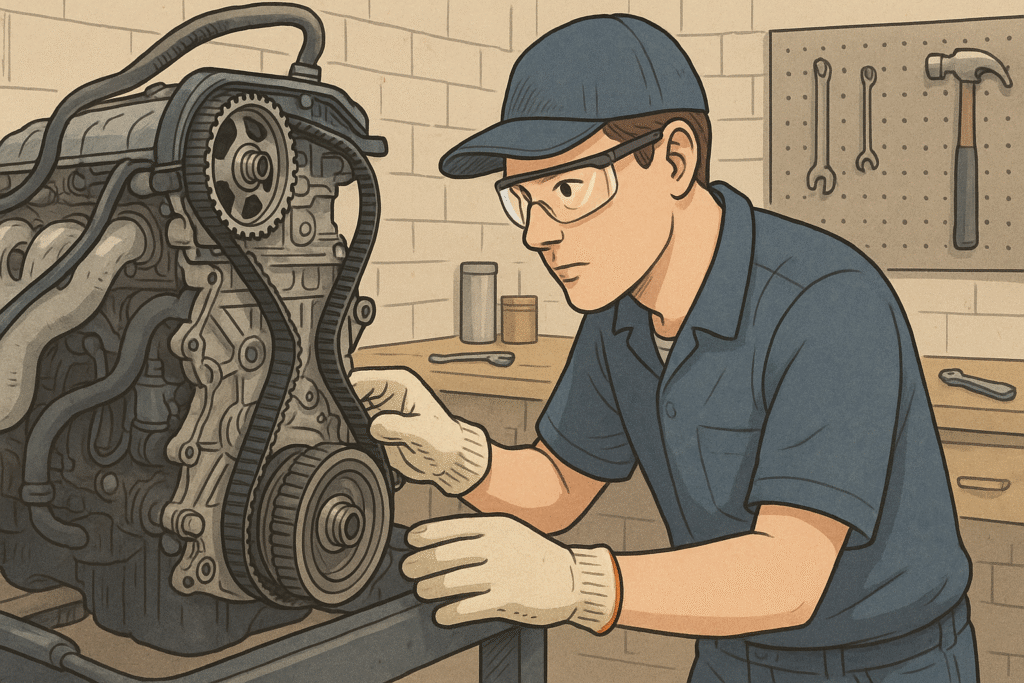
If you’ve ever heard strange noises coming from your car engine or noticed your vehicle running rough, your timing belt might be to blame.  A worn-out timing belt can lead to serious engine damage, leaving you with expensive repairs. But don’t panic – learning how to replace a timing belt can save you both time and money!
In this guide, we’ll walk you through every step of the process, from gathering the right tools to making sure your engine runs smoothly after the replacement. Whether you’re a seasoned DIYer or a first-time car repair enthusiast, this comprehensive, beginner-friendly guide will make timing belt replacement easy and approachable. Keep reading to avoid costly mechanic bills and give your car the maintenance it deserves! 
Understanding the Timing Belt
The timing belt is a crucial component of your car’s engine, playing a key role in ensuring everything runs smoothly. But what exactly is it, and why does it matter?
What is a Timing Belt?
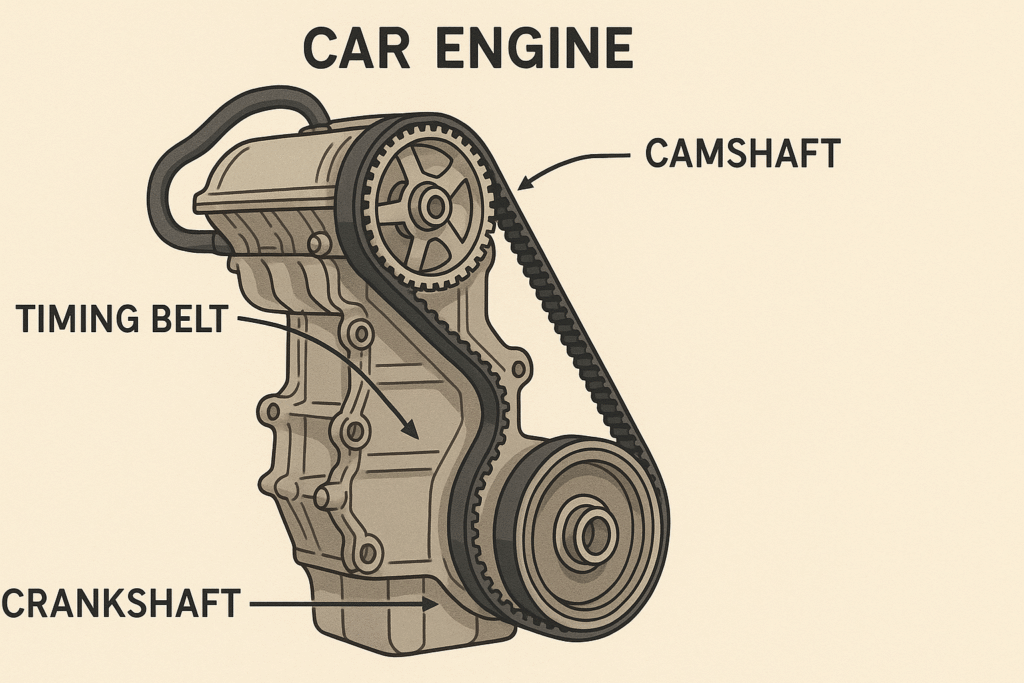
A timing belt is a rubber belt that connects the crankshaft to the camshaft in an internal combustion engine. It ensures the engine’s valves open and close at the correct times during each cylinder’s intake and exhaust strokes. Simply put, it keeps everything in sync to make sure your engine runs efficiently. 
Why is the Timing Belt Important?
Without a properly functioning timing belt, your engine wouldn’t run. It controls the timing of the engine’s valves and pistons. If the belt snaps or slips, the timing can go off, causing the pistons and valves to collide – which could lead to serious engine damage. 
Signs You Need to Replace Your Timing Belt
As the timing belt wears out, it can show signs that it’s time for a replacement. Here are some common indicators:
- Strange Noises: You may hear ticking, clicking, or grinding sounds coming from the engine.

- Rough Engine Performance: Misfires, stalling, or a rough idle can occur when the timing belt is loose or damaged.
- Warning Lights: A check engine light or oil pressure light might turn on.

- Visual Wear: Cracks, missing teeth, or oil contamination are all signs that the belt needs replacing.
How Often Should You Replace the Timing Belt?
Most manufacturers recommend replacing the timing belt every 60,000 to 100,000 miles, but it’s always best to check your vehicle’s manual for the manufacturer’s specific guidelines.
Tools and Materials You’ll Need
Before diving into the timing belt replacement, it’s essential to gather the right tools and materials. Having everything on hand will ensure the job goes smoothly and save you time during the process.
Essential Tools for Replacing a Timing Belt
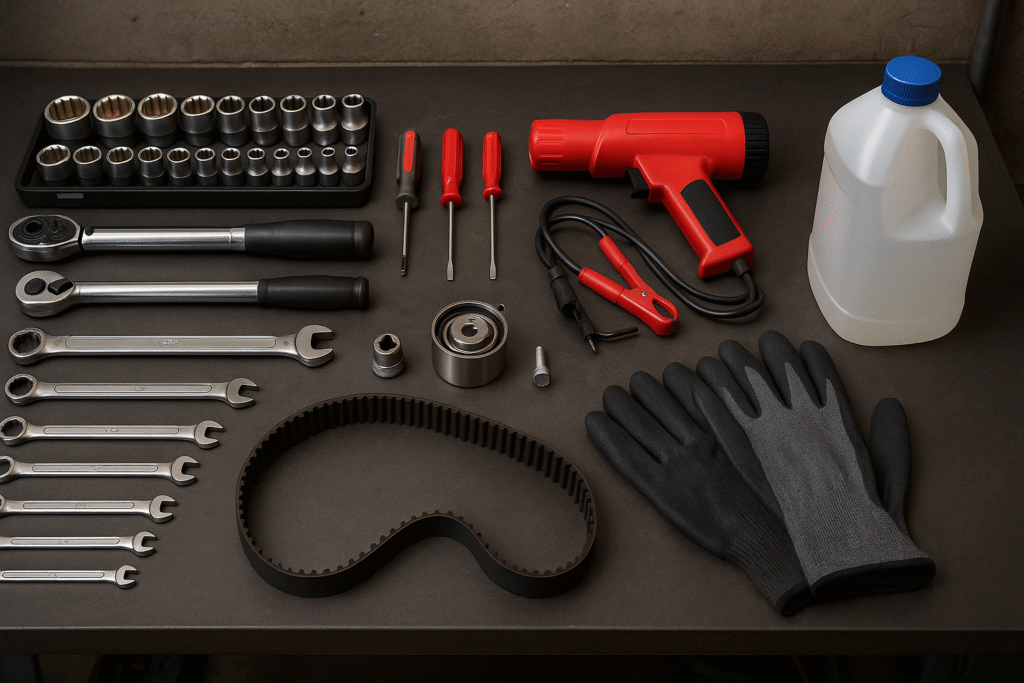
Here’s a list of tools you’ll need for the job:
- Socket and Wrench Set: A good set of sockets and wrenches will be necessary for removing bolts and fasteners around the timing belt. Make sure you have a variety of sizes.

- Torque Wrench: This tool helps you tighten bolts to the correct specifications, preventing damage to engine components.
- Ratchet and Extensions: These tools will give you extra leverage and allow you to reach hard-to-access bolts.
- Screwdrivers: A basic set of flathead and Phillips screwdrivers will come in handy for removing engine covers and other parts.
- Timing Light: While not always required, a timing light can be useful for ensuring the engine is properly timed after the belt replacement.

Additional Materials You’ll Need
- Timing Belt Kit: You’ll typically need to purchase a complete timing belt kit that includes the belt, tensioners, pulleys, and seals. Make sure to choose a kit that’s compatible with your vehicle’s make and model.
- Serpentine Belt: If your serpentine belt is also old or worn out, it’s a good idea to replace it while you’re working on the engine.
- Engine Oil: Having extra oil on hand will help if you need to top up after the job is done.
- Coolant: If you need to remove or move the radiator to access the timing belt, be sure to have coolant ready to refill the system.
- Rags and Cleaning Supplies: To keep your workspace clean and wipe off any dirt, oil, or debris.

Safety Gear
- Gloves: Protect your hands from sharp edges and grime.

- Safety Glasses: Keep debris and oil splashes out of your eyes.
- A Clean Work Area: Make sure you have plenty of space to lay out your tools and work on the car without feeling cramped.
Preparing for the Timing Belt Replacement
Before you begin the timing belt replacement, proper preparation is key to ensuring a smooth and safe process. Here’s how to get ready for the job step by step.
1. Safety First
Start by prioritizing safety. A timing belt replacement involves working with the engine, so you’ll want to ensure you’re in a safe environment:
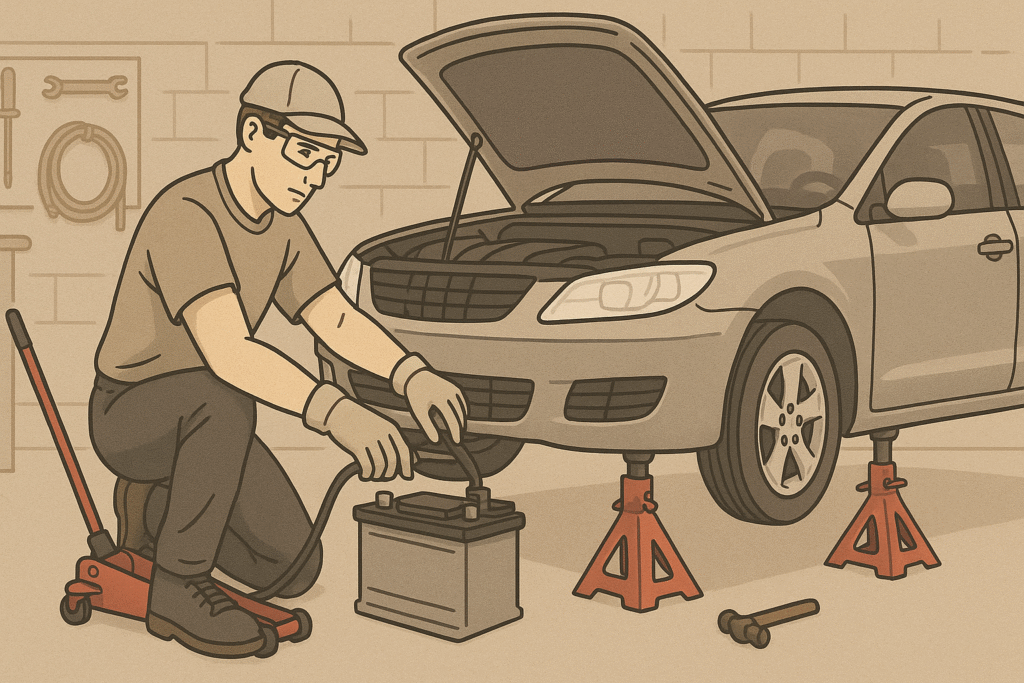
- Disconnect the Car Battery: Always start by disconnecting the negative terminal of the battery. This prevents any accidental electrical shorts or shocks while working on the engine.

- Let the Engine Cool: Make sure the engine is completely cool before beginning. Working on a hot engine can cause burns and also affect the integrity of rubber components like the timing belt.

2. Raise the Car (if needed)
If your timing belt is located in a lower section of the engine, you’ll need to lift the car to give yourself adequate working space.
- Use a Jack and Jack Stands: Secure the car with jack stands and never rely solely on a hydraulic jack. Safety is crucial, so ensure the car is stable before working underneath.
3. Remove the Engine Cover and Components
To access the timing belt, you’ll need to remove several components:
- Engine Cover: Begin by removing the engine cover or any panels that may be blocking your access to the timing belt. This often requires a few screws or bolts.
- Serpentine Belt: The serpentine belt may need to be removed first, as it often overlaps with other components. Use a wrench to loosen the tensioner and slide the belt off.
- Other Components: Depending on your vehicle, you might need to remove parts like the radiator hoses, air intake, or other parts that may obstruct your work area. Keep track of all fasteners so they can be reassembled later.
4. Locate Your Timing Marks
Before removing anything critical, it’s essential to align the engine’s timing marks.
- Align the Crankshaft and Camshaft: These marks will ensure that the new timing belt is installed correctly and the engine remains in sync. Failure to align these can result in major engine problems later on.
- Double-Check the Manual: Refer to your vehicle’s manual for specific instructions on locating the timing marks for your make and model. Every car is different!

5. Take Pictures
It’s always helpful to take clear pictures of the components before and after disassembly. This will help you reassemble everything in the correct order. 
6. Organize Your Tools and Parts
Keep your workspace neat and organized. Place tools and removed parts in order, so you don’t waste time looking for them later. Label or bag fasteners to avoid confusion during reassembly.
Step-by-Step Guide to Replacing the Timing Belt
Now that you’ve prepared your car and gathered the right tools, it’s time to replace the timing belt. Follow this detailed, step-by-step guide to ensure you get it done right.
Step 1: Raise the Car and Remove the Engine Cover
If you haven’t already, lift the car using a jack and jack stands for safety. Once the car is secure, remove the engine cover and any other parts blocking access to the timing belt. You may need to remove the serpentine belt and other components like hoses or brackets to clear the path.
- Tip: Take note of any parts or bolts you remove to make reassembly easier.
Step 2: Align the Engine to Top Dead Center (TDC)
Before removing the old timing belt, you must align the engine’s camshaft and crankshaft to the Top Dead Center (TDC) position. This is critical for accurate installation of the new timing belt.
- How to Do It: Rotate the crankshaft pulley by hand until the timing marks on the camshaft and crankshaft align with the TDC markings. Double-check that all marks are aligned properly.
Step 3: Remove the Timing Belt Tensioner
The timing belt is under tension, so before removing it, you need to relieve that tension. Use a wrench to loosen and remove the timing belt tensioner. This will allow you to slide the belt off more easily.
- Tip: Keep the tensioner in good condition for reuse or replace it if your kit includes a new one.
Step 4: Remove the Old Timing Belt
With the tensioner removed, carefully slide the old timing belt off the pulleys. Be cautious of any debris or dirt that may have accumulated around the belt or pulleys.
- Tip: If your car uses pulleys that are difficult to remove, mark the orientation of each part to ensure proper reassembly.
Step 5: Install the New Timing Belt
Now it’s time to install the new timing belt. Begin by aligning the new belt onto the crankshaft and camshaft pulleys. Make sure the belt is tight, but not overly stretched.
- Important: Check that the timing marks on the camshaft and crankshaft are still aligned correctly before fully installing the belt.
Step 6: Reinstall the Timing Belt Tensioner
Once the new timing belt is in place, reinstall the timing belt tensioner. This will put the right amount of tension on the new belt.
- Tip: Tighten the tensioner carefully to the manufacturer’s specified torque settings. Over-tightening can damage the components.
Step 7: Reassemble and Double-Check
Now, it’s time to put everything back together. Reinstall any components you removed earlier, such as the serpentine belt, hoses, or covers. Tighten all bolts and make sure no parts are left loose.
- Tip: It’s a good idea to check all pulleys, belts, and components for wear and replace them if necessary.
Step 8: Test the Engine
Before you finish, it’s time to test the engine. Reconnect the battery and start the car to check for any unusual noises or issues. Let the engine run for a few minutes and listen for any ticking, which may indicate the timing belt is not installed correctly.
- Tip: If everything sounds good, check the engine oil and coolant levels as needed.
Once you’ve confirmed that the engine runs smoothly without issues, you’ve successfully replaced your timing belt! 

Troubleshooting Common Problems
Replacing a timing belt can be a tricky task, and sometimes issues can arise even if you’ve followed every step carefully. Don’t worry—here are some common problems you may encounter and how to fix them.
Problem 1: Timing Belt Slipping or Misalignment
One of the most common issues is a timing belt that slips or doesn’t align properly. This can cause engine misfires, poor performance, or even engine damage if not corrected.
What to Check:
- Timing Marks: Double-check that the camshaft and crankshaft timing marks are perfectly aligned. Even a small misalignment can lead to big issues.
- Belt Tension: Make sure the timing belt is properly tensioned. If it’s too loose, it can slip. If it’s too tight, it can cause excessive wear or damage to the components.
Solution: If the belt has slipped or is misaligned, remove the belt and reposition it, ensuring that all marks are aligned before reinstalling the tensioner.
Problem 2: Engine Won’t Start After Installation
After replacing the timing belt, if the engine doesn’t start, it may be due to improper timing or a component that wasn’t reinstalled correctly.
What to Check:
- Timing Marks: Ensure the timing marks are aligned properly at TDC (Top Dead Center). Incorrect alignment can prevent the engine from starting.
- Reconnected Parts: Verify that all parts (like the serpentine belt, hoses, and engine cover) have been properly reassembled and tightened.
Solution: If the timing marks are off, realign them and recheck the components you’ve reattached. Ensure the battery is connected properly and that nothing was missed during reassembly.
Problem 3: Strange Noises (Ticking or Clicking)
A ticking or clicking sound coming from the engine after replacing the timing belt is a common concern. This could be a sign that the timing belt is either too loose or there’s an issue with one of the pulleys.
What to Check:
- Belt Tension: A loose timing belt can create noise. Ensure that the tensioner is correctly adjusted.
- Pulleys: Check if any pulleys are misaligned or damaged. Worn-out pulleys can cause uneven tension and lead to noises.
Solution: If the belt is too loose, adjust the tensioner and check for any damaged pulleys that need to be replaced. Listen closely to identify if the noise is coming from a specific component.
Problem 4: Leaking Coolant or Oil
If you notice coolant or oil leaks after replacing the timing belt, it could be due to a faulty seal or improper installation.
What to Check:
- Seals and Gaskets: Ensure that all seals and gaskets (such as the camshaft and crankshaft seals) were properly replaced and are seated correctly.
- Tighten Components: Sometimes, leaks can occur if bolts aren’t tightened enough during reassembly.
Solution: If the seals or gaskets were disturbed during the replacement, replace them and tighten any components that may have been improperly secured. Always use new seals to prevent future leaks.
Problem 5: Check Engine Light Comes On
If the check engine light comes on after replacing the timing belt, it could be due to a sensor issue or incorrect installation.
What to Check:
- Camshaft and Crankshaft Position Sensors: Make sure these sensors are properly reconnected and functioning. If they were disconnected during the replacement, they may need to be reset or re-calibrated.
- Timing: Recheck the timing marks. If the timing is off, it can trigger a check engine light.
Solution: If the timing is correct and sensors are properly reconnected, reset the check engine light using an OBD-II scanner. If the problem persists, take the vehicle to a professional for a diagnostic check.

Congratulations! You’ve successfully replaced your timing belt, and your car is ready to hit the road with a smooth-running engine.
By following this step-by-step guide, you’ve not only saved money on expensive mechanic fees, but you’ve also gained valuable knowledge about your vehicle’s inner workings. Replacing the timing belt is an important task that, when done correctly, will keep your engine in top shape for years to come.
Key Takeaways:
- Always double-check the timing marks and tension to ensure proper alignment.
- Use the right tools and safety measures to protect yourself during the process.
- Don’t hesitate to troubleshoot common issues, and remember that even small misalignments can cause big problems.
Regular maintenance of your vehicle is key to its longevity, and replacing the timing belt is just one step in ensuring that your engine performs at its best. Keep an eye on your car’s overall health and refer back to this guide whenever you need a refresher. 
Now, with your timing belt replacement complete, enjoy the peace of mind that comes with knowing you’ve handled this essential car repair yourself. Stay safe and happy driving!