
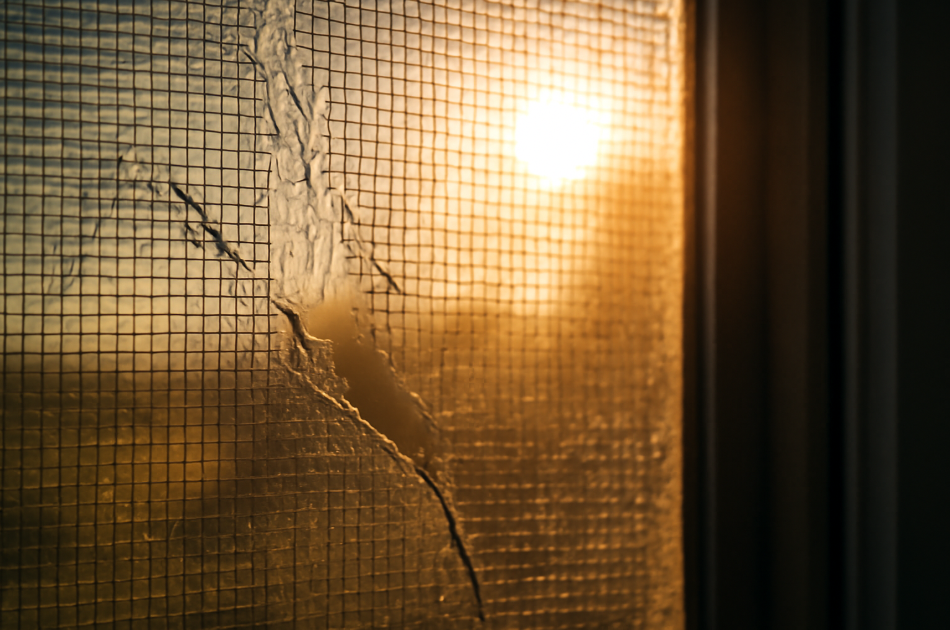
Have you ever come home to find a hole in your window screen, only to realize it’s letting in bugs, dust, and unwanted heat? 😣 A broken window screen can be more than just an eyesore—it can affect the comfort of your home and your peace of mind. Whether it’s from a curious pet, an accidental bump, or wear and tear, repairing a broken window screen is something you can easily do yourself.
In this guide, we’ll share tips for repairing a broken window screen, providing a simple, step-by-step process to help you restore your screen without the need for expensive professionals. No special skills required! With just a few tools and a little patience, you can have your window screen looking brand new in no time. Keep reading to learn how to fix your broken screen and get back to enjoying fresh air, minus the bugs! 🦋
Understanding the Components of a Window Screen
Before you can repair your broken window screen, it’s important to understand the parts that make it up. Each component plays a role in keeping your home protected from insects while allowing fresh air to flow in. Here’s a quick breakdown of the essential parts you’ll need to know:
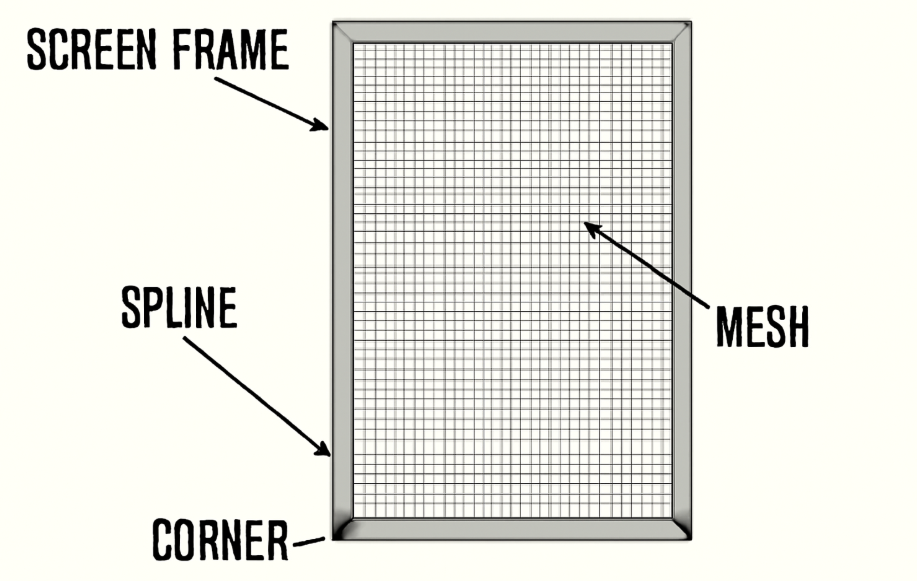
1. The Screen Frame
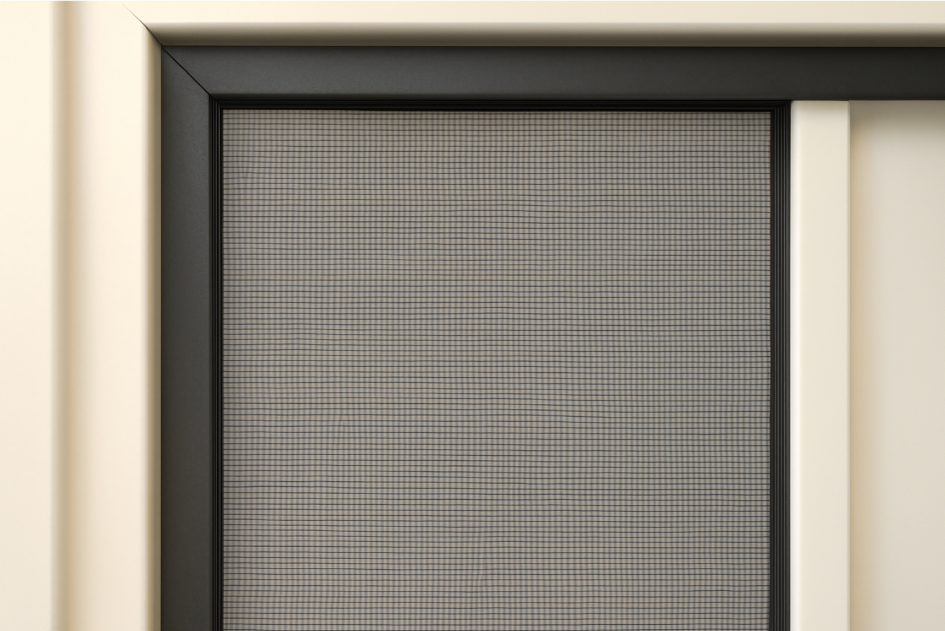
The frame is the rigid structure that holds everything together. It’s typically made from materials like aluminum, vinyl, or wood. The frame gives your screen its shape and provides the support needed to keep the mesh taut.
- Aluminum frames are lightweight and durable, making them the most common option.
- Vinyl frames are weather-resistant and easy to maintain.
- Wood frames offer a more traditional look but are less common for modern screens.
2. The Mesh
The mesh is the material that covers the frame and provides the actual “screen” function, keeping bugs and debris out. Window screen mesh comes in various types, with the most common being fiberglass and aluminum.
- Fiberglass mesh is flexible, resistant to rust, and often the most cost-effective.
- Aluminum mesh is more durable and provides stronger protection against pests, though it can be more rigid.
3. The Spline
The spline is a rubber material that holds the mesh tightly in place within the frame. Think of it like the “seal” that keeps everything from slipping out of place. The spline needs to be securely pressed into the frame to ensure the mesh doesn’t sag or tear.
4. Corners and Fasteners
While not all window screens use these, some screens have corner pieces or fasteners that help secure the frame and mesh, especially for larger or custom windows. They provide extra stability and ensure the screen doesn’t come apart over time.
Why Window Screens Break and How to Prevent It
Window screens may seem like a simple addition to your home, but they can be surprisingly delicate. Understanding why they break and how to prevent damage can help you save time and money on repairs. Let’s take a look at the common causes and how you can protect your screens from future damage.
1. Physical Damage
The most obvious cause of a broken window screen is physical damage. This could happen due to pets, children, or even a gust of wind. 🐶🐱 Sometimes, you might accidentally knock the screen out of the frame when opening or closing your window.
- Keep pets away from screens when they’re in the window. Consider installing a pet-resistant mesh, which is stronger and more durable.
- Install window guards or use a screen with a stronger, reinforced frame if you have active kids or pets.
2. Weather Exposure
Over time, exposure to weather elements can weaken your window screens. Sunlight, moisture, and wind can all take a toll. Sun damage can cause the mesh to become brittle, while rain or high humidity can cause rust or mildew, especially if the frame is made of metal.
Prevention Tip:
- Consider screen covers or weatherproofing to protect your screen from extreme weather conditions.
- In areas with heavy rainfall, aluminum frames are more weather-resistant than wood or vinyl.
3. Improper Installation or Maintenance
Sometimes, window screens break due to improper installation or lack of maintenance. If the screen mesh isn’t stretched tightly enough or the spline isn’t pressed in securely, it can sag or tear under pressure. Similarly, not cleaning or inspecting your screens regularly can lead to unnoticed wear and tear.
Prevention Tip:
- Install screens properly by following the right steps—ensure the mesh is taut and the spline is securely in place.
- Regular maintenance is key. Clean your window screens a few times a year to prevent dirt buildup and check for any damage.
4. Age and Wear
Like any part of your home, window screens can break down over time. If your screens are old, the mesh might simply become brittle from years of use.
Prevention Tip:
- Regularly inspect your screens for wear, especially if they’re older. If you see any fraying or holes, it’s time to replace the mesh before the damage gets worse.
Tools and Materials You’ll Need
Before you start fixing your window screen, it’s important to gather the right tools and materials. Having everything on hand will make the process smoother and quicker. Here’s a list of what you’ll need:
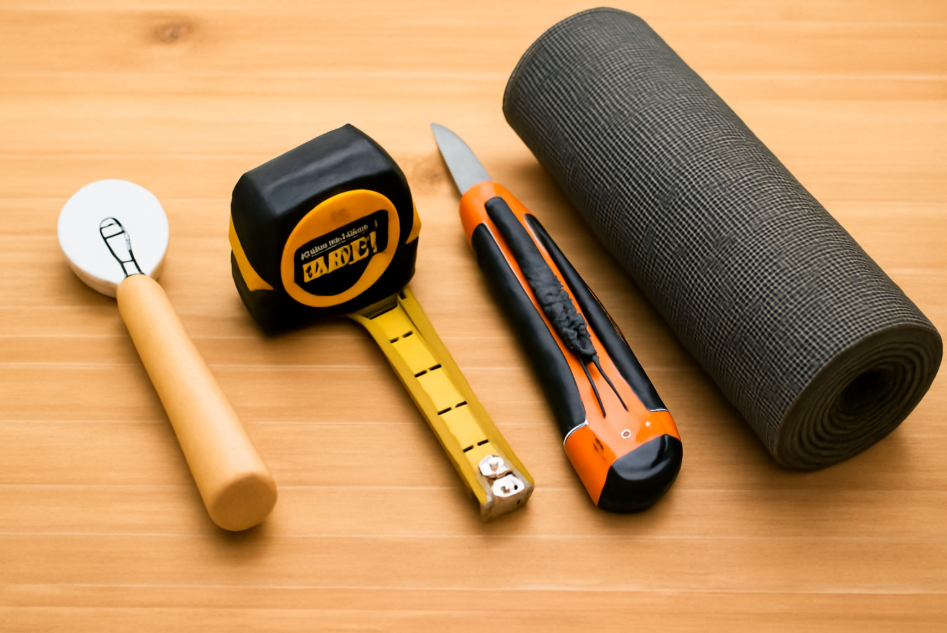
1. Replacement Screen Mesh
You’ll need fresh mesh to replace the damaged portion of your screen. The most common options are fiberglass mesh (lightweight and flexible) or aluminum mesh (stronger and more durable). Choose based on your needs:
- Fiberglass mesh is great for most DIY repairs and is easy to work with.
- Aluminum mesh is sturdier, making it ideal for areas with pets or high winds.
2. Spline Roller Tool
The spline roller is essential for pressing the spline (the rubber strip) into the frame to hold the mesh securely. It has a wheel that helps you roll the spline into place evenly. 🛠️ Without it, securing the mesh will be much more difficult!
3. Flathead Screwdriver or Pliers
You’ll need a flathead screwdriver or needle-nose pliers to remove the old spline and mesh. If your screen frame is stuck in place, a screwdriver can also help you loosen it.
4. Utility Knife or Scissors
To cut your new mesh to the right size, a utility knife or sharp scissors will do the job. Just be sure to measure the frame before cutting to avoid wasting material!
5. Measuring Tape
A measuring tape is crucial for ensuring your new screen fits properly. Measure the height and width of the frame, adding a few extra inches on each side for overlap.
6. Corner Reinforcements
If the corners of your screen frame are damaged or weak, you might want to invest in corner reinforcements. These help stabilize the frame and ensure a snug fit when you reinstall the screen.
7. Replacement Spline
If the original spline is worn out or brittle, replace it with new spline material. It’s available at most hardware stores and comes in different thicknesses, so make sure you get the right one for your frame.
Where to Buy These Materials:
Most of these tools and materials can be found at your local hardware store, or you can order them online from sites like Amazon or Home Depot. If you’re working on a specific type of window frame, make sure to double-check the measurements and material compatibility.
Step-by-Step Guide to Repairing a Broken Window Screen
Repairing a broken window screen might sound like a big task, but it’s simpler than you think! Follow these easy steps, and you’ll have your screen looking as good as new in no time. Let’s dive right in! 🛠️
Step 1: Remove the Broken Screen
Start by carefully removing the screen from the window frame. If it’s still attached, gently pry it loose using a flathead screwdriver. Be cautious not to damage the frame while doing this.
- Pro Tip: If your screen frame is large, ask a friend to help with the removal, especially if it’s heavy.
Step 2: Clean the Frame
Before you begin the repair, clean the frame. Wipe away any dust, dirt, or debris to ensure a smooth surface for the new mesh. If there’s any rust or buildup, scrub it off with a brush.
- Tip: Check for any damage to the frame. If there are any dents or cracks, it may be a good idea to replace the frame or reinforce it with corner reinforcements.
Step 3: Cut the New Mesh
Measure the screen frame carefully with a measuring tape. Add about 2–3 inches on each side to account for the overlap. Then, cut the new mesh using a utility knife or scissors.
- Pro Tip: It’s better to cut a little extra mesh than too little. You can always trim the excess later!
Step 4: Install the Mesh
Lay the mesh over the frame. Make sure it’s evenly spread out on all sides. The mesh should be taut but not overly stretched.
- Tip: If the mesh starts to shift while you’re working, use a few small pieces of tape to hold it in place temporarily.
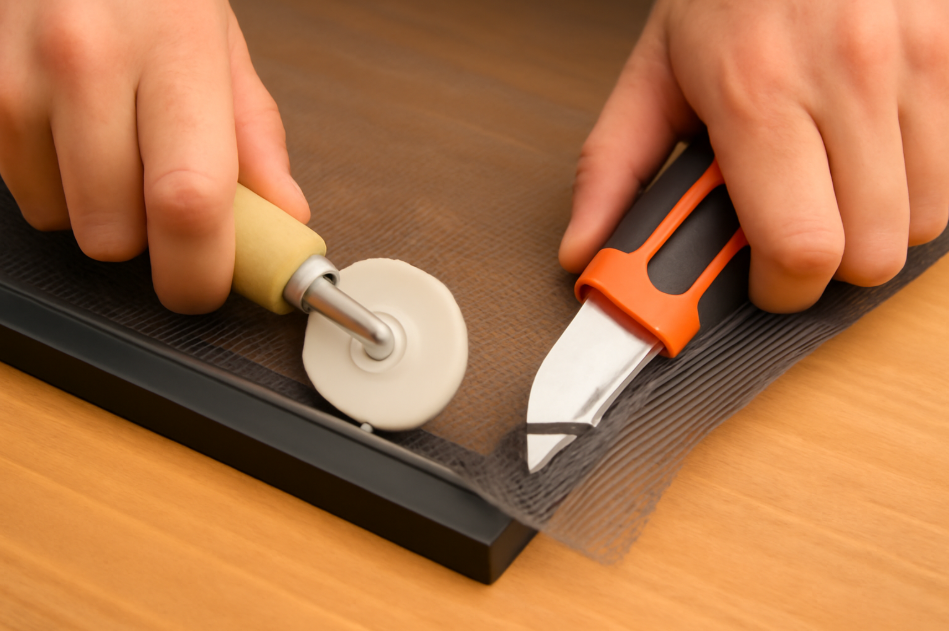
Step 5: Secure the Mesh with the Spline
Take your spline roller tool and press the spline into the groove of the frame, securing the mesh in place. The spline should be pressed in firmly but not so tight that it distorts the mesh.
- Pro Tip: Start at one corner and work your way around the frame, ensuring the mesh stays tight and evenly spaced.
Step 6: Trim the Excess Mesh
Once the spline is in place, use your utility knife to trim off any excess mesh around the frame. Be careful not to cut into the spline.
- Tip: Leave a little extra mesh around the edges for a cleaner finish.
Step 7: Reinstall the Screen
Now that the mesh is securely in place, carefully reinstall the screen into the window frame. If your screen was difficult to remove earlier, this is where having a second pair of hands can help.
- Pro Tip: Double-check that the screen fits snugly in the frame with no gaps, and make sure it opens and closes easily.
Tips for a Successful Window Screen Repair
Repairing a broken window screen can be a rewarding DIY project, but there are a few tips and tricks that can make the process even easier and ensure a professional-looking finish. Here are some key pointers to help you achieve the best results:
1. Measure Twice, Cut Once
Accurate measurements are key to ensuring your new mesh fits perfectly. Always measure the frame’s height and width, then add a few extra inches on all sides for overlap. Double-check your measurements before cutting—this will save you from wasting material and time. 📏
2. Keep the Mesh Taut
When installing the mesh, it’s crucial to keep it as taut as possible. Loose mesh can lead to sagging, wrinkles, or tearing over time. If you find the mesh is too loose, carefully pull it tight and press it into place with the spline roller.
3. Use the Right Amount of Spline
Too much spline can make it difficult to press into place, while too little will cause the mesh to come loose. When you’re inserting the spline, aim for an even fit—just enough to secure the mesh tightly in the frame. If you’re not sure, you can always trim any excess spline.
4. Work in a Clean, Flat Area
Having a clean, flat surface to work on will help prevent the mesh from shifting or becoming damaged. Lay down a large sheet or tarp to keep everything in place while you work. This also helps avoid any debris from getting caught in the mesh.
5. Be Patient with the Frame
If your frame has dents or is slightly bent, take a little extra time to straighten it out. A frame that’s out of shape can make it harder to get the mesh properly installed. Use pliers to gently bend it back into place before you begin the repair.
6. Regularly Inspect Your Screens
Prevent future repairs by regularly inspecting your window screens. Look for any wear and tear, such as holes or fraying, and address these issues early. A quick patch or replacement can extend the life of your screen and save you from a bigger repair later on. 🔍
7. Don’t Skip the Clean-Up
After you’ve finished the repair, take a few moments to clean the screen. Wipe down the frame and mesh to remove any dust or dirt, and check that the screen is securely in place. A neat finish not only improves the look but also ensures your repair lasts longer.

Repairing a broken window screen is a simple, satisfying DIY project that can save you time and money. By following the steps outlined in this guide—along with the helpful tips and tricks—you’ll be able to restore your screen to perfect working condition in no time. 😊
Remember, taking the time to measure carefully, keep the mesh taut, and ensure the spline is properly secured will result in a sturdy, long-lasting repair. With a little patience and the right tools, you’ll be able to enjoy fresh air and bug-free days once again! 🦋
So, why wait? Grab your tools, and get started on fixing that screen today. With this step-by-step guide, you’ve got everything you need to succeed. Happy repairing! 💪👷♂️